Grails on Raspberry Pi Part 4 - Intro To GPIO
Posted By: Todd Sharp on 3/17/2017 8:15 GMT
Tagged: Grails, Groovy, Groovy On Raspberry Pi, Java, Raspberry Pi

If you've missed the first three parts in this series you may want to check them out before proceeding:
Alright, now that you're all caught up, let's dig into some of the cool stuff. In this post we'll look at using Pi4J via a Groovy script to work with the GPIO pins on the Raspberry Pi.
First, for the true beginners out there, what is GPIO? Wikipedia says:
General-purpose input/output (GPIO) is a generic pin on an integrated circuit or computer board whose behavior—including whether it is an input or output pin—is controllable by the user at run time.
Put simply, the GPIO pins on the Pi give us a way to create simple (or even complex) circuits by hooking up sensors, transmitters, receivers, switches, motors - all kinds of cool, crazy things. I should warn you, now that you're in this deep you're probably going to end up a little lighter in the wallet after your first few months of tinkering. It's not that it costs a ton of money, but it does get rather addictive once you start searching around on Amazon or Adafruit, Pimoroni and some of the other sites out there that cater to the maker crowd.
The Pi gives us 40 digital pins to play around with (give or take a few for power and ground) which is more than enough for most projects. It's important to note that the Pi pins are all digital - there are no analog pins (unlike say the Arduino) - so if you want to hook up something like an analog joystick you'll have to get creative with an Analog to Digital Converter (aka ADC) like this example from Adafruit shows.
GPIO pins can be configured (via code) as either an input pin (like a temperature sensor or a switch) or an output pin (like an LED). There are tons of examples online and most retailers even include sample code right on their site. Here's 800+ ideas to get your wheels turning.
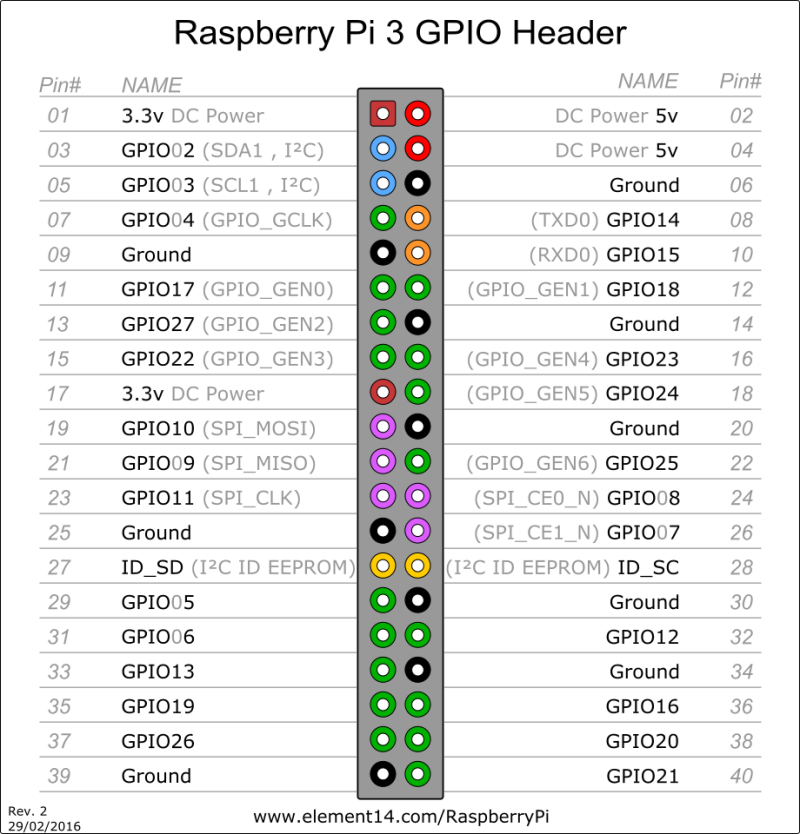
Before you wire up a circuit and work with the GPIO pins you'll need to know which pins are which. Here's the pin numbering layout for the Pi 3 Model B:
But since we're using Pi4J, we need the numbering scheme that they use, which looks like this:
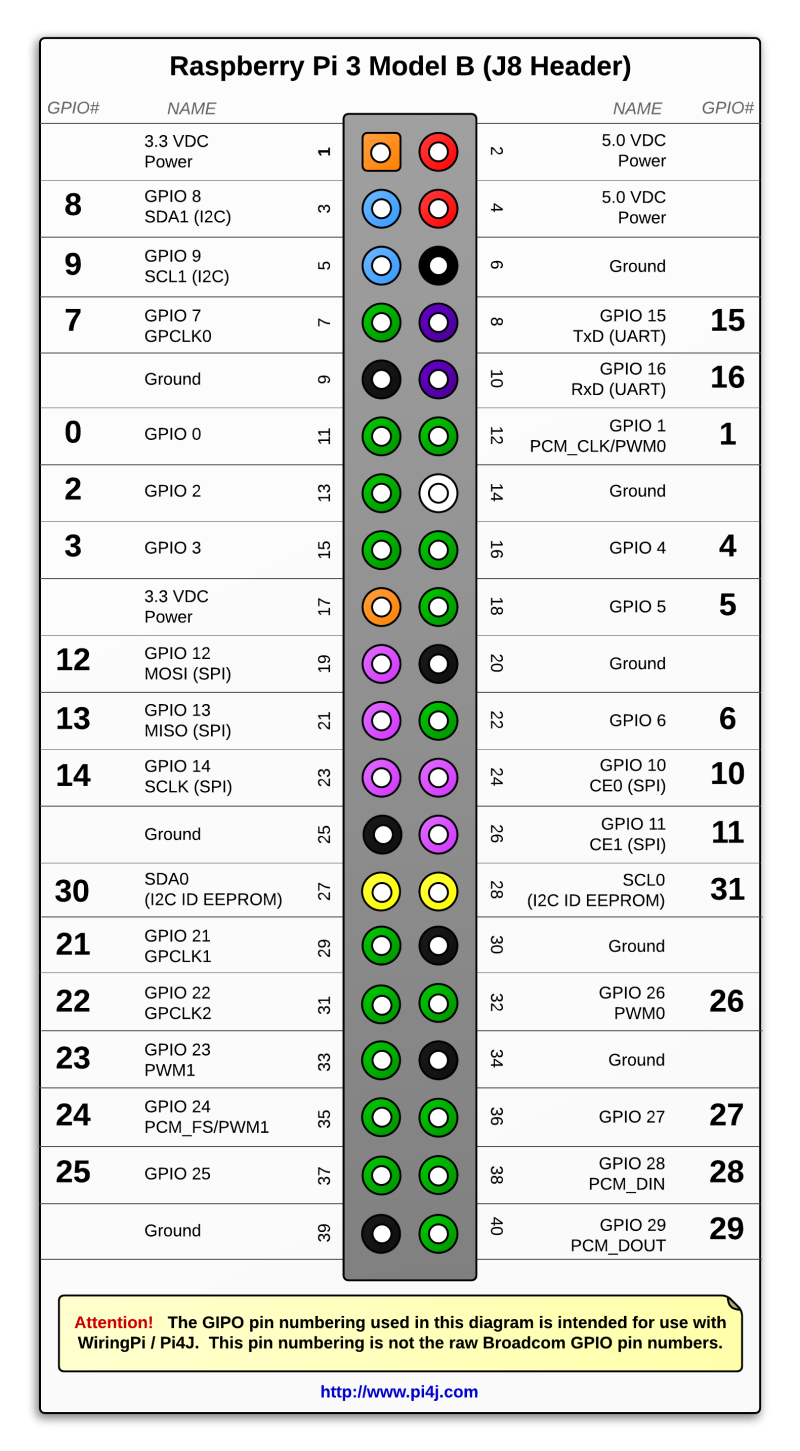
I have a printed copy of both of those that I keep in a vinyl binder sheet on my desk at all times. I mainly use the Pi4J one, but if I have to do anything with Python it's a good idea to have each one handy.
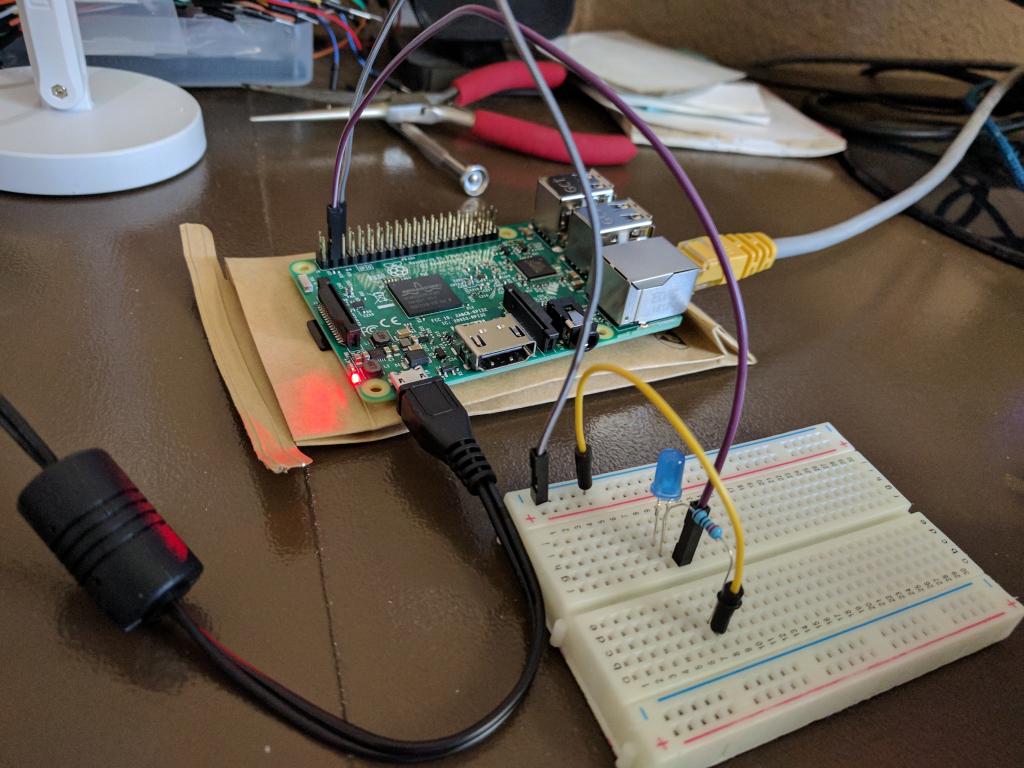
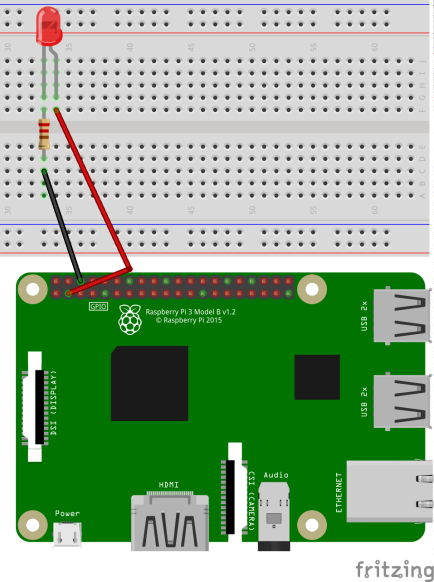
Feelin' pretty good about GPIO so far? Great, let's move on to some code. Let's wire up a super simple LED circuit and use some Groovy code to turn the LED on and off. Here's a diagram of the connections necessary for this demo. Use the Pi4J schematic above to hook up the anode of the LED to GPIO 8 and the cathode to a ground pin with a 220 ohm resistor inline.
Now let's write up a quick Groovy script to turn it on, wait 3 seconds and turn it off. In this example we'll use Grape to grab our Pi4J dependency. Create a new file called led-test.groovy, enter the following script and save it.
Now run it with:
groovy led-test.groovy
You should see the LED turn on and then off 3 seconds later. You'll also see the result of the println calls in your console.So what's going on here? Line 10 is where we use the GpioFactory to get an instance of the GpioController. We then use the controller to provision a "digital output pin" located at pin 8. We pass a boolean value to setState to indicate whether we want the pin in a "High" state (true) or "Low" (false). Then we shutdown.
That's it. GPIO Magic with Pi4J via a simple, standalone Groovy script. In the next post, we'll take a look at a much better alternative to simple text editors for writing Groovy code for the Pi.
Related Posts

Querying Autonomous Database from an Oracle Function (The Quick, Easy & Completely Secure Way)
I've written many blog posts about connecting to an Autonomous DB instance in the past. Best practices evolve as tools, services, and frameworks become...

Sending Email With OCI Email Delivery From Micronaut
Email delivery is a critical function of most web applications in the world today. I've managed an email server in the past - and trust me - it's not fun...

Brain to the Cloud - Part III - Examining the Relationship Between Brain Activity and Video Game Performance
In my last post, we looked at the technical aspects of my Brain to the Cloud project including much of the code that was used to collect and analyze the...