Announcing the Micronaut Oracle Cloud Infrastructure Module for Simple SDK Integration and Performant Serverless Functions
Posted By: Todd Sharp on 9/11/2020 12:00 GMT
Tagged: Cloud, Cloud, Cloud Native, Cloud Native, Developers, Developers, Java, Java, Open Source, Open Source

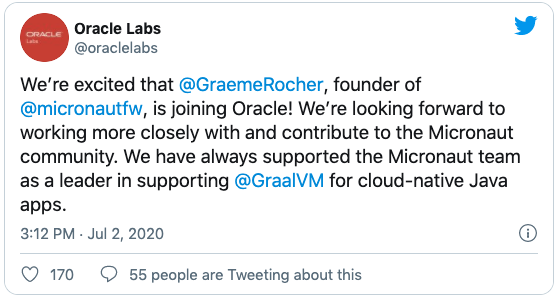
If you are a member or follower of the Java community, then you likely saw this news a few months ago:
This is huge news.
If you've read my blogs here, follow me on Twitter, or on GitHub then you have figured out that I'm a pretty big fan of Micronaut. I won't get into the performance aspect of what makes it so great in this post (and trust me, there is plenty to talk about regarding performance). Instead, I'll focus on a few of the other reasons why I'm such a fan. First off, the framework is well documented and has plenty of modules available to make software development, testing, and deployments easier developers. Maybe you're using Liquibase or Flyway to manage database migrations? Perhaps you'd like to document your microservices with OpenAPI/Swagger? No problem, that's easy to do with Micronaut. There are new features coming all the time and it's easy to develop and contribute your own integrations to the community. But it's not just developer tool integrations like Liquibase, Flyway, and Open API that make Micronaut great. There are also cloud integrations that you would expect in a framework that calls itself "natively cloud-native".
There is already great support for Oracle Database and Oracle Cloud Infrastructure in Micronaut. You can easily connect your application to Oracle Database via OJDBC using Micronaut Data, use Oracle UCP for connection pooling, detect the Oracle Cloud Infrastructure environment and retrieve cloud instance metadata, use Oracle Cloud Infrastructure vaults as secure, distributed configuration stores and more. And today, we're announcing the launch of the Micronaut module for Oracle Cloud Infrastructure.
Where are the Examples? All of the code that we'll look at below (and more) can be found in the docs-examples directory on GitHub located at https://github.com/micronaut-projects/micronaut-oracle-cloud/tree/master/docs-examples
This module provides developers the ability to configure a secure authentication provider (via four different methods), and inject any client from the OCI Java SDK into your Micronaut controllers and services for use as necessary.
OCI SDK Integration
The first step is to provide credentials that Micronaut will need to construct an authentication provider for the SDK clients. If you have set up the OCI CLI then you'll have a config file with a DEFAULT profile for the CLI located at $USER_HOME/.oci/config. The easiest way to use this method is to provide the following configuration in your Micronaut application.yml file.
Another option is to provide the necessary information directly via the application.yml file (you might do this in your build pipeline or in conjunction with secret values from your Oracle Cloud vault).
The other two possible auth methods involve instance principals (for VMs running in the Oracle Cloud) and resource principals (for serverless functions). The module guide covers both of these, so refer to it as applicable.
At this point, Micronaut will handle all of the needed authentication and hand you a client that is ready to use when you inject it into your controllers and services. Here's an example of injecting the ObjectStorage client into a controller:
The ObjectStorage client is now available from your controller methods.
In addition to the standard clients in the OCI SDK, the module provides a complete set of reactive clients that use RxJava to allow you to perform the same operations in a non-blocking manner. Just inject the Rx client variation:
And use the client in your methods (notice the method now returns a Single<List<String>>).
Serverless Functions
In addition to the SDK integration, the module provides support for Micronaut serverless functions. Just configure the dependencies, extend OciFunction, and include a custom Dockerfile (see the guide) and you'll get all of the power of Micronaut in your serverless functions.
Hot Tip! Since they are compiled to native images inside of the Docker container when they are deployed you'll get amazing performance out of your serverless functions. We're talking (unscientifically measured) 600ms cold starts and 250ms warm invocations.
HTTP Serverless
This feature is one that I'm really excited about. With this module, you can create Micronaut controllers that perform your application's business logic and point an API Gateway at your serverless function. The module will handle all of the necessary routing to invoke the proper controller method and return the necessary result based on the incoming path and HTTP request method. This allows you to create powerful serverless backends with a minimal amount of effort and code. I have some more advanced demos planned in the near future, but for now, let me give you an example of how this works. I'll show a simple example, but the GitHub repo has a more advanced demo that illustrates the fact that you can easily integrate the OCI SDK into your serverless and http+serverless applications.
We start off with a controller which has two endpoints. Both are located at /echo/{name} but one uses POST and the other uses GET.
@Controller("/test")
public class TestController {
    @Post(uri = "/echo/{name}", produces = MediaType.TEXT_PLAIN)
    public String testPost(@PathVariable String name) {
        System.out.println("/echo as POST");
        return "Hello, " + name;
    }
    @Get(uri = "/echo/{name}", produces = MediaType.TEXT_PLAIN)
    public String testGet(@PathVariable String name) {
        System.out.println("/echo as GET");
        return "Hello, " + name;
    }
}
Next, we include the necessary Dockerfile (see the guide and/or GitHub repo), call ./gradlew buildLayers and deploy with fn deploy --app [your app]. Now we need to set up an API Gateway to expose our function and point incoming calls at it.
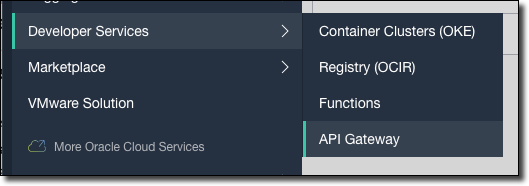
First, create an API Gateway by selecting 'Developer Services', then 'API Gateway' from the Oracle Cloud console dashboard.
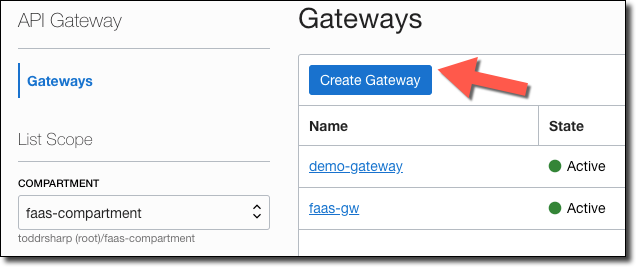
Click on 'Create Gateway'.
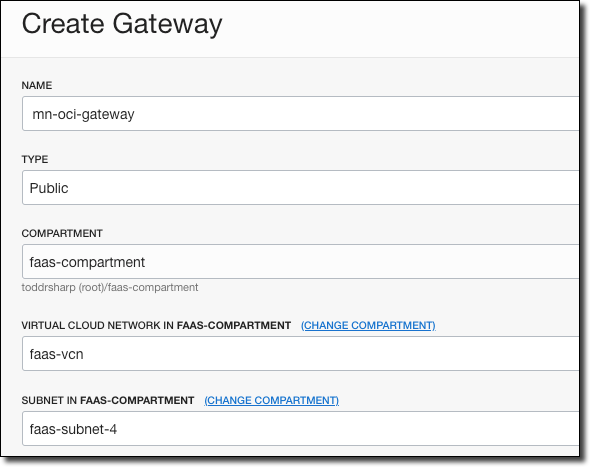
Enter a name for the gateway, choose the compartment it is stored in, and the network and subnet.
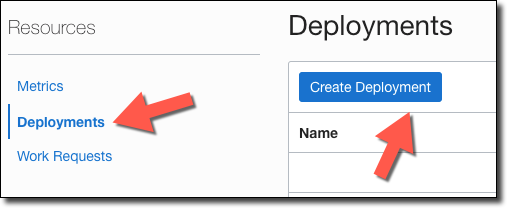
When the gateway is ‘Active’, click ‘Deployments’, then ‘Create Deployment’.
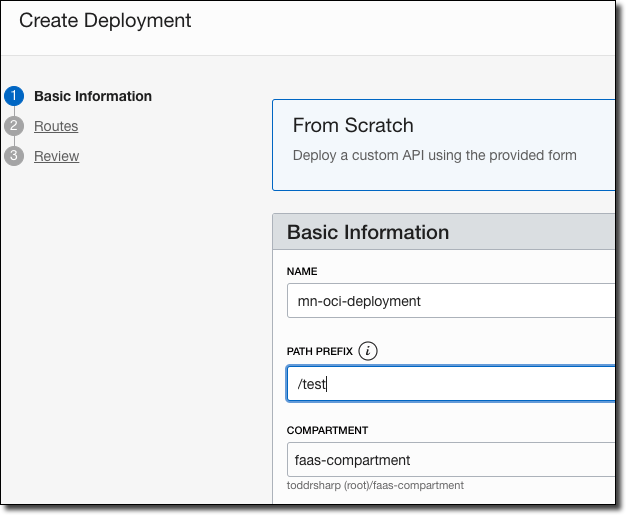
Provide a name for the deployment and enter a “Path Prefix”. If necessary, configure any Authentication, CORS, or Rate Limiting and click ’Next’.
The path prefix must match the path you used in your controller (IE: @Controller("/test")).
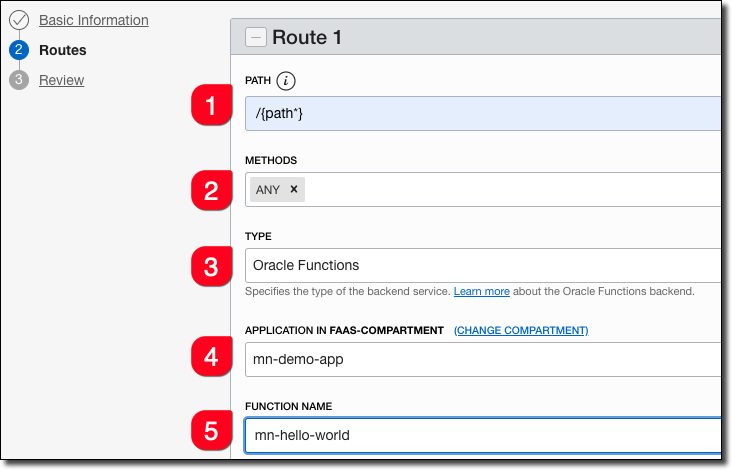
On the next tab, enter the route information.
-
Enter
/{path*}as the Path. This will capture all incoming requests and the Micronaut router will match the incoming path and request method with the proper controller method. -
Choose
ANYfor methods. Optionally, choose the necessary methods individually. -
Choose 'Oracle Functions' as the type.
-
Choose the appropriate Oracle Functions application.
-
Choose the function name that you used. This can be found in your function’s
func.yamlfile.
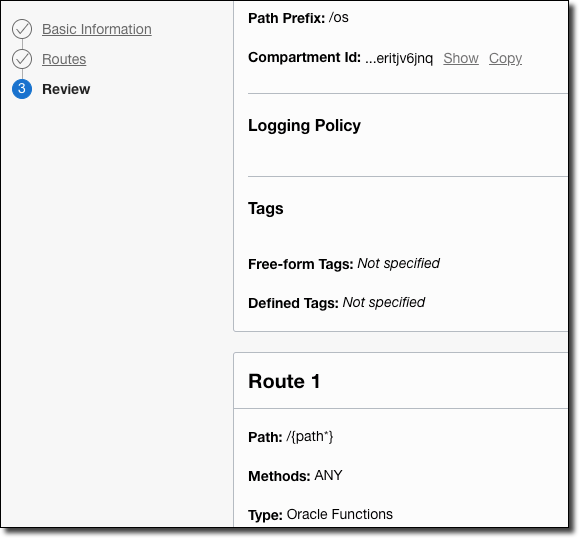
Click 'Next', then review the deployment details and click 'Create'.
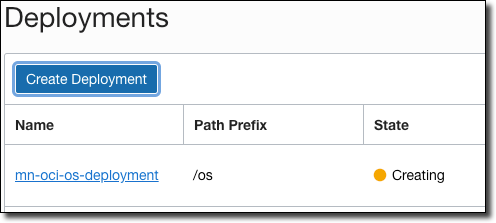
Your new deployment will be listed in 'Creating' state.
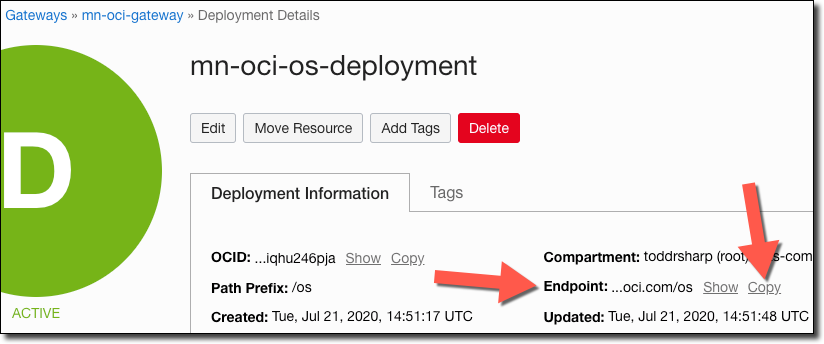
When your new deployment becomes 'Active', click on the deployment to view the deployment details. Copy the 'Endpoint' - this is the base URL that you’ll use for your function invocations.
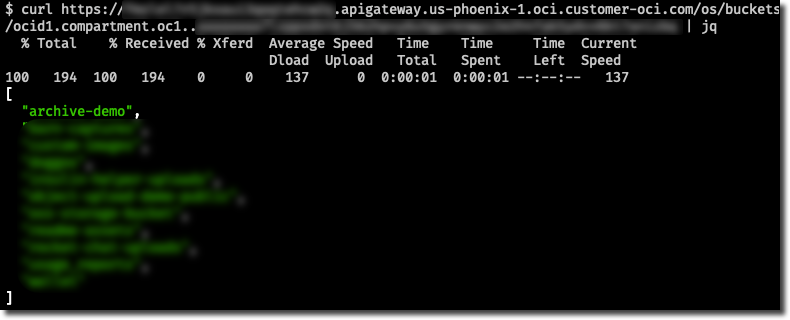
Test your functions by appending the proper controller path and one of your controller endpoints.
Future Plans
There are tons of them, but Graeme probably wouldn't like it if I told you all of them! Keep an eye on Micronaut + Helidon integrations, more work with GraalVM integrations, and much more. As far as this module is concerned, we're working on enhancing Micronaut Launch to provide some support for generating projects that use the micronaut-oci module, as well as serverless functions with Dockerfile generation and much more! Also, stay tuned for the Micronaut Gradle plugin which is also coming soon. I'll cover that in another blog post in the near future.
In the meantime, please give the functionality above a try and give us your feedback. Issues can be filed on GitHub, and comments are welcomed via the comments below or on Twitter.
More Information! For all the technical details of this module, please read the full documentation for these integrations.
Photo by Alex Knight on Unsplash
