Complete Guide to Getting Started with MySQL DB in the Oracle Cloud
Posted By: Todd Sharp on 1/29/2021 12:00 GMT
Tagged: Cloud, Database, MySQL

Back in September, we finally announced the long-awaited MySQL Database Service in the Oracle Cloud. It’s big news for developers who are familiar and comfortable with MySQL and want a secure, fully managed cloud service to use with their applications. All of the features you’d expect from a managed cloud service are there - automated backups, monitoring, integration with SDKs, APIs and the OCI CLI. In this post, we’ll take a look at what it takes to deploy, configure, and connect to a MySQL DB System in the Oracle Cloud. Let’s jump right into it!
Cheat Mode! The blog post below will show you, in detail, how to manually launch your MySQL DB, a Virtual Cloud Network (VCN), and an optional Compute Instance as a bastion host. If you prefer to automate your deployment with Terraform you can skip ahead to the section where we look at how to deploy all of these resources automatically with Oracle Cloud Infrastructure Resource Manager.
Since this guide is quite long, I've decided to add a Table of Contents here so that you can skip ahead as necessary.
- Create a Compartment
- Create a Virtual Cloud Network (VCN)
- Create a Compute Instance
- Create a Group & User
- Creating a MySQL System
- Bonus - Deploy Resources with Terraform and OCI Resource Manager
- Configuring your MySQL DB System
- Connecting to the MySQL DB System
- Summary
Create a Compartment
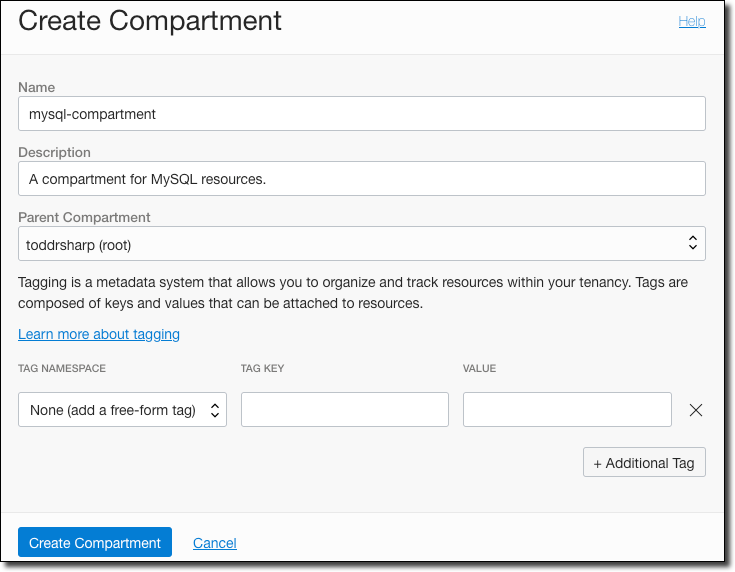
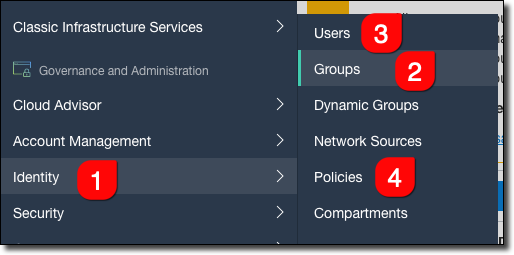
The first thing that I recommend you do is to create a new compartment to store your MySQL resources within. It’s not mandatory, but it helps to keep things, well, compartmentalized in your cloud tenancy. In the Oracle Cloud console sidebar menu, select ‘Identity’ and then ‘Compartments’ and click on ‘Create Compartment’.

Give it a name - we’ll use mysql-compartment in this post if you’re playing along at home.
Create a Virtual Cloud Network (VCN)
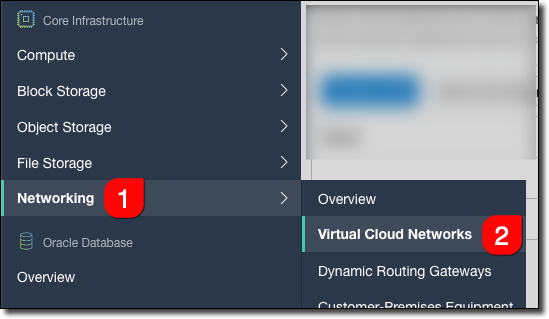
Now we will create a new Virtual Cloud Network (VCN) that will be used for the DB system and any other resources that need to communicate with it. Select ’Networking’ and ‘Virtual Cloud Networks’ from the sidebar.
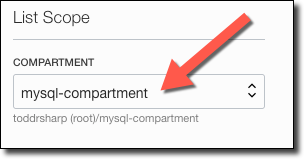
Remember to select the newly created compartment to make sure that you will be creating your VCN in that compartment.
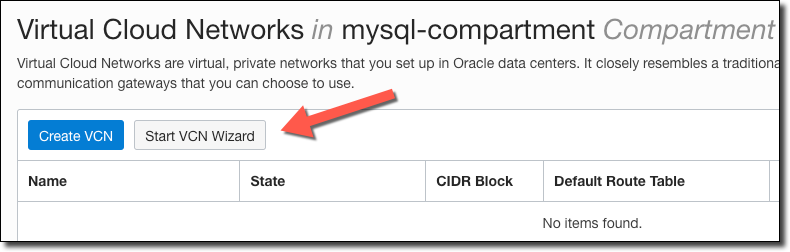
To create the VCN, we could click ‘Create VCN’ but that would require us to manually create the associated subnets, etc. It’s much easier to click ’Start VCN Wizard’ which will automate the necessary components.
Now select ‘VCN with Internet Connectivity’ and start the wizard.
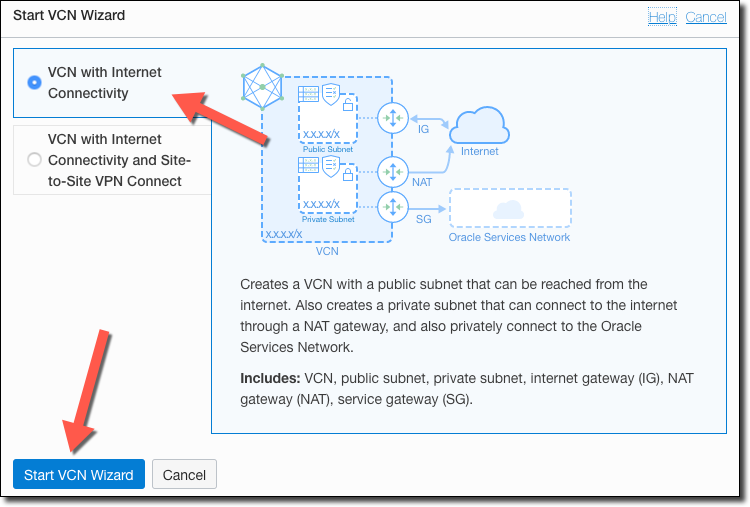
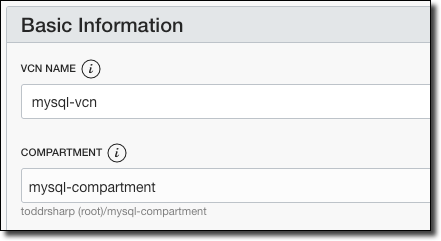
Name it mysql-vcn and choose the mysql-compartment compartment.
Assign the VCN CIDR Block and the public and private CIDR blocks.

Click Next, review the entries, and click ‘Create’.
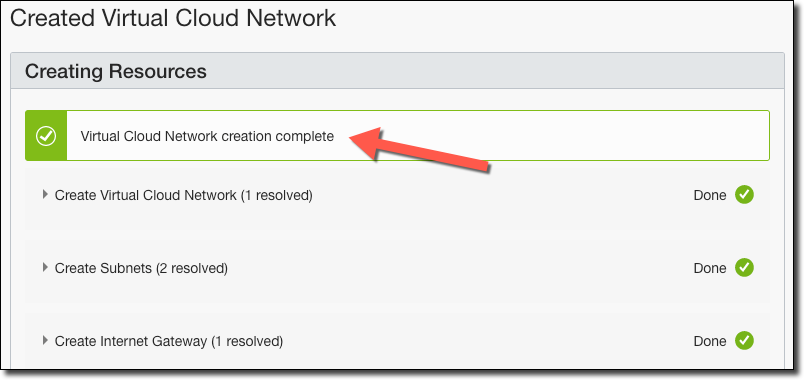
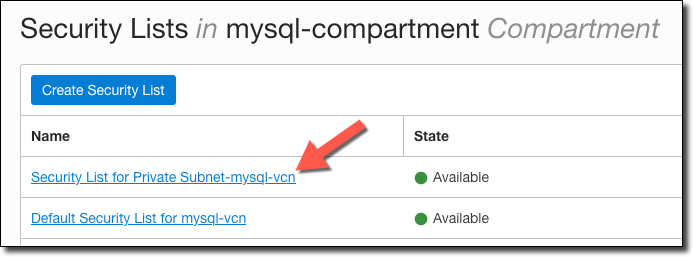
Click ‘View Virtual Cloud Network’. In the VCN sidebar, click ’Security Lists’.
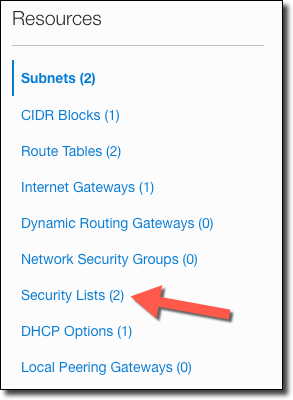
Click on the Security List for the Private Subnet.
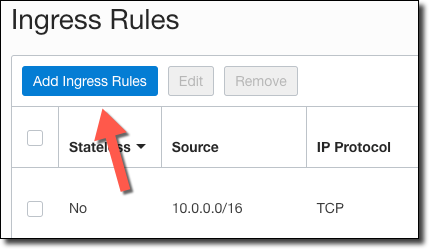
In the Private Subnet security list click on ‘Add Ingress Rules’.
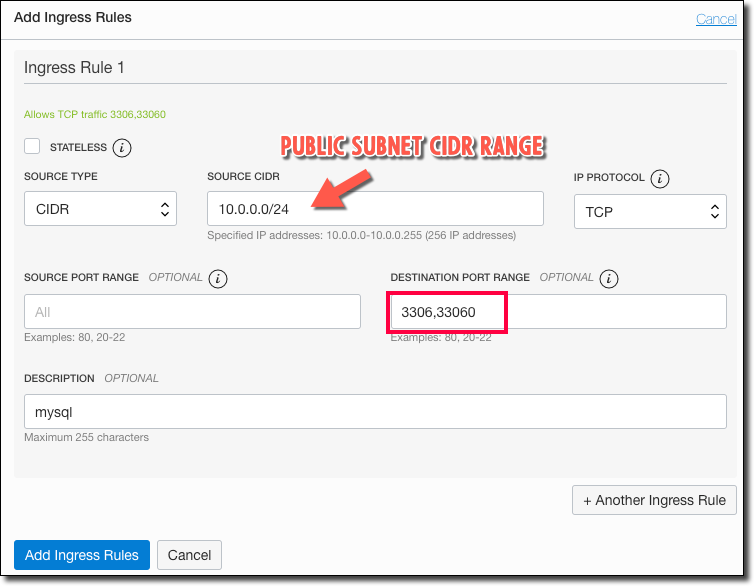
Add an ingress rule using the CIDR range of the private subnet for the TCP protocol on ports 3306 (MySQL) and 33060 (MySQL X Protocol). Essentially what we are doing here is opening up these ports for internal traffic on the VCN so that any resource (your application(s) or bastion host) can communicate with the MySQL DB.
Create a Compute Instance
Note: This is only necessary if you wish to connect to the MySQL instance from your localhost. If you are using MySQL as a test or production instance with a deployed application, you do not need to create a compute instance to act as a bastion host and can skip ahead to the next section.
We will need to create a compute instance to act as a bastion host to access our MySQL instance.
Tip! You can always scale up/down your bastion host instance to avoid paying for it when you’re not using it. To learn more, check out Cloud Cost Cutting: Autoscaling Your Dev/QA Environments.
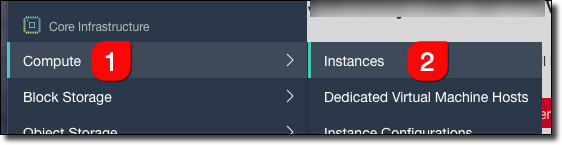
Click on ‘Compute’ - ‘Instances’.
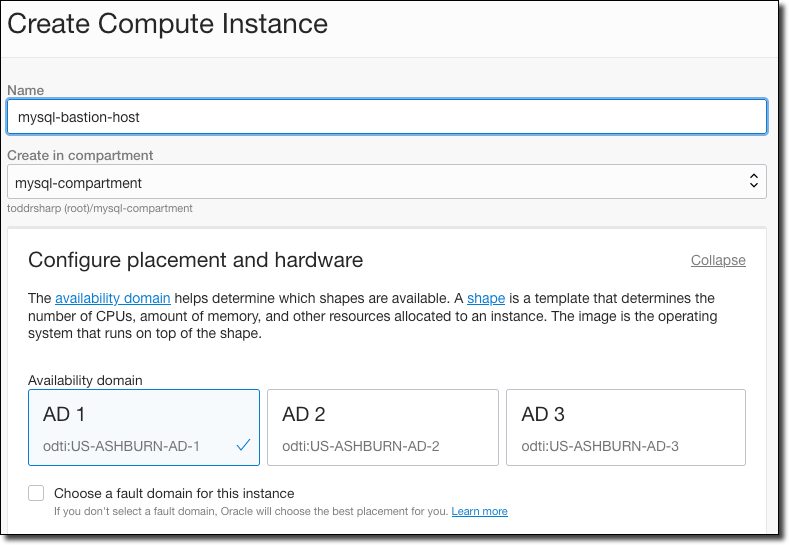
Click ‘Create Instance’.

Give it a name, and if necessary choose the AD.
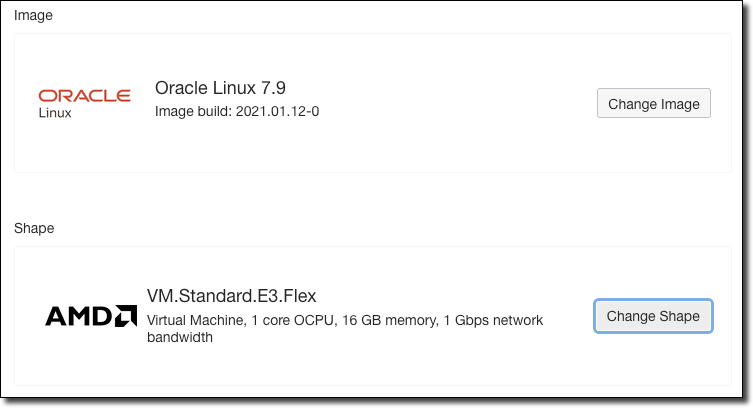
Choose an OS image and the shape of the VM.
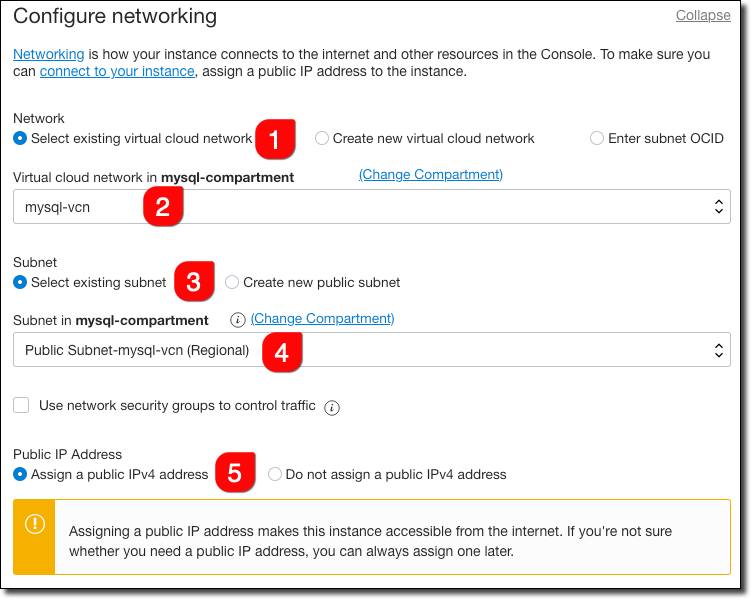
Configure networking so that it uses the VCN we created earlier and the public subnet (because this is a bastion host that we’ll use to ‘jump’ to the MySQL DB).
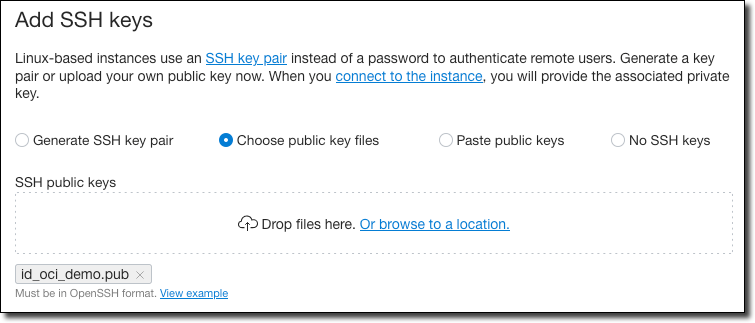
Choose your SSH key option (I’m uploading an existing public key).
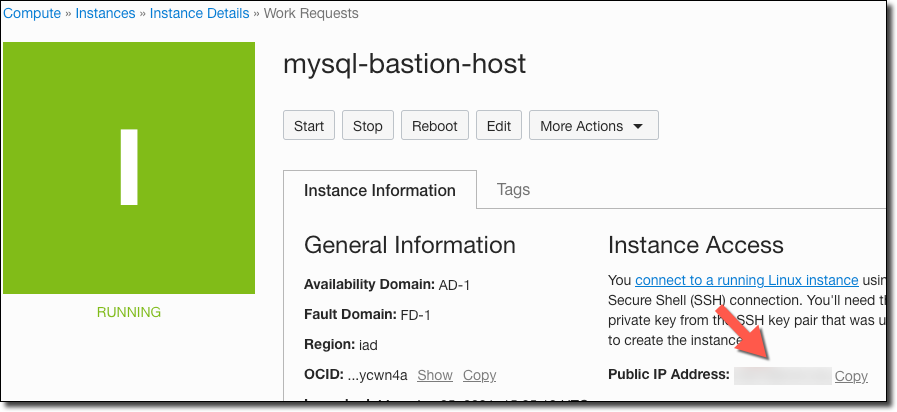
Accept the default values for the boot volume and then click ‘Create’. Once the instance has entered a “Running” state, grab the public IP.
Create a Group & User
If you're going to create the MySQL DB System with a user that does not have full permissions in the tenancy, you'll need to create a new user (or apply the group policy below to an existing user). You can skip this section if your user has admin permission. For more information regarding policies, refer to the documentation.
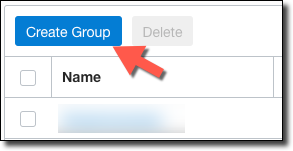
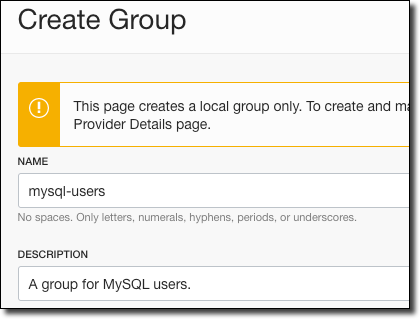
Create a group named mysql-users.
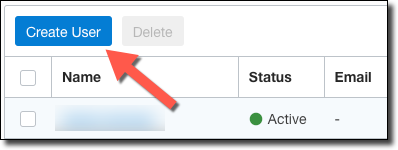
Go to ‘Users’, and click ‘Create User’.
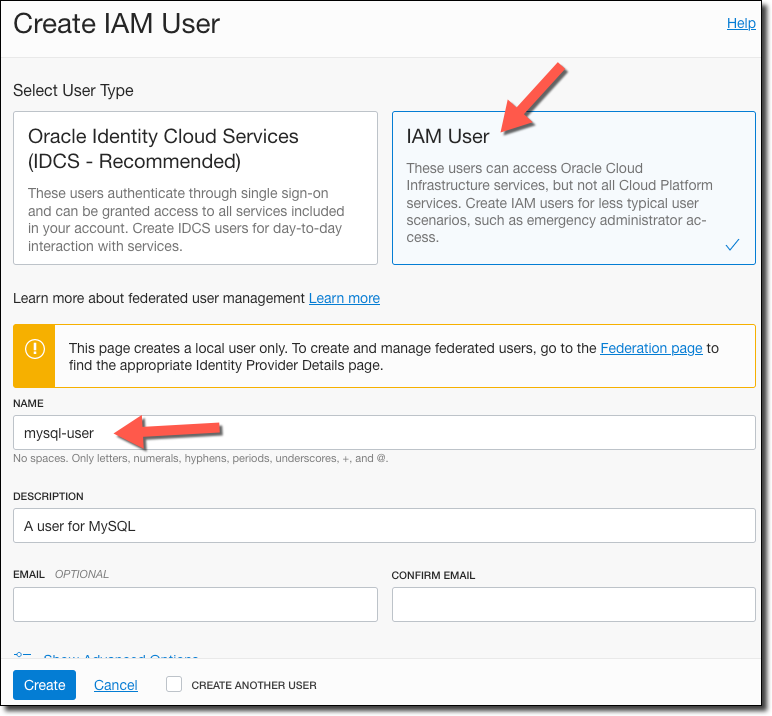
Create an IAM user named mysql-user.
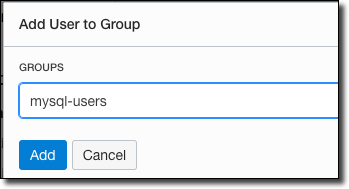
On the mysql-user details page, click ‘Add User to Group’ and add the user to the mysql-users group.
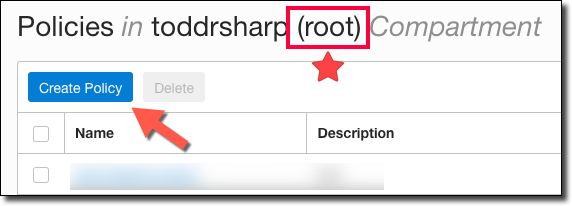
Go to ‘Policies’. In your ROOT compartment, create a new policy.
Create a policy with three statements:
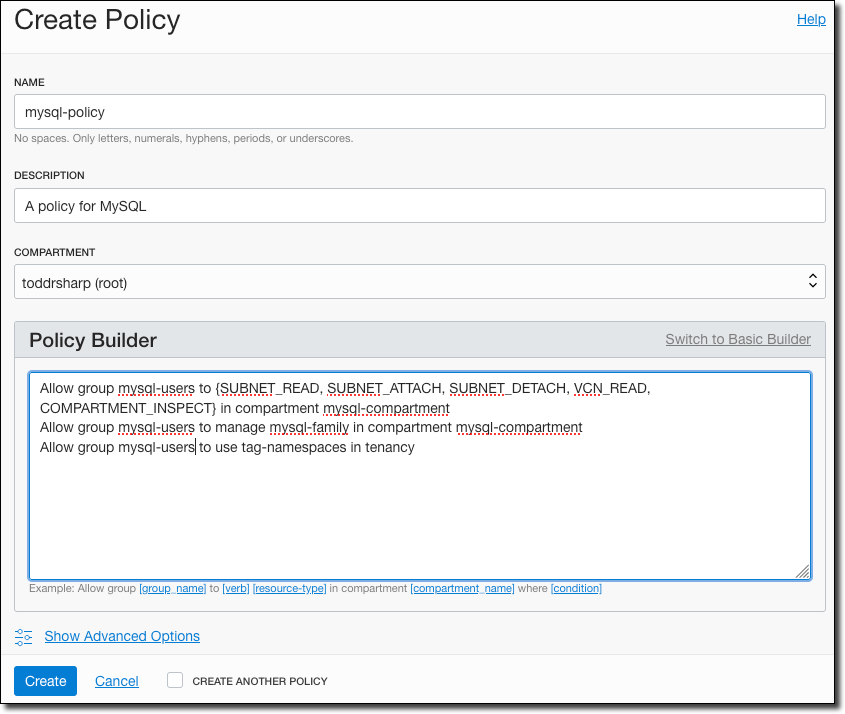
For easier copy/paste, here are the required statements (assuming you’ve used the same group name and compartment name that I specified above).
Creating a MySQL System
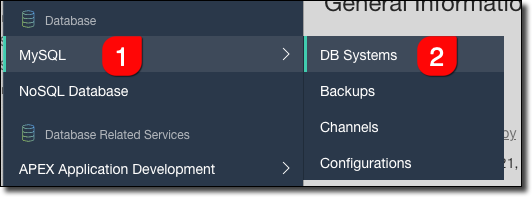
On to the MySQL system! Choose ‘MySQL’ and ‘DB Systems’ from the sidebar.
CLI Users: If you’d prefer to use the command line, check out the documentation: Creating a DB System using the CLI.
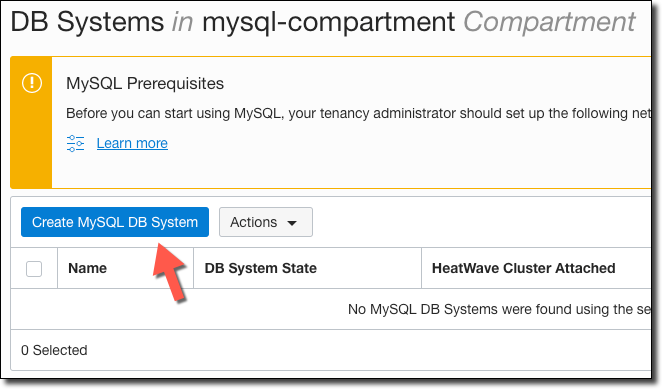
Disregard the information in ‘MySQL Prerequisites’ since we have already addressed all of the necessary prerequisites. Click ‘Create MySQL DB System’.
Enter a name and a description for the system. Make sure the mysql-compartment is selected and leave the default AD selected.

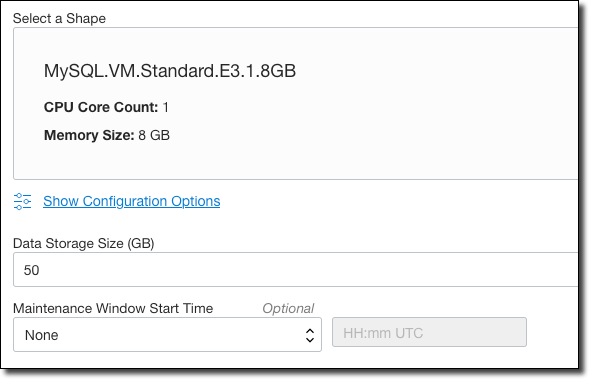
Choose a VM shape for the system, enter the required storage size and choose a preferred maintenance window (if desired). Click ’Next’.
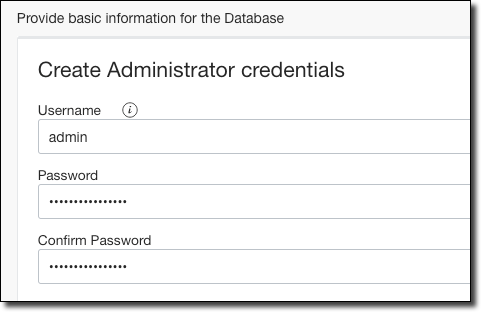
In step 2 of the wizard, enter a username and password (and confirm the password) for your administrator user.
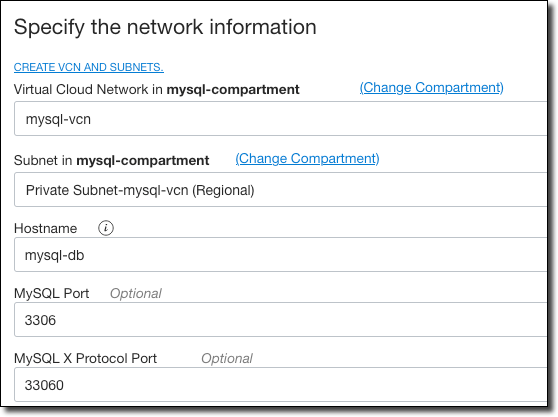
Choose the VCN that we created earlier and the ‘Private’ subnet. Enter a hostname and accept the default ports. Click ’Next’.
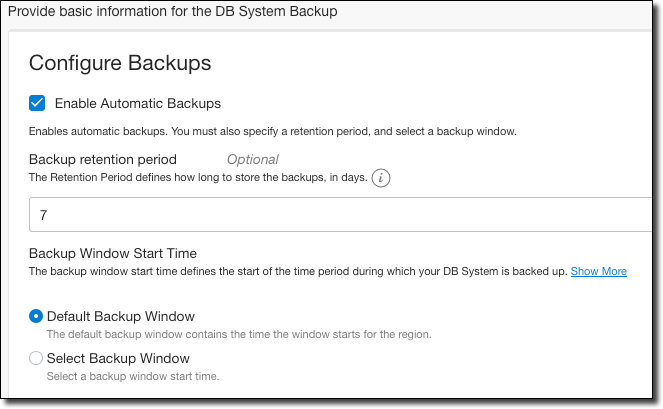
Finally, define how you’d like your DB system to be backed up, and then click ‘Create’.
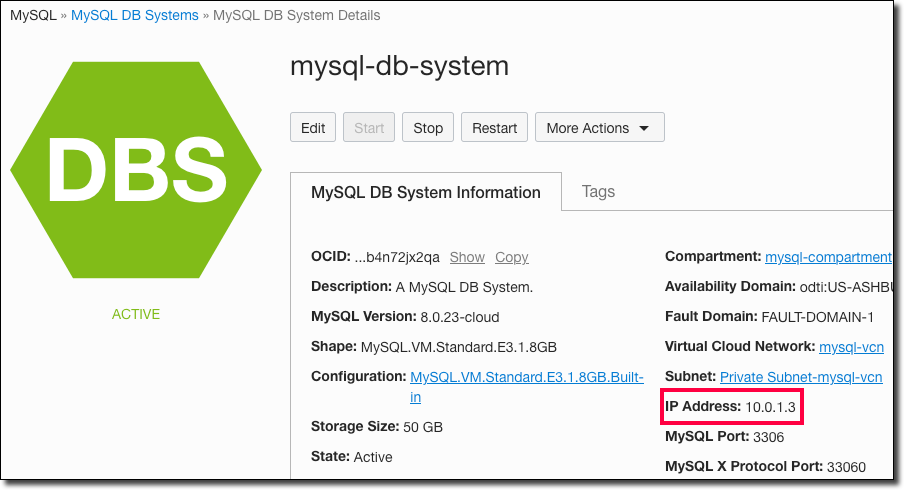
Once your MySQL DB System is running, take note of the private IP address that has been assigned.
If you are wondering about privileges, the default privileges are listed in the documentation.
Bonus - Deploy Resources with Terraform and OCI Resource Manager
It’s always great to know how to deploy resources manually, but sometimes it’s easier to use tools like Terraform to automate our Infrastructure creation so that we can integrate it into our CI/CD pipelines. I’ve created a set of Terraform scripts that can be used to do just that and hosted them on GitHub. You’ll need to fork it into your own repository in order to use it. If you’re not familiar with Resource Manager, let’s take a look at how to deploy the stack.
Create a Configuration
First, we’ll need to create a Personal Access Token on GitHub which will give Resource Manager access to pull from GitHub.
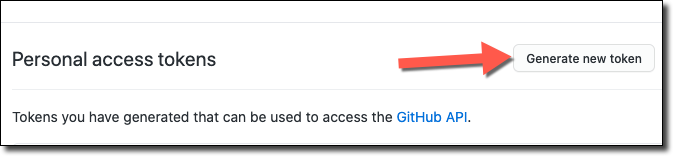
Name your token and grant it read:packages permissions.

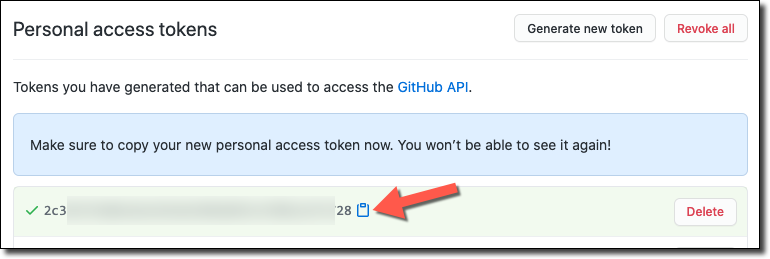
Copy it and store it somewhere handy - we’ll need it in just a minute.
Back in the OCI console, select ‘Resource Manager’, ‘Configuration Source Providers’.
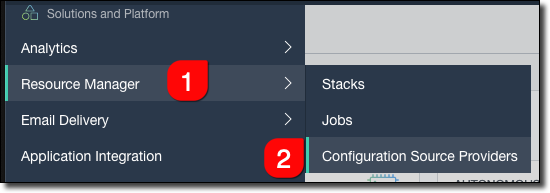
Click on ‘Create Configuration Source Provider’.

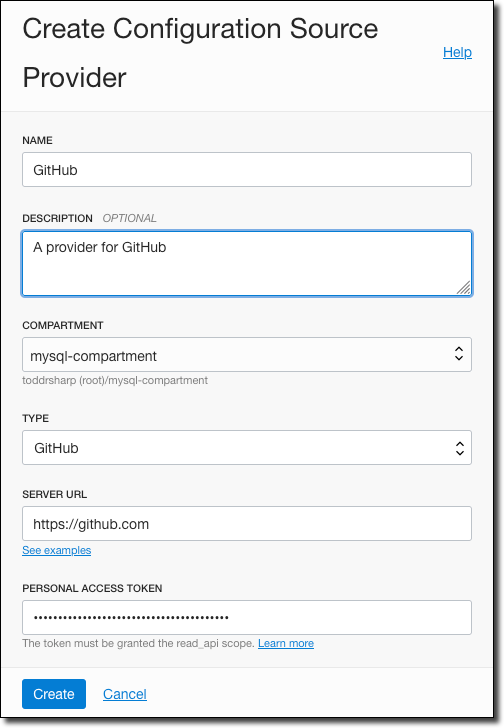
Name it, enter https://github.com for the Server URL, and paste the GitHub Personal Access Token that we created above.
Now click on ’Stacks’ in the sidebar and then ‘Create Stack’.

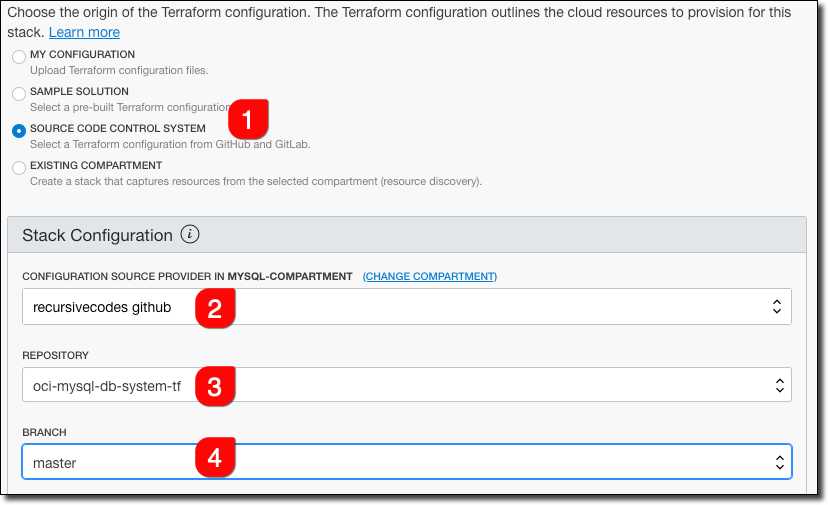
Select ’Source Code Control System’ (#1) as the source for the stack, choose the Configuration Source (#2) that we just created, and then choose the repo that you forked into (#3) and the branch (#4).
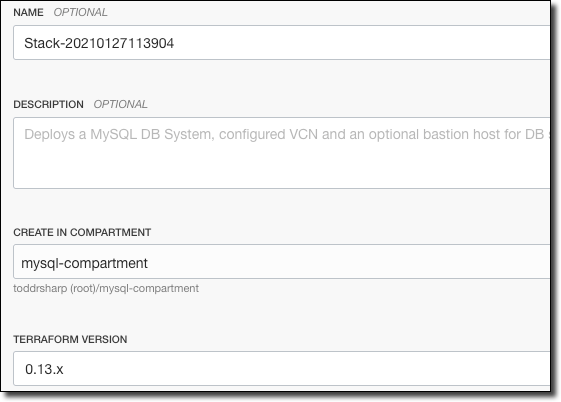
You can name the stack whatever you’d like, choose the compartment to store the stack in, and choose the Terraform version (choose 0.13.x). Click ’Next’.
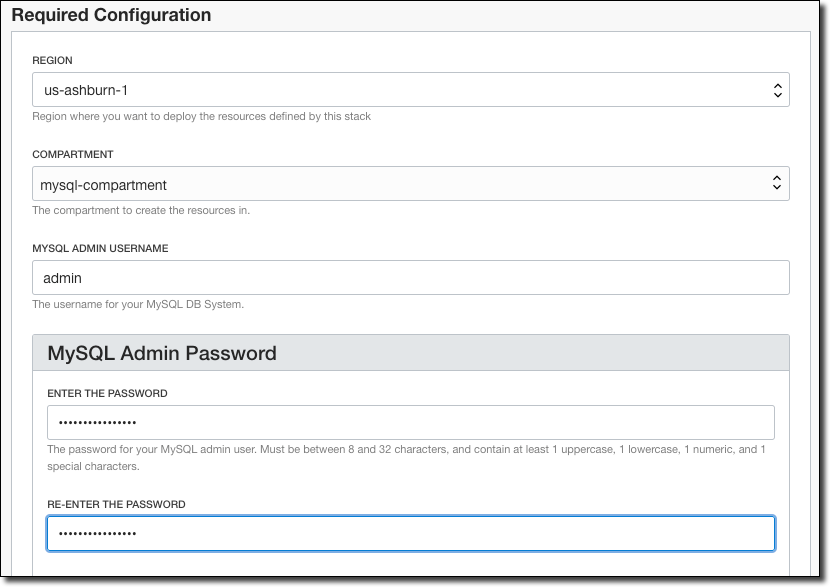
On the next screen, you’ll be prompted to make some selections and enter some variable names that will be used for the resources that will be created. Choose the region, compartment (where to store the created resources), enter a MySQL admin username, and enter and confirm the admin password.
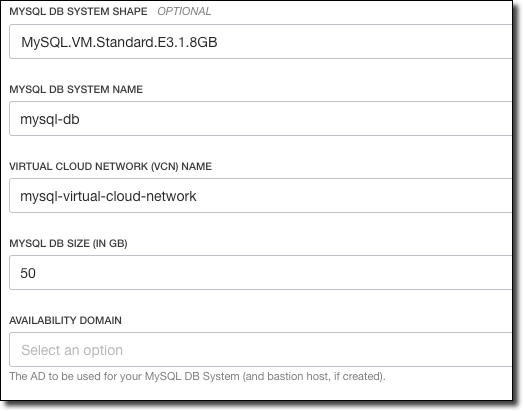
Choose the shape to be used for the MySQL DB System, enter a name for the DB system and the VCN, enter the amount of storage for the DB (default 50GB), and choose an Availability Domain.
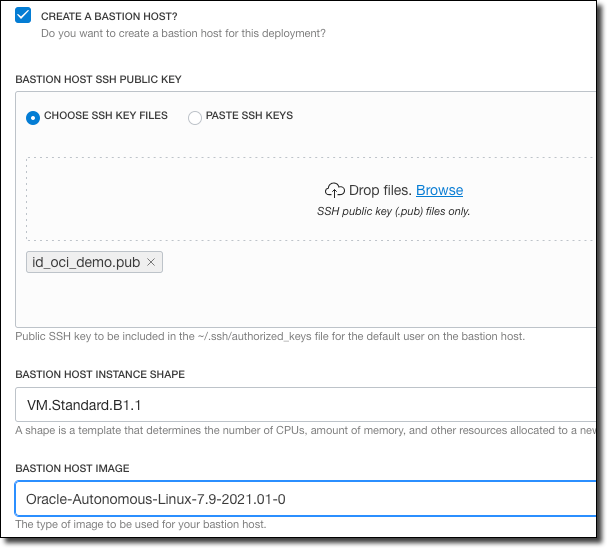
If you want to create a bastion host, check the box and choose an SSH public key file, instance shape, and image for the bastion host. When you’re done, click ’Next’, review the inputs and then click ‘Create’ on the following screen.
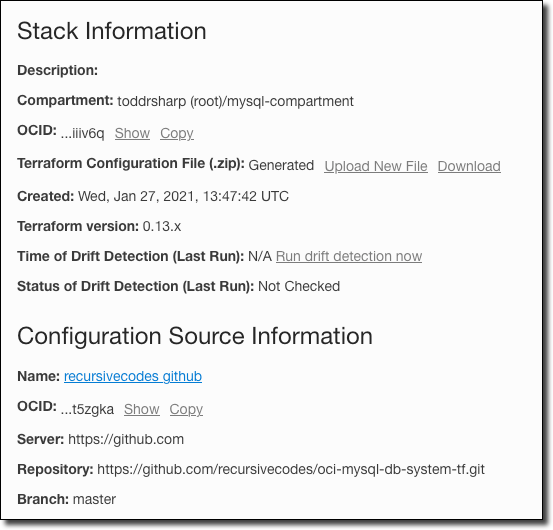
On the Stack details page, you can review details about the stack.
At the top of the Stack details page, click on the ’Terraform Actions’ button to view the options that you can perform with the stack.
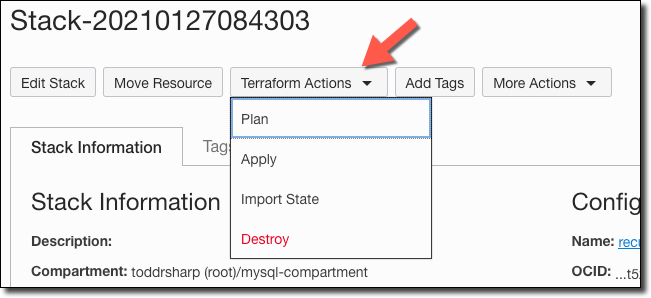
Click on ‘Plan’, name the plan and click ‘Plan’ to generate a plan.
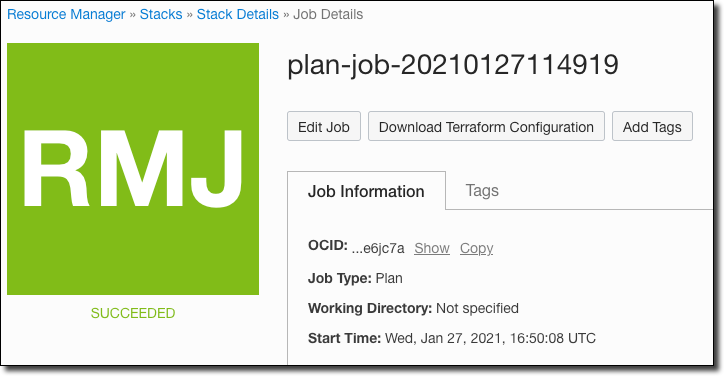
Once the plan is successfully generated, head back to the stack details and click ‘Apply’ under ’Terraform Actions’. Choose the plan that we just created and click ‘Apply’.
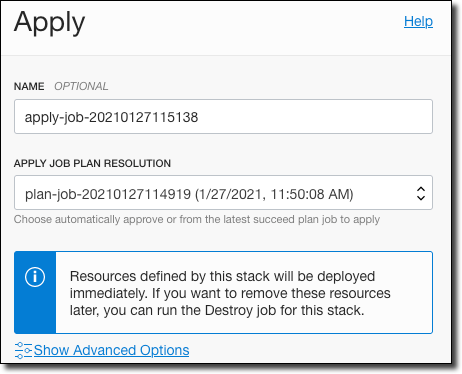
The ‘Apply’ will take a bit to create all of the resources (10 minutes - maybe more) but once it has succeeded you are all set.
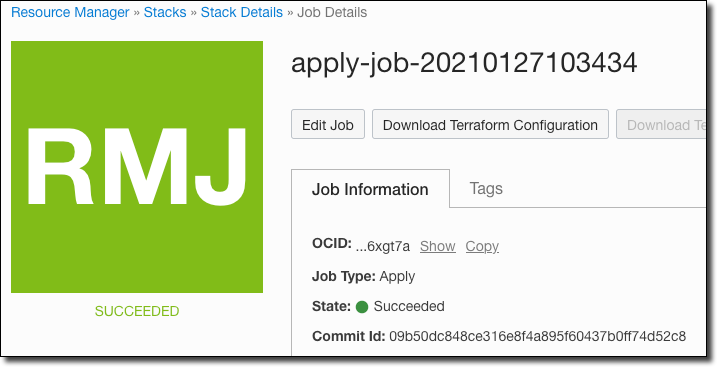
Tip: The ‘Apply’ action stores the Commit Id of the GitHub commit used to generate and run this plan.
You can now review the output by clicking ‘Outputs’ in the sidebar. This will give you a summary of the admin username, private IP (for the DB system) and the public IP for the bastion host compute instance.
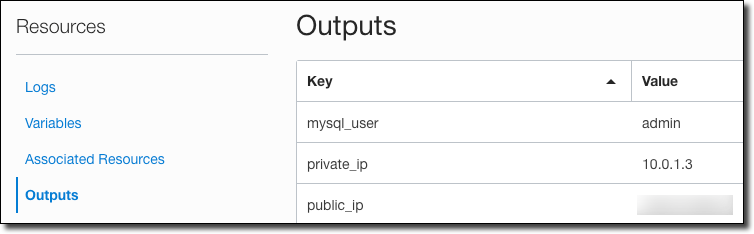
You’re ready to connect and start using the MySQL DB! If you ever have the need to delete all of the resources that were created with the stack, select ‘Destroy’ as the ’Terraform Action’ from the stack details page.
Configuring your MySQL DB System
MySQL Configurations are collections of variables that define the operation of the DB System. You can think of them like you would the standard my.ini or my.cnf files used in your local installation. We won’t visit this topic in-depth in this blog post (perhaps in another post!), but in the meantime, you can refer to the documentation to learn more about MySQL Configurations.
Connecting to the MySQL DB System
There are several ways to connect up to the MySQL DB System at this point. The first way we will look at involves making a secure connection to the bastion host compute instance and using the MySQL Shell to connect. To do this, use SSH with the private key that corresponds to the public key that you specified during instance creation.
Connecting with MySQL Shell
The first time that you connect, you’ll have to install the MySQL shell.
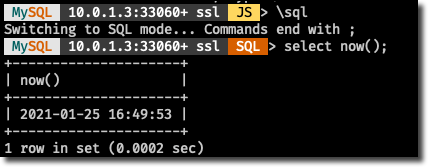
Next, connect with mysqlsh.
The MySQL shell will now be connected.
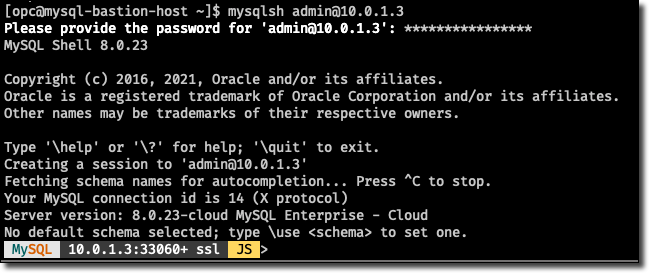
At this point, you can use MySQL Shell for whatever tasks you need to perform.
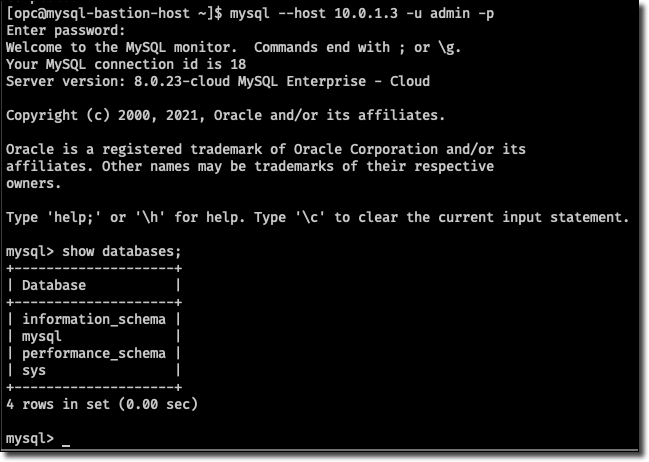
Connecting with MySQL Client
You can also install and use the MySQL Client if you are more comfortable or familiar with it:
Connect with:
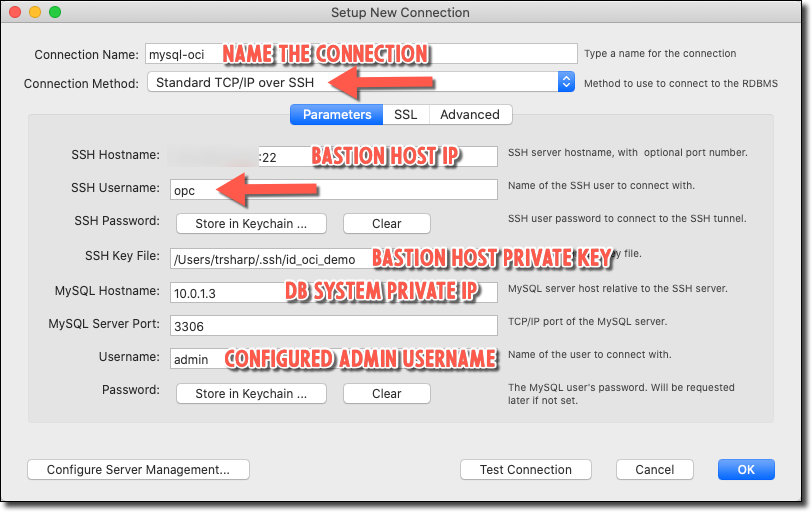
Connecting from MySQL Workbench
If you’re like me, you prefer to connect to your MySQL DBs with MySQL Workbench. This is pretty straightforward - just make a new connection and choose ‘Standard TCP/IP over SSH’ as the Connection Method. Enter your bastion host and additional credentials as shown below. Of course, you can (and should) create a dedicated schema user and log in with that user going forward.
Another option would use SSH tunneling and create a connection from MySQL Workbench to your localhost and the forwarded port. For example:
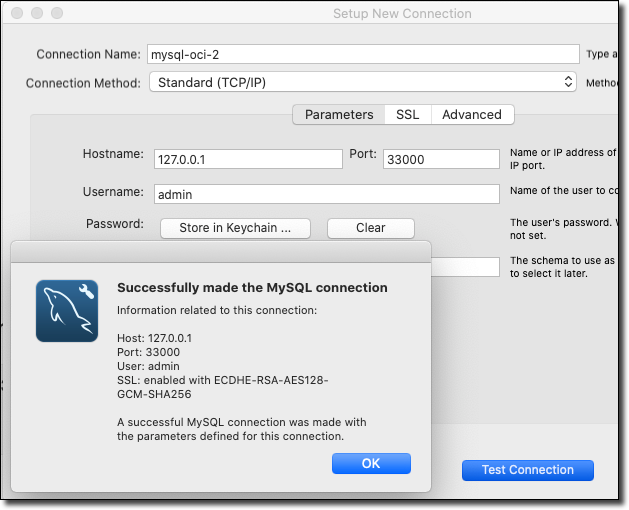
SSH tunneling would be a good option if you needed to connect to your MySQL cloud instance securely from your running applications on localhost. You can also launch MySQL Workbench from the command line and pipe the SSH tunnel so that it will automatically disconnect when you close Workbench. On my Mac, that looks like this:
Summary
In this post, we looked at getting up and running with the MySQL cloud service in the Oracle Cloud by configuring a Virtual Cloud Network, creating a compute instance to be used as a bastion host and creating the DB system. We then looked at several ways to connect to the newly created system. Feel free to connect with me on Twitter or leave a comment below if you have suggestions on what you’d like to read next!
Image by Gerhard G. from Pixabay