Install & Run Discourse For Free In The Oracle Cloud
Posted By: Todd Sharp on 10/30/2019 4:00 GMT
Tagged: Cloud

In today's post, I'd like to show you how to install and configure an instance of Discourse in a completely free VM in the Oracle Cloud. If you are not familiar with Discourse, it is a completely free and open source application for online discussions. Back in the early days we called them "bulletin boards" or "discussion forums", and in fact the concept of a BBS pre-dates the WWW itself. The fact that the first BBS can be traced back to around 1978 might have been the reason why the folks who built Discourse decided to re-imagine the concept of online discussions a bit. In their words, "Discourse is a from-scratch reboot, an attempt to reimagine what a modern Internet discussion forum should be today, in a world of ubiquitous smartphones, tablets, Facebook, and Twitter." You've certainly used an instance of Discourse at some point - maybe on How-To Geek, or the Twitter Developer Forums.
The next question is: what will you use it for? Maybe you're associated with a club, church group, non-profit or home owners association that would like to have a place to discuss common interest topics? It doesn't really matter what you use it for, but the awesome thing is you can get it up and running in under an hour using the tutorial below and it will be free to use, with no catch or "gotchas", forever. Seriously.
OK, let's get our hands dirty! Here are the steps we will take. If you're already familiar with a certain step, use the links below to jump to any section.
Please do not skip the "Before You Install Discourse" section or your install will likely fail.
- Create An Always Free VM
- Before You Install Discourse
- Install Discourse
- Launch And Configure Discourse
- Next Steps
Create An Always Free VM
If you're new to Oracle Cloud, you'll have to first sign up for a completely free account. You'll need to have a credit card on file, but you'll absolutely never be charged if you stick to the "always free" services. Once you've signed up for your free account, log in and head to the Oracle Cloud dashboard. It looks like this:
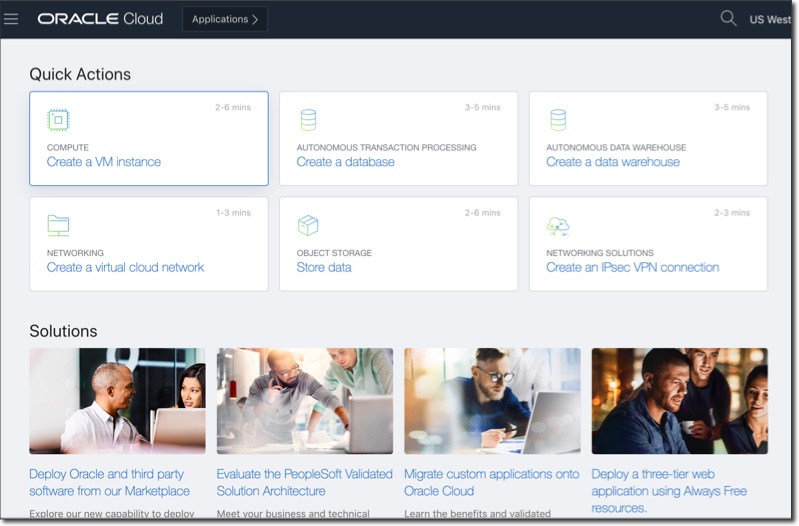
Let's create a VM. Click on 'Create a VM instance':

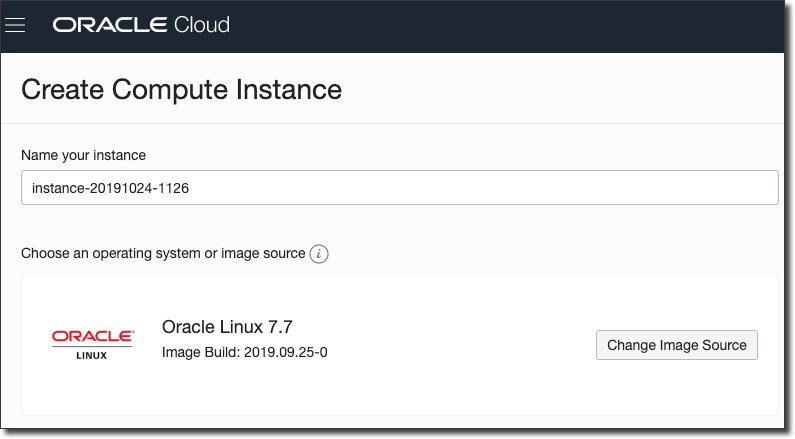
Give your instance a name and optionally change the image source. The instructions below will be for the default OS which is Oracle Linux, so it's probably best to stick with the default.
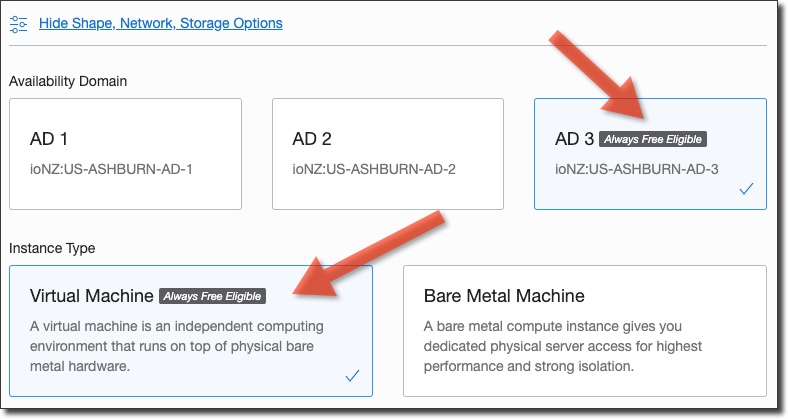
If necessary, click 'Show Shape, Network, Storage Options' and make sure the Availability Domain and Instance Type are both 'Always Free Eligible'.
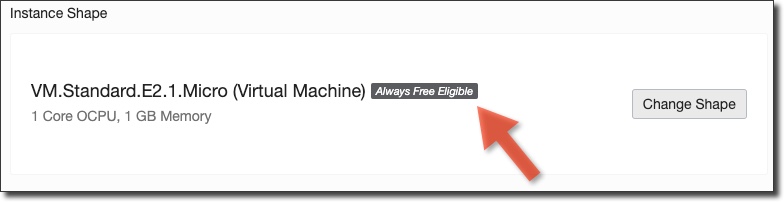
Same thing goes for the instance shape - choose the 'Always Free Eligible' option.
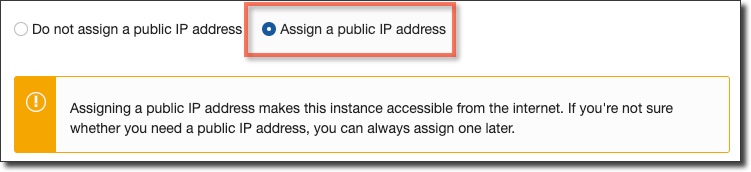
Make sure to check 'Assign a public IP address' otherwise you will not be able to access the VM via the web!
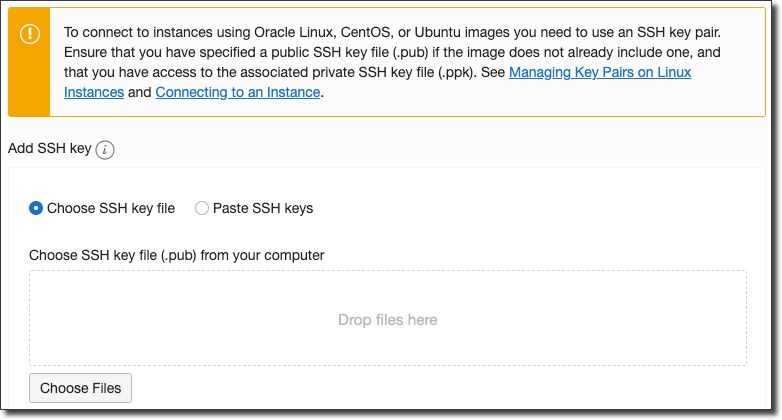
Next, choose a public key file that has an associated private key that can be used to access this VM after it is created.
Click on 'Create' and you'll be directed to the instance details page and the VM will be in a 'Provisioning' state:

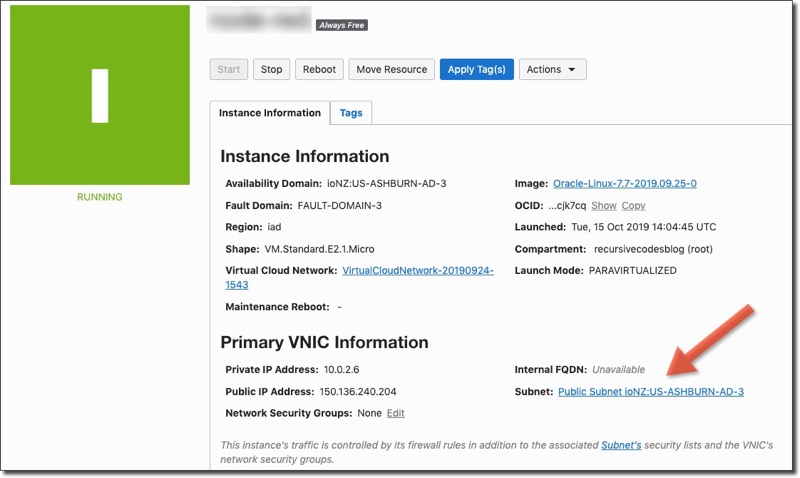
After a short wait the instance will become 'Available'. Copy the public IP address that has been assigned to the VM. We'll need this as we move on in this tutorial.
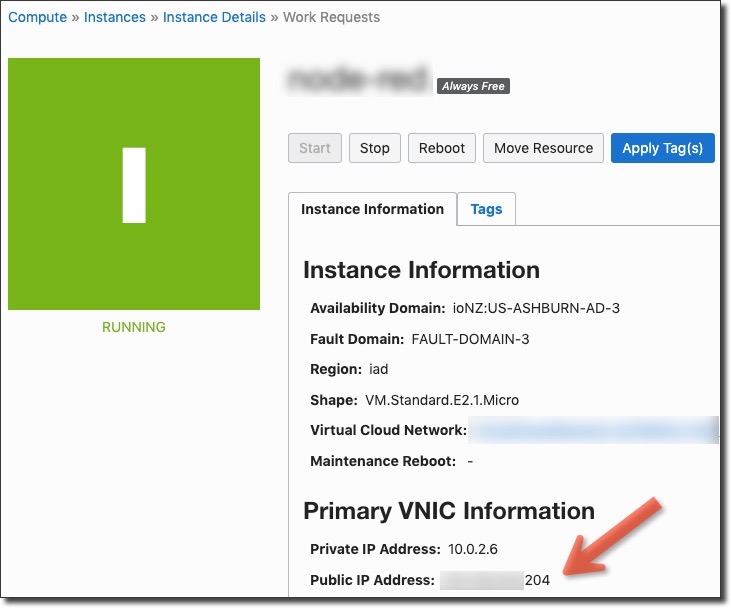
Your VM is now ready to go. You can now SSH in to the machine using the private key associated with the public key you uploaded when you created the VM.
Before You Install Discourse
We'll need to take care of a few items before we can start the Discourse install. If you skip this step your install will certainly fail.
Domain Name Record Set
The first thing we'll need to do is associate our VM's public IP address with a domain name. You can certainly skip this step if you would like to access your forum via its IP address, but you'll be unable to access it with HTTPS if you choose to do that. In my case, I'm going to use the URL discourse.toddrsharp.com, so I'll add an A record with my DNS host to point at my VM's IP address:
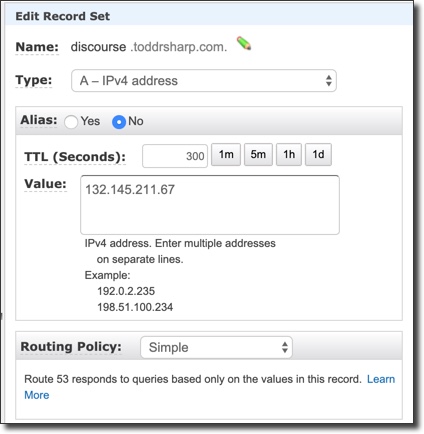
Follow the directions of your particular hosting provider to point a domain (or subdomain) at your VMs IP address and you're ready to SSH in to the VM and continue the process.
Configure Firewall And Security List
We'll need to open some ports in our firewall and security list to expose the Discourse application to the web, so let's start by add some ingress rules to our VM security list in the Oracle Cloud dashboard. From the VM details page, click on the subnet:
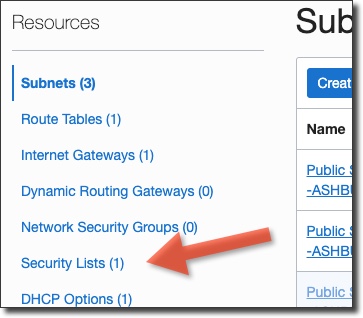
On the subnet details page, click on 'Security Lists'.
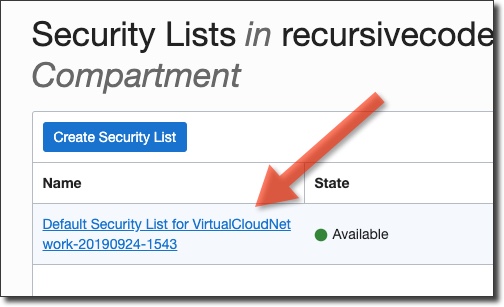
Click on the default security list to edit the rules.
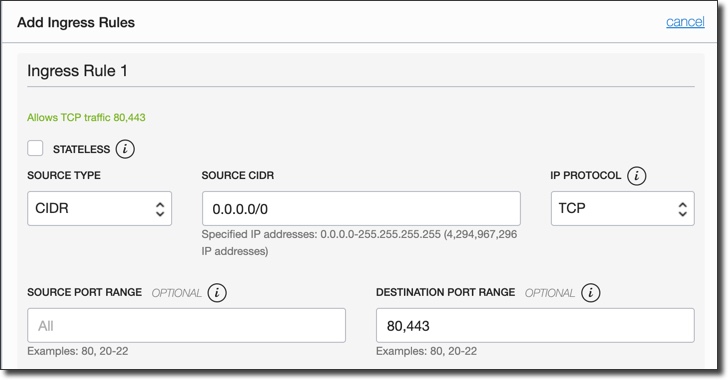
Click 'Add Ingress Rule' and enter a rule to open ports 80,443 to the 'Source CIDR' 0.0.0.0/0 (all IP addresses):
At this point and moving forward, we will need to be SSH'd in to the VM for most of the steps. Once you've SSH'd in, run the following commands to open the same ports on the VM firewall that we allowed in the security list above:
Alright, let's move on to installing some prerequisites!
Install Prerequisites
Before you move forward, bring everything installed on the VM up to date with a good old sudo yum update. Now we'll need a few additional dependencies, so add Git and netcat with the following command:
sudo yum install git nc -y
We're ready to move on to installing Docker.
Install Docker
If we were to run the Discourse install at this point, we'd get a failure when it tries to install Docker. So let's prevent that failure by manually installing Docker. Use the following commands to install:
Obtain Email Configuration
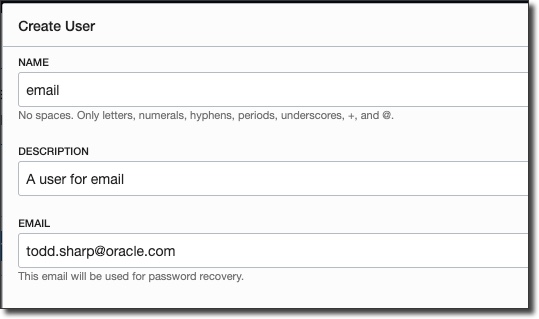
We'll need to collect some info from our cloud account that we'll need in the next step. First though, let's create a dedicated user for email if you do not have one already. From the sidebar, select Identity -> Users and then click 'Create User':
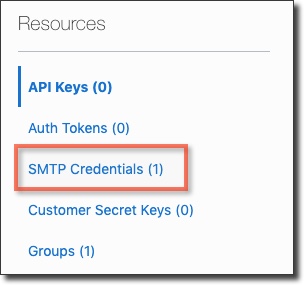
After you have created the user, click on 'SMTP Credentials' in the left sidebar menu of the user details page:
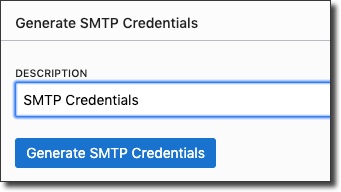
Click 'Generate SMTP Credentials' to bring up the dialog, enter a description, then click 'Generate SMTP Credentials' to create them.
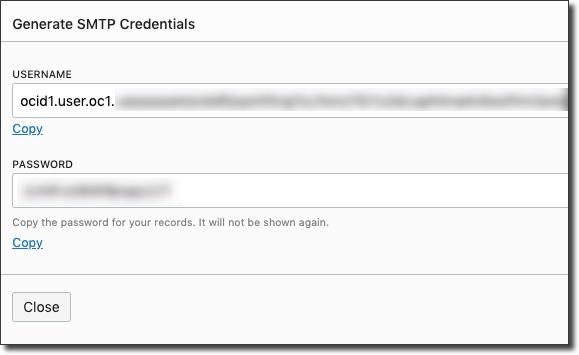
Copy the generated username and password and keep them handy for when we're installing Discourse.
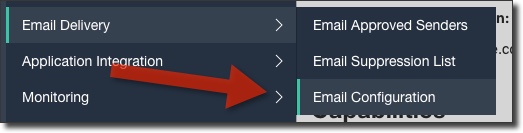
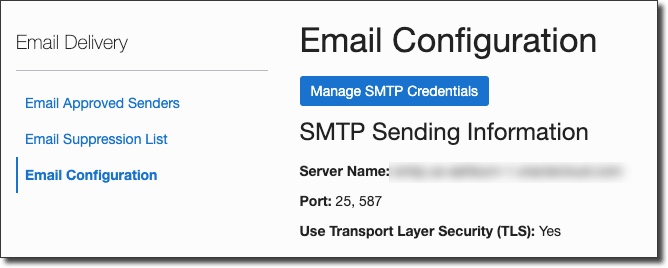
Next, let's grab our SMTP server info and then add an "approved sender" to our cloud account so that Discourse is able to properly send emails (which is pretty crucial to its functionality)! From the Oracle Cloud console sidebar, select 'Email Delivery' -> 'Email Configuration':
And copy the server name. Keep this handy as well for the Discourse install.
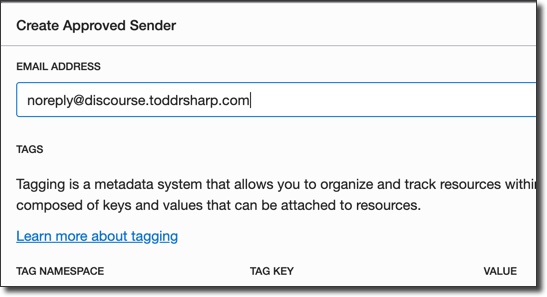
After you've copied the server name, click on 'Email Approved Senders' in the sidebar and add an Approved Sender. Use the email address format of noreply@[domain] which is the address that will be used to send notifications, verification emails, etc from your install.
Cool, that's all we need to do before we install Discourse. Moving on!
Install Discourse
Alright, this is where things get exciting! We're a few steps away from being up and running, so grab a cup of coffee and get ready to launch the install. In fact, from here on out you could follow the Discourse Cloud Install guide directly and everything should "just work", but to keep this tutorial complete I'll show you the necessary commands here so you don't have to run off to somewhere else to finish the install. Let's do it!
Clone Discourse From Git
Grab the Discourse Docker project from GitHub and run it:
The installer will ask for several bits of information, all of which you've already collected if you followed the steps above:
The install should take between 2-8 minutes, and once it is complete you are up and running and should be able to continue the setup via the browser:
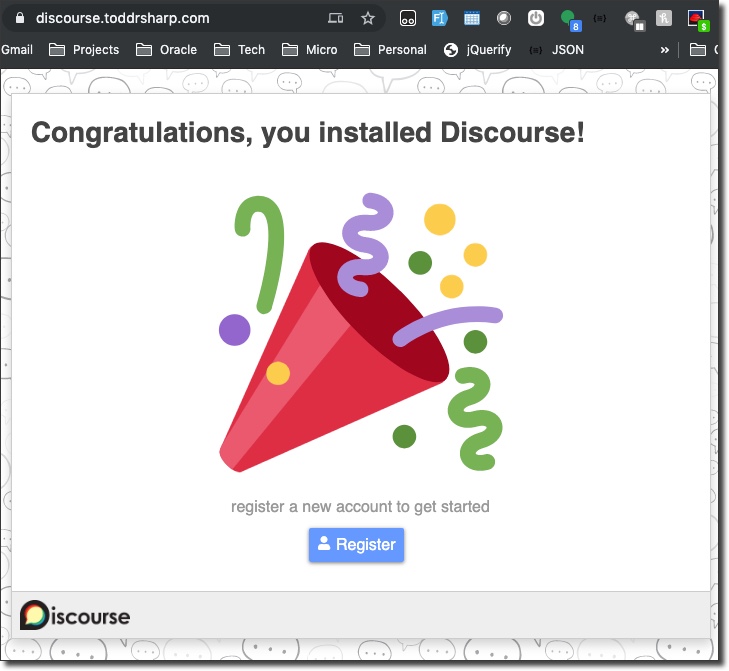
Continue through the online setup process to complete the install. Refer to the Discourse Cloud Install documentation if you experience any issues.
Next Steps
At this point, your discussion forum is up and running. You can check out my install to see an example of what it looks like when it's up and running. In a future post, I'll cover how to point your Discourse install at your free Oracle Cloud Object Storage bucket, but at this point there is a limitation to our API that prevents this integration that I have been working with our engineers to address. Hopefully that will be resolved in the near future and I will blog instructions on how to make that integration!
Photo by Thomas Drouault on Unsplash