Launching Your First Free Autonomous DB Instance
Posted By: Todd Sharp on 9/27/2019 12:00 GMT
Tagged: Cloud, Database

You're a developer, which means you have roughly 4.3 conversations each week with friends and family about building an application for a club, sports league, charity, church group or other organization. I know this, because I also have those same conversations every week, without fail. And I've built a few of those apps myself. The thing that those friends and family don't realize is that it costs actual money to host those sites on the internet. Sometimes we can find free hosting for the simple ones, but for the more advanced or custom applications we often end up going to a cloud provider and finding the cheapest tier available and using that. Things like simple custom blogs or golf league websites that don't draw more than a few dozen hits a week often can use the cheap tier without concern. But even the cheap tier can start to add up over time.
I've got good news. You don't have to host that stuff on the cheap (or time bound "free") tiers anymore. Introducing the "always free" tier from Oracle Cloud. Now you can host those robotics club websites and simple bowling league blogs for free, forever, in the easy to use Oracle Cloud. I'm not just talking about compute here either - you get a few VMs, of course - but you also get storage, load balancing and 2 free Autonomous DB instances. Yeah, that's pretty amazing.
But before you run off to sign up, let me show you just how easy it is to get started with free Autonomous DB in the Oracle Cloud.
Sign Up
It's really quick and easy. Go here, enter your info and sign up. Yeah, you need to put in a credit card. No, you won't be charged unless you opt in to paid services. Yes, we clearly tell you "always free" when something is "always free". It's not hidden, or ambiguous. Here's the first screen you need to fill out:
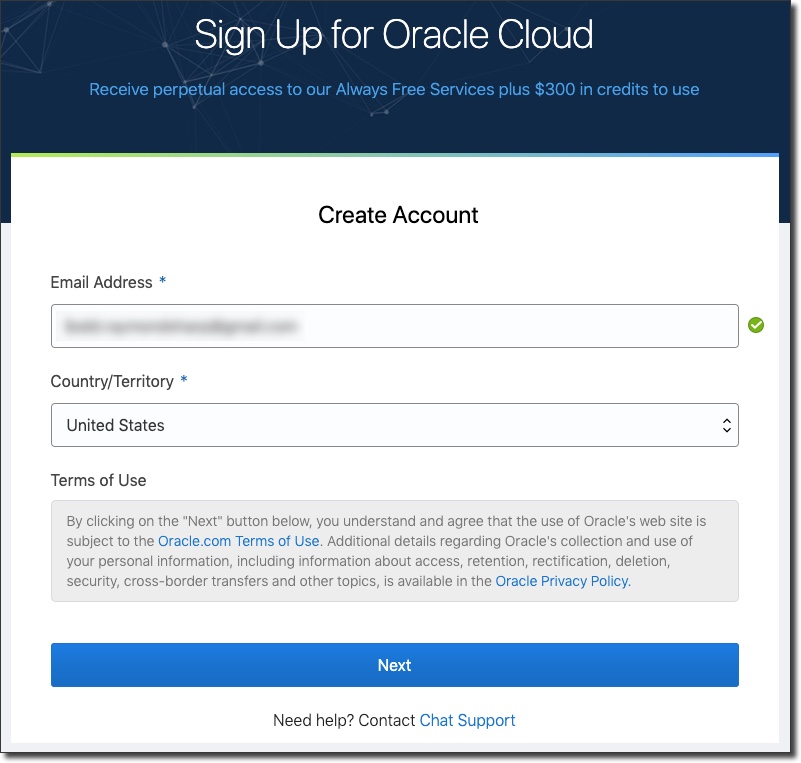
Click Next, and enter some personal info:
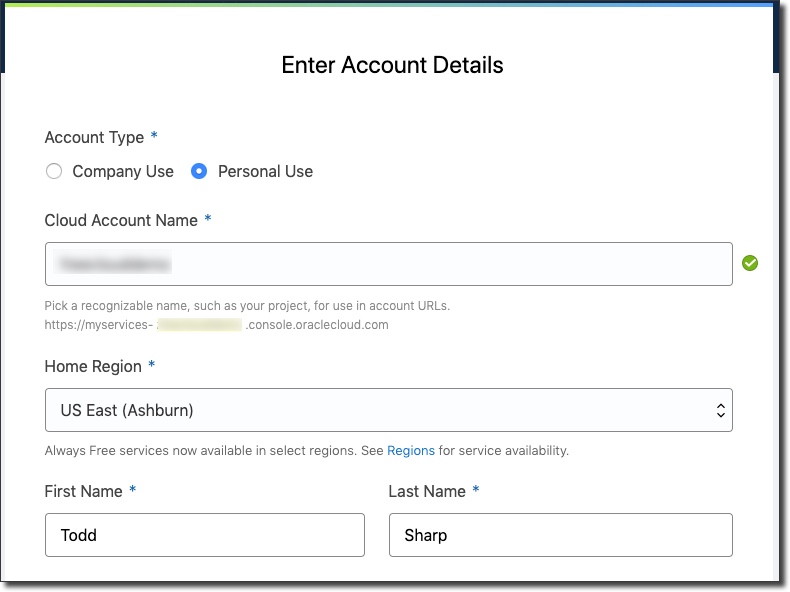
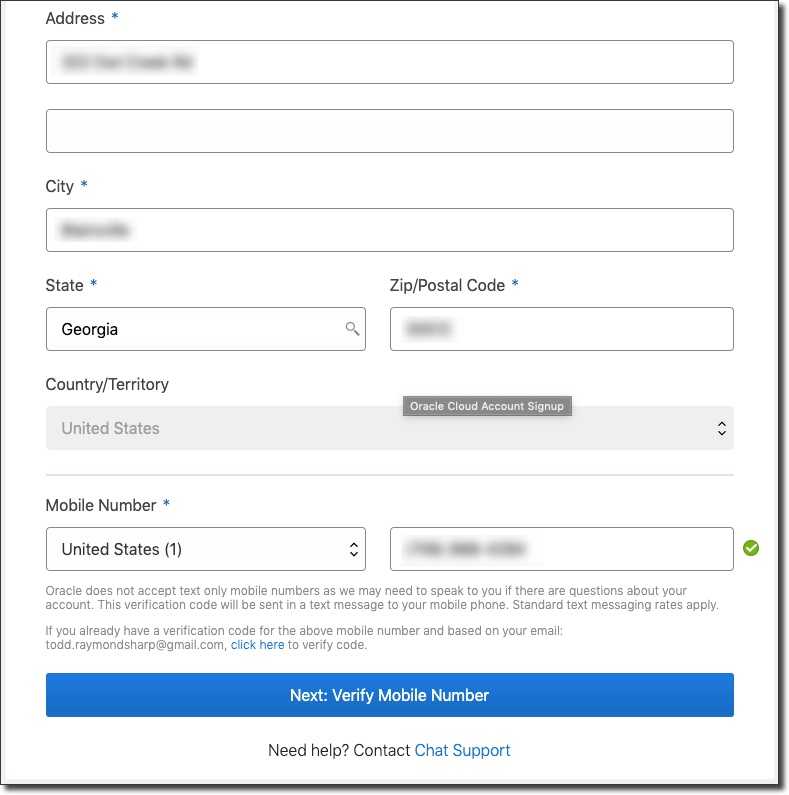
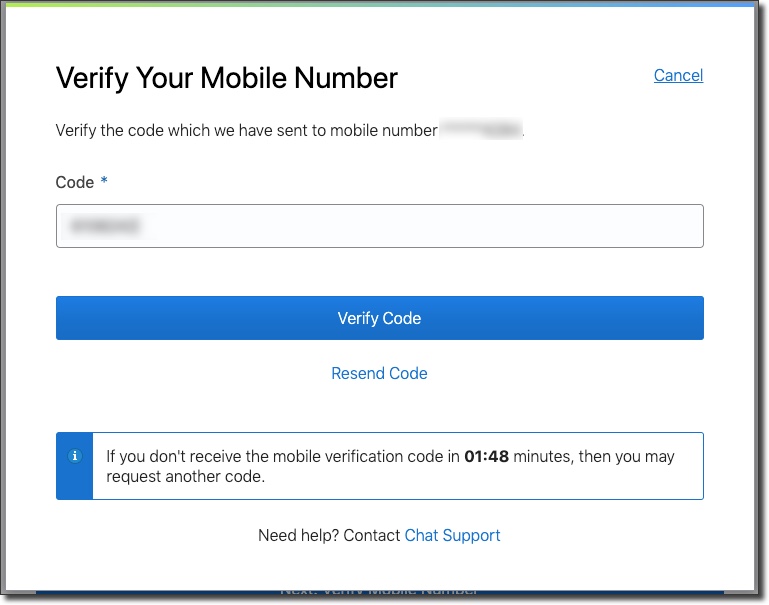
Then verify your mobile number:
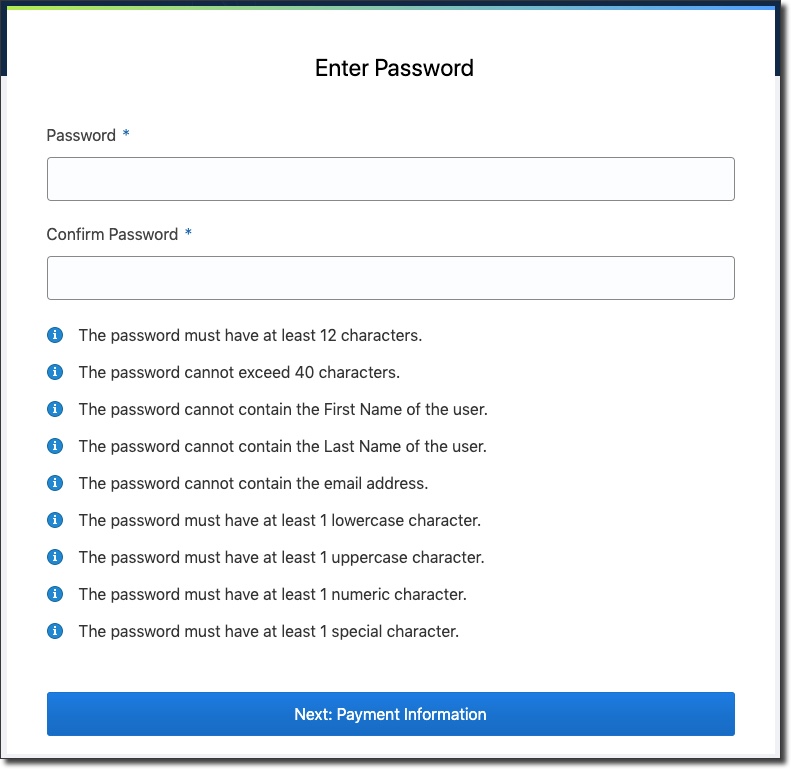
Next, choose an account password (this will be used to log in to your cloud account):
Next, enter your payment information and then click 'Complete Sign-Up':
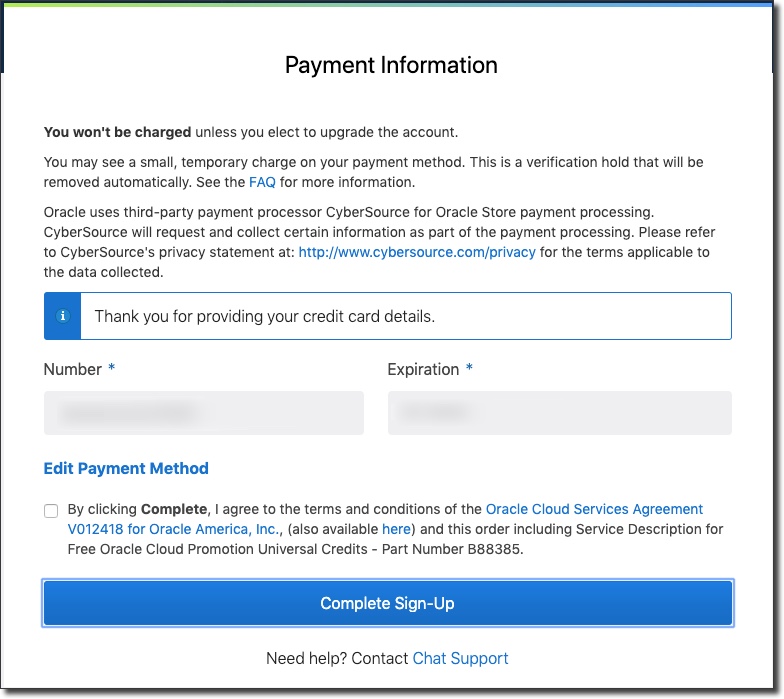
It takes about 10 minutes to fully provision your account, but once that's complete you'll receive an email letting you know it's ready to go. You can login in with your email and password at the following url:
Oracle Cloud Console: https://cloud.oracle.com/sign-in
Creating Your First Free Autonomous DB
Once you've logged in to your fully provisioned account you are immediately able to start creating your free Compute and Autonomous DB instances. In fact, the very first thing you'll probably see is "Quick Actions" to do just that:
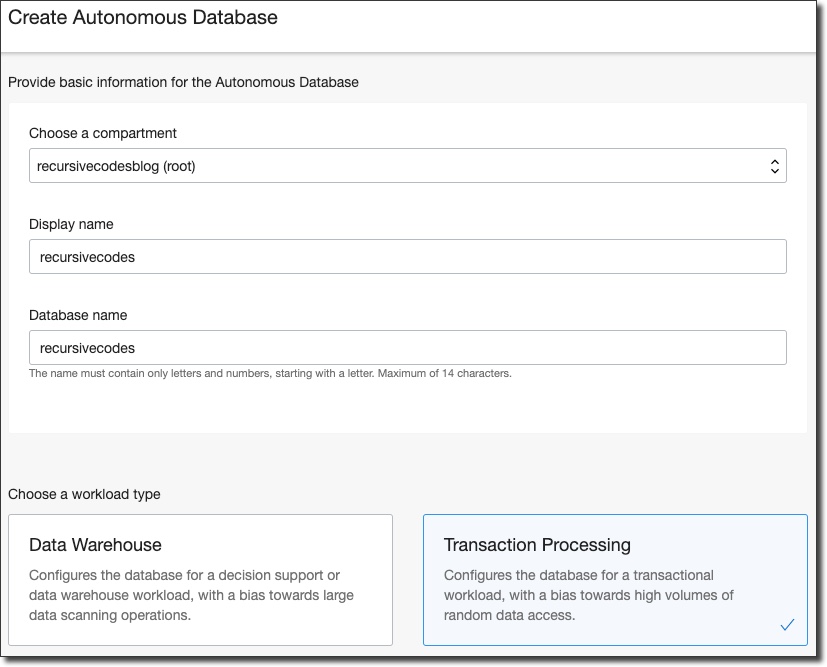
Notice the 'Always Free Eligible' label. You'll see this label, or a label that says "Always Free" on created resources, for items that will never include any charges whatsoever. Click 'Create a database' to get started, which will bring you to the Autonomous DB instance creation screen where you can enter a display name, database name and choose your workload type:
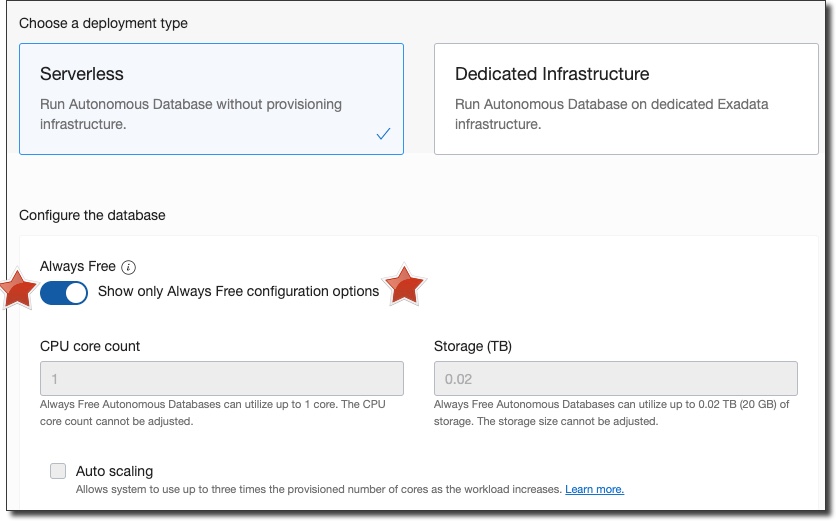
Choose deployment type - most likely you'll choose 'serverless' (which really just means the DB resides on shared infrastructure) and toggle the "Always Free" option:
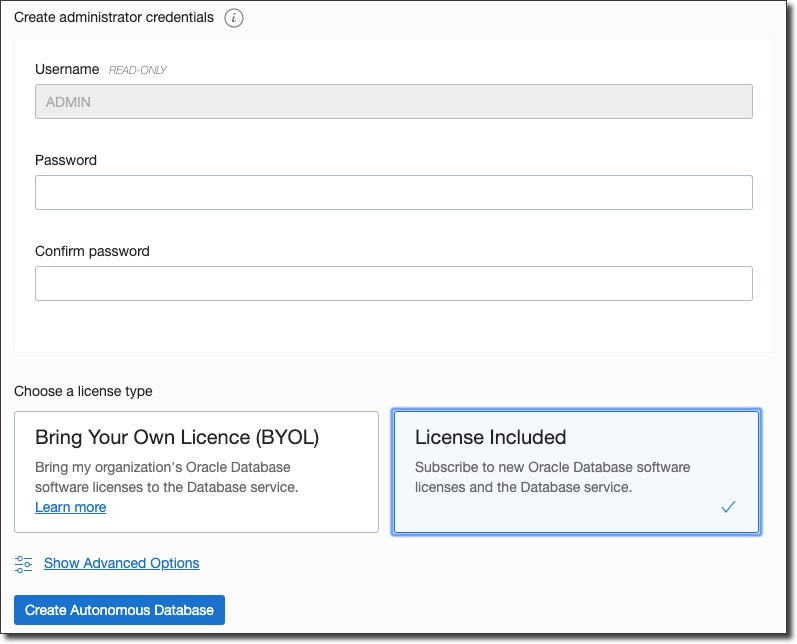
Create your admin credentials and finally click 'Create Autonomous Database' to launch the provisioning of your first free instance:
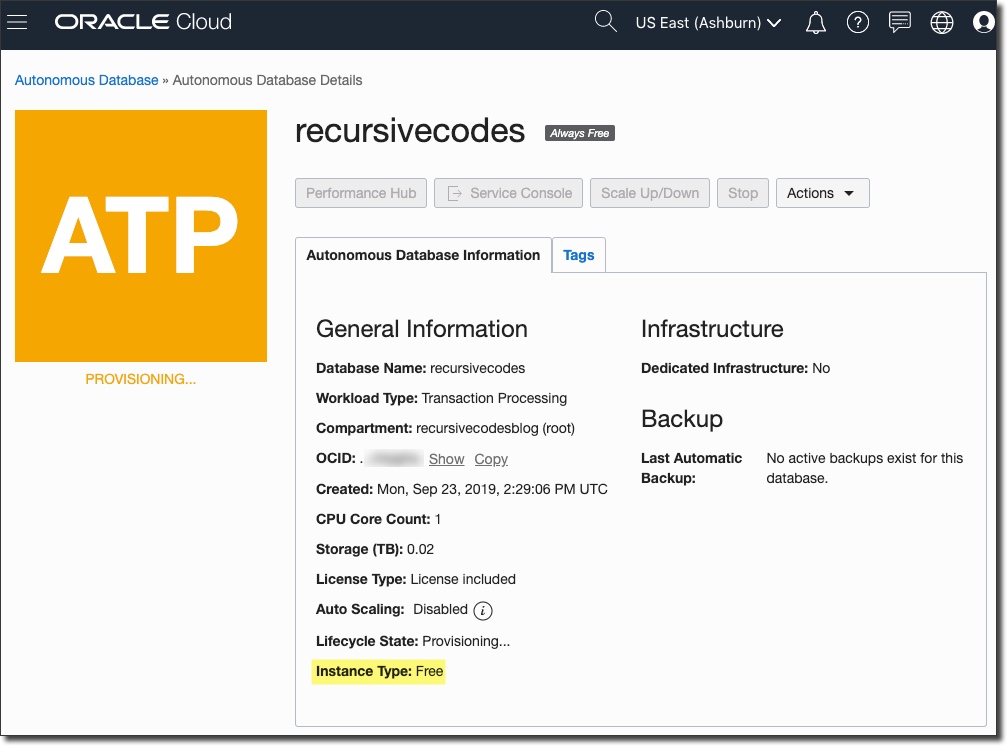
You'll be redirected to the instance details page - note the 'Always Free' label and the Instance Type of "Free". It'll take a few minutes to provision your instance:
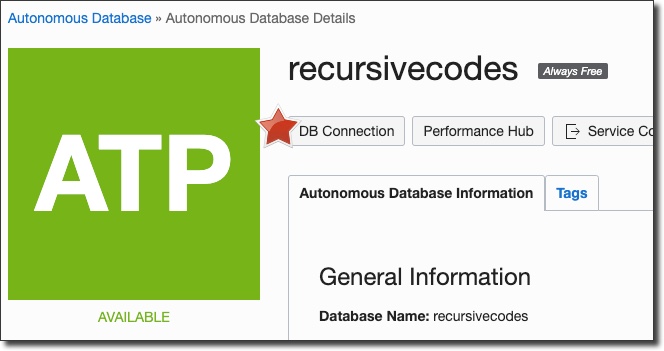
And when it's complete, you'll see the state change to 'Running'. Next, click on 'DB Connection':
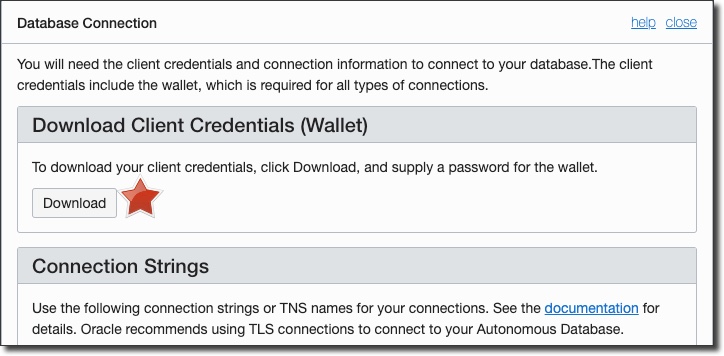
Within the Database Connection dialog, download your Client Credentials Wallet. This is used by your applications and tools to initiate a secure connection to your Autonomous DB instance.
And that's it. You've signed up for a free Oracle Cloud account and launched an always free DB instance with 20 GB of storage in less than 15 minutes.
Photo by William White on Unsplash
