Project GreenThumb Part 1 - Automating & Monitoring Seedling Growth With Microcontrollers & The Cloud
Posted By: Todd Sharp on 3/22/2021 12:00 GMT
Tagged: Cloud, Cloud, Java, Java, Open Source, Open Source

It all started in the summer of 2020. I, like most others, had been isolating at home to minimize my chances of becoming infected by the coronavirus. The only times I left my home where to head to the store or market to obtain groceries or other essential supplies. It was on one of these trips when inspiration struck. With proper social distancing and mask, I walked past a booth at the local farmers market that was selling some hot chili (or, chile) peppers and I knew immediately what had to be done. I would have to make hot sauce! For me, it was the perfect project to undertake as it combined my love of spicy foods and the culinary arts into an endeavor that would give me some daily route to look forward to and keep my mind occupied each day when distractions for the growing boredom of being stuck at home were in short supply. I bought about 5 pounds of the perfumed and pungent peppers and prepared to produce a perfect product. I cleaned and roughly chopped the peppers, tossed them into large mason jars with some aromatics (garlic, onions, etc), covered them in a brine solution, weighted them down and waited. The fermentation process involved frequent monitoring to release the gas produced during the process and make sure that no “bad” bacteria entered the party. Several weeks later when the fermentation process had reached a favorable point, I drained, blended and cooked the mash into a spicy and savory blend that I bottled and shared with some friends.
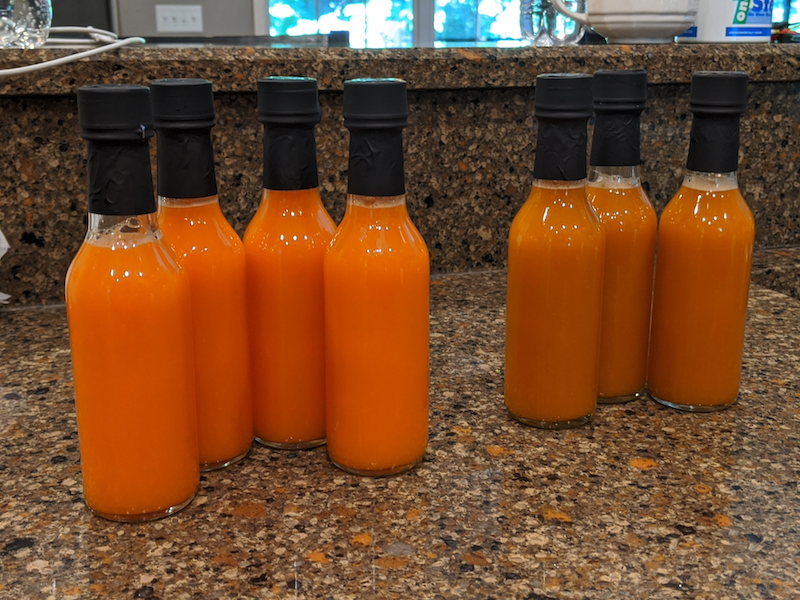
Thus was born a new obsession, and as the calendar turned into 2021 I knew that I would have to take things one step further and produce this year's sauce with peppers that I had grown myself from seed. Of course, the prospect of home horticulture instantly led me to think of how I could integrate more of my passions - technology, automation and the cloud - into the growing and production process. So in early February, I set out to build an Arduino-based monitoring and automation solution for my seed-growing operation that would help me achieve my garden goals. Of course, I was aware of the untold number of gardening-related open source solutions built with various microcontrollers and single-board computers, but this project had to be my own from the start. I had nothing against any of those solutions or tutorials, and I’m not suggesting that my method is in any way superior to any of them, but I wanted to try to solve this problem as organically as possible to see what I could learn and accomplish without outside influence. I decided to share this project to inspire others to do the same with a problem that they face or perceive in their world because I feel that there is an inherent sense of pride and growth that comes along with learning about solutions by struggling through some of the problems one faces when crafting a solution from scratch. In a series of short blog posts, I'm going to walk you through the hardware, software and cloud side of what I’m calling “Project GreenThumb”, and I hope it teaches you something new and inspires you to take on a similar project.
The Objective
Now let me get this out of the way right up front - I’m certainly no master horticulturalist, so I’m quite positive that someone who knows better will educate me on any incorrect assumptions that I’ve made below. That said, I did as I always do and made sure to do a fair bit of research before getting started and settled on these values as a result of that research. I chose 5 environmental attributes to monitor and control:
-
Air Temperature
-
Soil Temperature
-
Humidity
-
Soil Moisture
-
Light
Based on my experience, I knew these 5 elements would be rather easy to monitor via sensors connected to a microcontroller. My research led me to establish the following values as my targets for the seedlings during the time that they’d be incubating indoors:
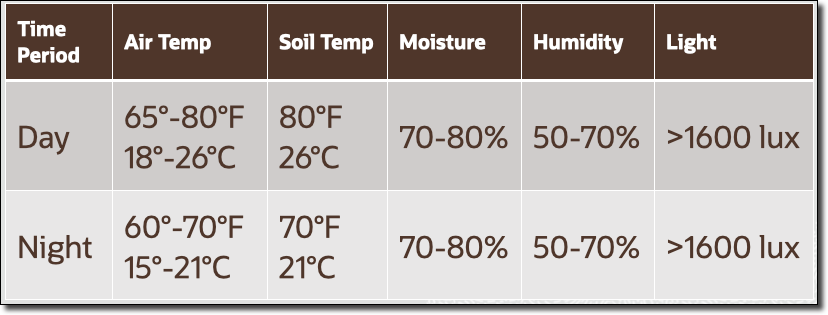
With the objective established, it was time to assemble and program the microcontroller so that the planting phase could begin.
The Architecture
There was certainly a temptation for me to engineer an overly complex system for the task at hand (it’s what I always do), but this time my goal was to keep things as simple as possible while still providing valuable monitoring data and automating some portion of the operation. I decided to design a system that would regulate the soil temperature to stay within the goal range and to collect the other data to compare it against subsequent grow operations to see how I might improve the process in future growing seasons. I regret that I didn’t establish a manual “control” scenario (without any of the monitoring or automation) to have a scenario to compare my automation efforts against, but I simply didn’t have the extra space to grow (or transplant) another set of seedlings and didn’t want to waste resources just for comparison’s sake.
The hardware portion of the project involves multiple sensors that would be attached to the NodeMCU ESP8266 microcontroller and a mini-OLED display for visual status reporting.
-
NodeMCU ESP8266 (Microcontroller)
-
DHT11 (Air Temperature and Humidity)
-
DS18B20 (Probe Thermometer - Soil Temperature)
-
BH1750 (Light Intensity)
-
Moisture Sensor (Soil Moisture)
-
SSD1306 (OLED LCD Display)
Lesson Learned! I should have used a capacitive soil moisture sensor instead of the resistive sensor that I chose to prevent issues with corrosion. Next time, I will certainly know better!
Once wired up and placed into a 3d printed enclosure, the microcontroller assembly looked like so.
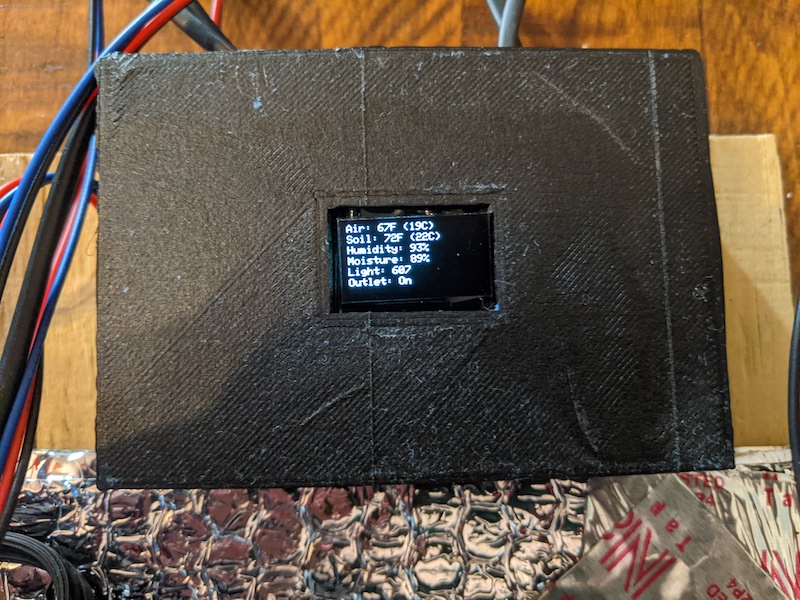
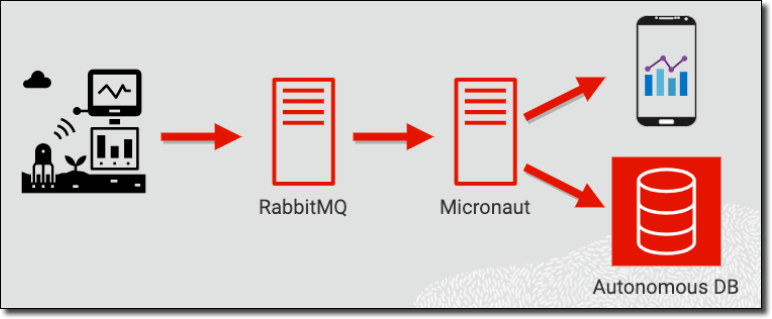
The NodeMCU reads the sensors every 10 seconds, wraps the current readings in a JSON object and publishes that object to an MQTT topic on a RabbitMQ instance running on an “always free” VM in the cloud. A simple Micronaut application consumes the MQTT topic, persists the readings into a table in an Autonomous DB instance (also “always free”), and simultaneously pushes the readings to subscribers on a websocket endpoint. I decided to keep things uncomplicated and used a monolithic approach, so I serve the views via the same Micronaut application instead of creating a separate project. This keeps my infrastructure needs to a minimum and the code manageable. My views are responsive so they would look great on mobile, but instead of depending on a third-party framework like Bootstrap, I went with a “vanilla” CSS approach. Here’s a simple visualization of the architecture, to help you see the big picture of this small project.
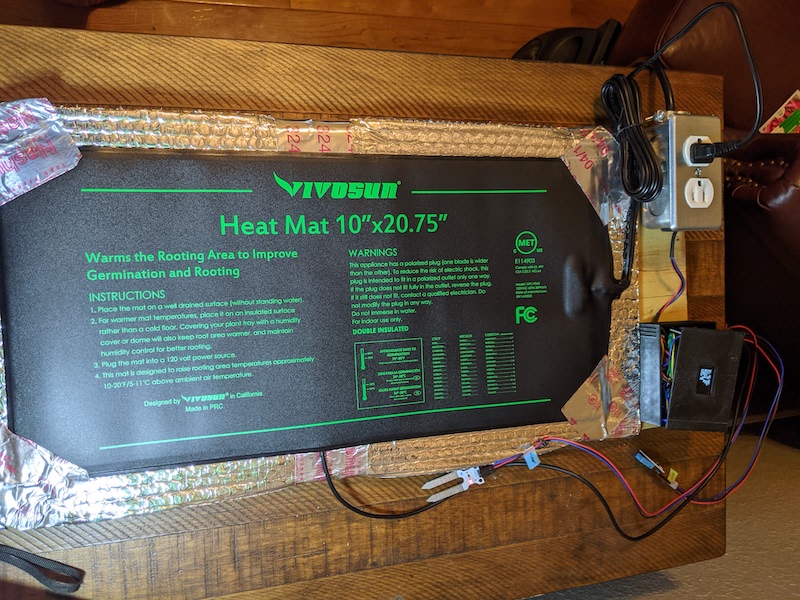
Temperature regulation was handled by placing a seedling heat mat below the planted seedlings and turning the heat mat on and off via a relay inside the outlet that the mat is connected to. Yeah, they make thermostat-driven heat mats that perform this functionality, but what fun would it be to not automate that myself?
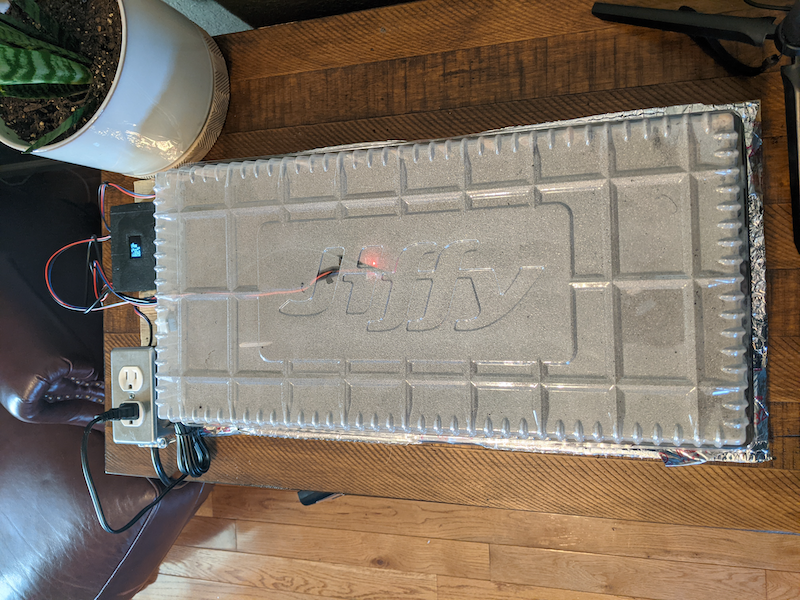
Once the hardware was assembled and wired up, I planted the seeds and placed the seedling tray on the heat mat.
Summary
In this post, I introduced you to Project GreenThumb, a hardware, software and cloud-based solution for monitoring and automating seedling growth. We looked at the goals of the project and I introduced you to the basic architecture and hardware used in the project. In the next post, we’ll take a deeper look at the data collection process.
Feeling Inspired? If this post inspired you to build something similar, you can host all of the infrastructure that I use in this project in the “always free” tier of the Oracle Cloud. You get 2 free Autonomous DB instances, 2 free Virtual Machine instances, 10GB of Object Storage, and more! No time limits, no hidden fees, no nonsense. Just free, forever. Sign up today: https://www.oracle.com/cloud/free/