The Complete Guide To Getting Up And Running With Docker And Kubernetes On The Oracle Cloud
Posted By: Todd Sharp on 7/1/2019 12:00 GMT
Tagged: Cloud, Containers, Microservices, APIs, Developers
In my last post we defined the term “microservice” and looked at some of the reasons you might choose to implement a microservice approach to building your application’s API. Before we dive too deep into code, I wanted to begin this series by showing how to prep your Oracle Cloud environment for your future microservice implementation. With that in mind, let’s get started in creating a Kubernetes cluster and getting a Docker registry ready to go for our application. You’ve no doubt heard of Kubernetes, and you might be a bit intimidated by it if you haven’t had much experience with it. We’ll keep things simple for the purposes of this series though and use it as a way to deploy and expose our services as Docker containers.
Setting Up A Compartment
First up, let’s create a compartment in our Oracle Cloud console. Compartments are simply a way to group our infrastructure and services so we can keep items related to this particular project separate from the rest of our services that we consume on the Oracle Cloud.
Note: there are typically several ways to create service instances and resources on the Oracle Cloud. When possible, I’ll show you how to create them via the console dashboard as well as via the OCI CLI.
Create Compartment Via Dashboard
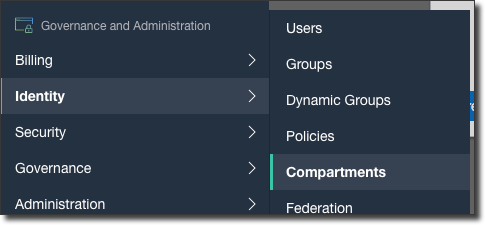
To create a compartment via the dashboard, select Identity -> Compartments from the console sidebar menu:
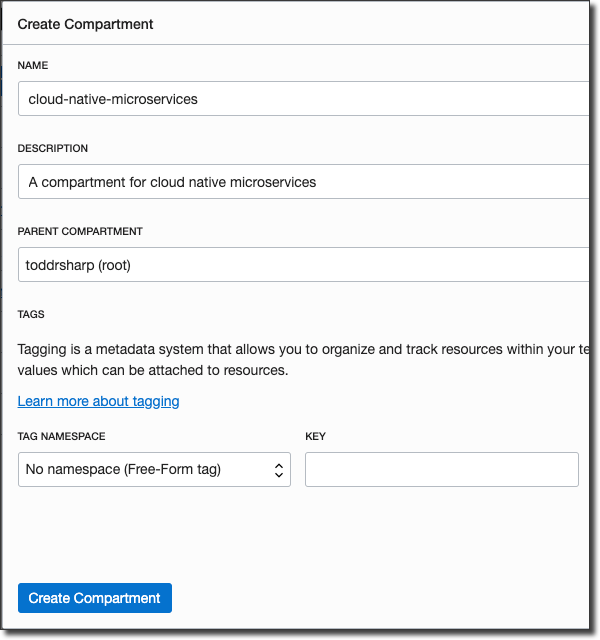
From the Compartment list page, click on ‘Create Compartment’ and populate the Create Compartment dialog like so:
Create Compartment Via CLI
To create a compartment via the CLI, run:
You must specify your “home” region when using the IAM service in the OCI CLI. You should receive a result that looks like so:
To view a list of all compartments, run:
Creating A Kubernetes Cluster (OKE)
Next, we’ll need to create a Kubernetes cluster. This will be where we ultimately deploy our microservices.
Create Cluster Via Dashboard
From the console sidebar menu, select Developer Services -> Container Clusters (OKE):

Before you begin, it’s very important that you read the documentation to make sure your environment and development machine are prepared to work with Kubernetes. You’ll need to create the necessary policies before you create your cluster and make sure that you have kubectl set up locally to manage your cluster.
From the Cluster list page, first make sure that our newly created compartment is selected in the left-hand menu, then click ‘Create Cluster’. Let’s break this dialog down into a few steps:
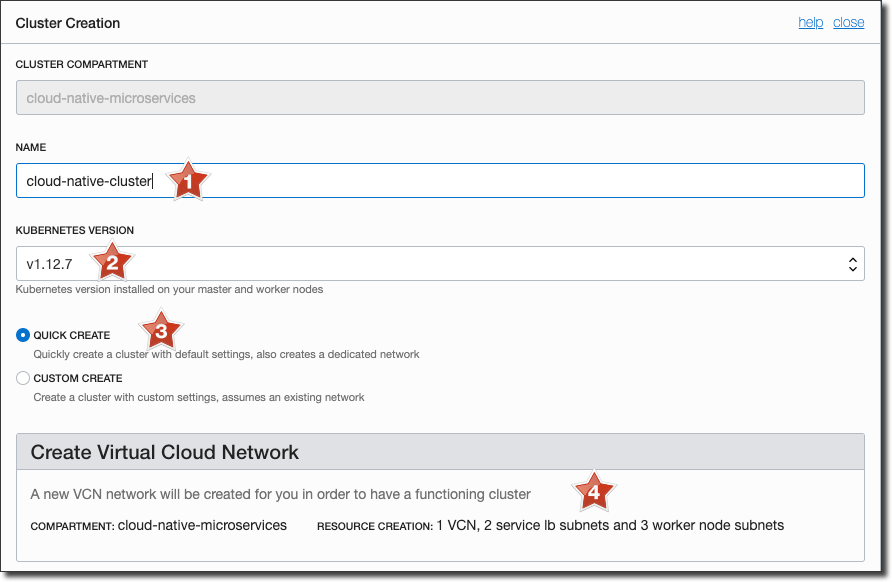
In this screenshot, note a few items:
- The name of the cluster (must be 32 chars or less)
- Kubernetes version (choose the most recent version)
- Quick Create
- A summary of the VCN actions that will be taken
I strongly recommend that you choose the ‘Quick Create’ option which will create the necessary VCN, and subnets required for networking. You can choose ‘Custom Create’ if you’d like to connect your cluster to an existing, manually created VCN, but for most clusters the ‘Quick Create’ option should be sufficient.
Next, let’s look at the rest of the dialog:
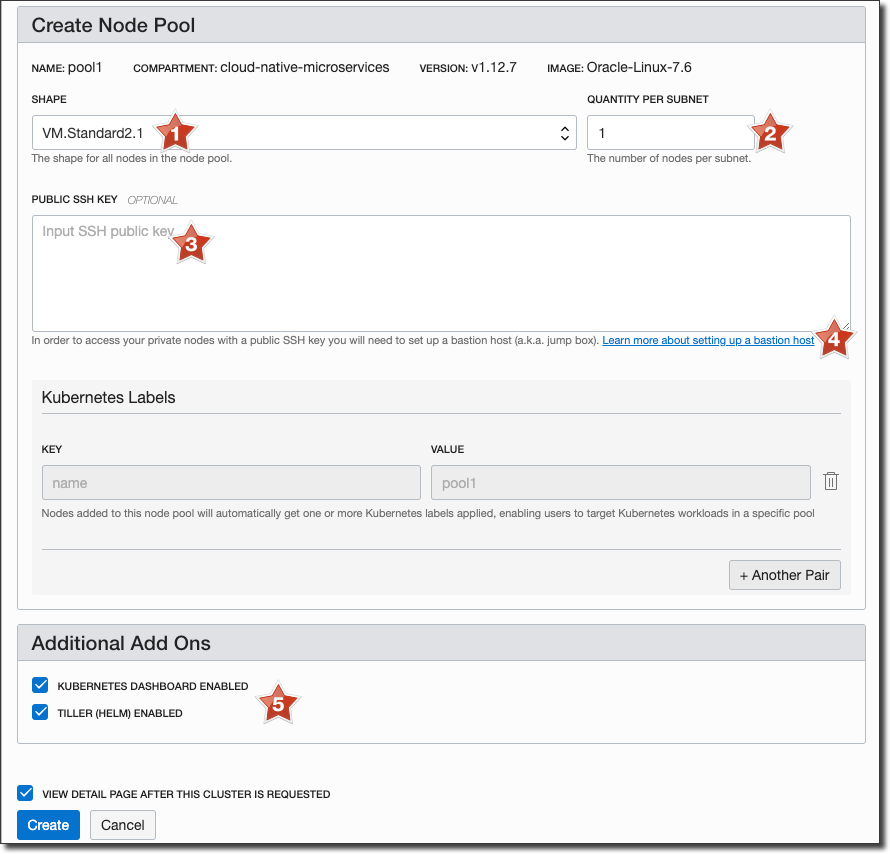
In this section we’ll specify details related to our cluster’s node pool. We’ll choose the shape of the VMs used in our node pool (#1), the amount of nodes to be created in each subnet (#2, this can be changed later on), input an SSH public key (#3) which needs a bastion host (#4) in order to access the private nodes, and choose to enable the Kubernetes dashboard as well as Helm. Once you’ve populate these items, click ‘Create’ and you’ll be taken to a dialog which reports progress as resources are created.
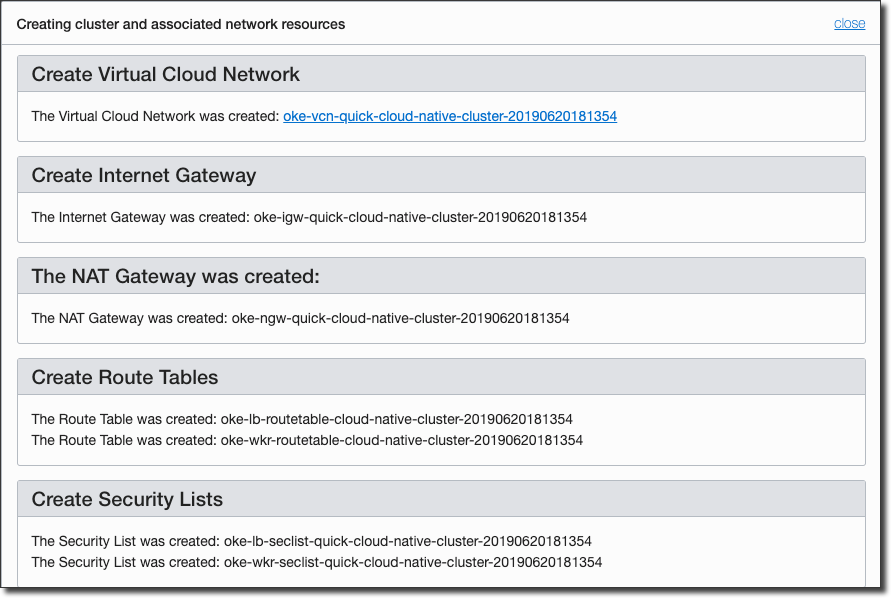
Once complete, the dialog should look similar to this:
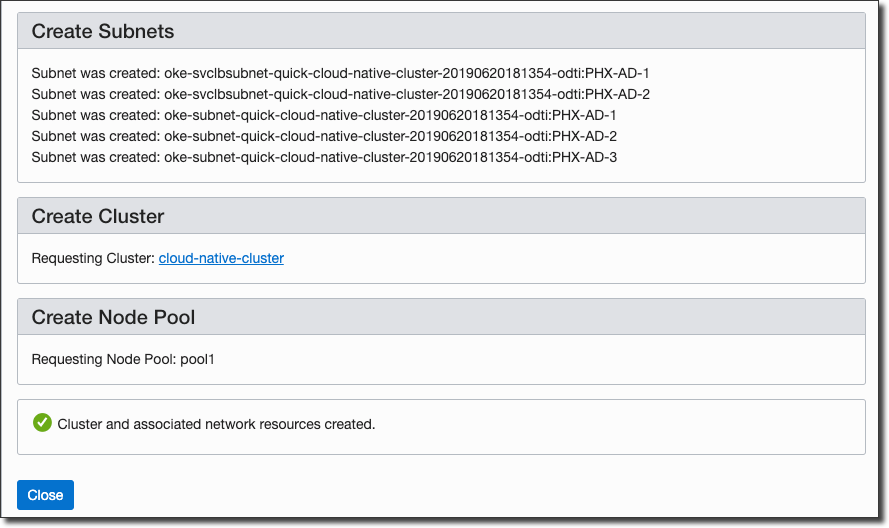
Click ‘Close’ on this dialog you’ll be taken directly to the cluster details page, which will report that the cluster is currently in a ‘Creating’ state.
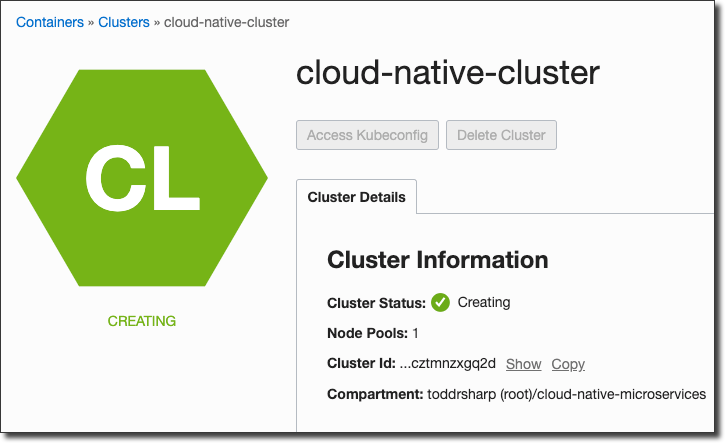
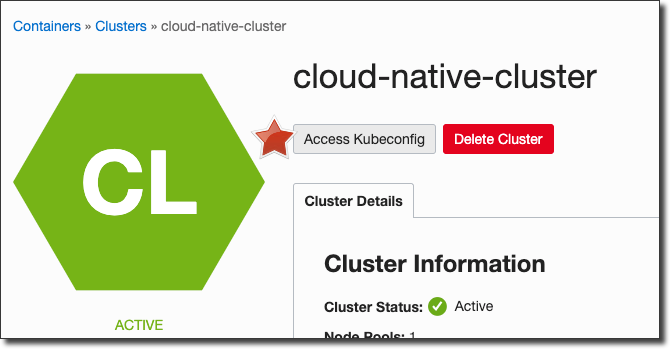
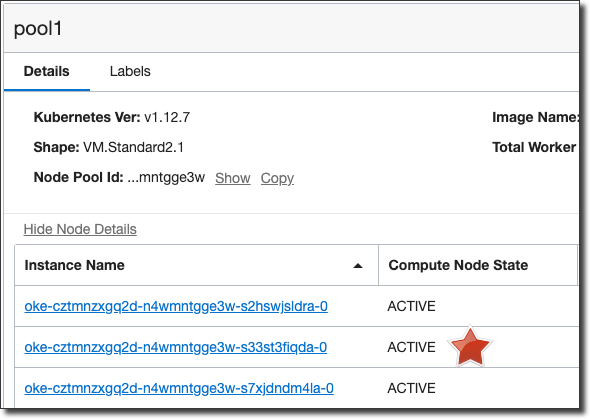
Creating the cluster will take about 5 minutes, after which the cluster state will switch to ‘Active’ and the node pool instances will begin creating. Once all of the instances in the cluster become ‘active’ the cluster is ready to go:
To set up your local machine to interact with the newly created cluster, click on ‘Access Kubeconfig’ on the cluster details page:

Follow the instructions in the dialog to create your local kubeconfig:
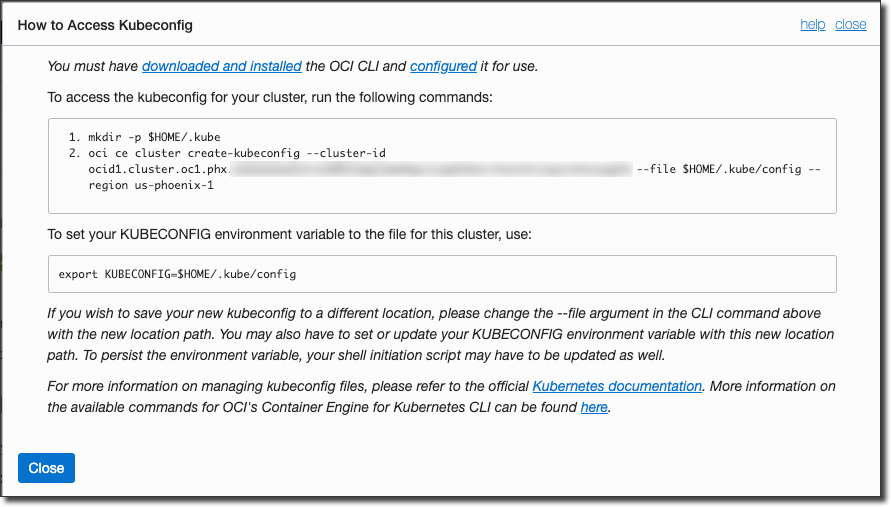
After you’ve finished setting up the kubeconfig, run a few commands to confirm that your cluster is up and running.


Your cluster is now ready to go!
Creating A Cluster Via CLI
I don’t recommend using the CLI to create your OKE cluster, as the ‘Quick Create’ options available via the console dashboard are not an option via the CLI at this time. This means that the VCN and subnets must also be manually created via the CLI. You can certainly do this, and if you would like to do so please refer to the OKE and Networking CLI documentation.
Setting Up Docker (OCIR)
To deploy Docker containers to your newly created Kubernetes cluster, you’ll need to set up your Docker registry (OCIR) and a dedicated user. If you don’t have Docker installed on your development machine, you’ll need to do that first. Refer to the Docker install docs for specific instructions.
Creating A Docker User Via Console
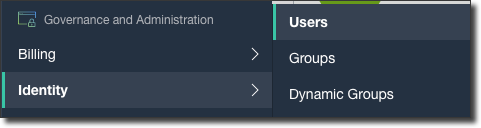
To create a dedicated user for OCIR, select Identity -> Users from the console sidebar menu:
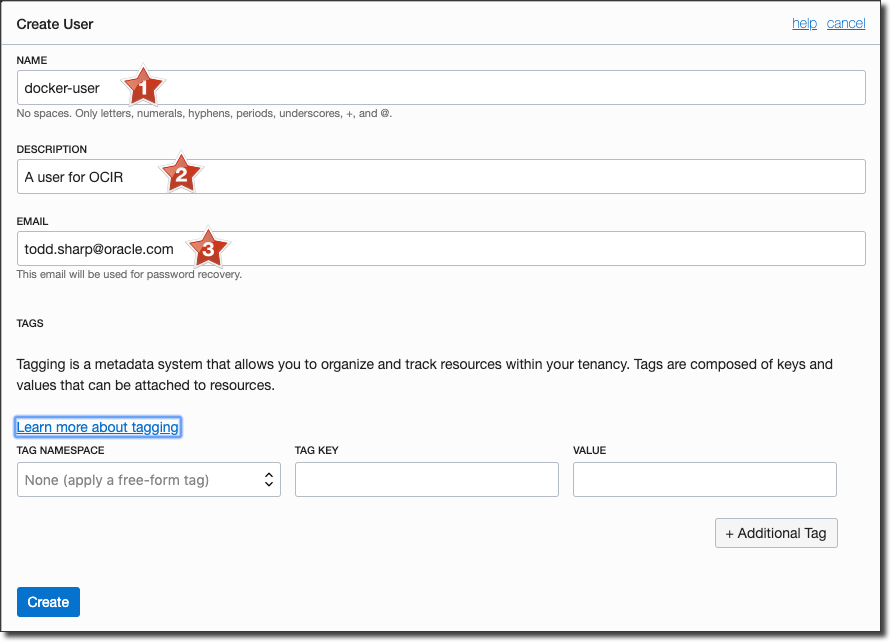
Click ‘Create User’ and populate the user name (#1), a description (#2) and the user’s email address (#3):
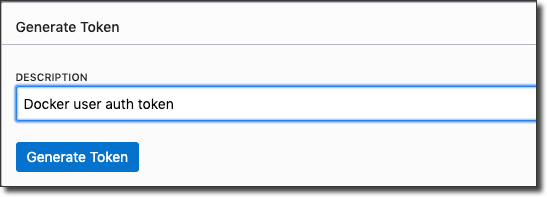
Now visit the details page for this new user and click ‘Auth Tokens’ in the left sidebar menu. Generate and save a new Auth Token:
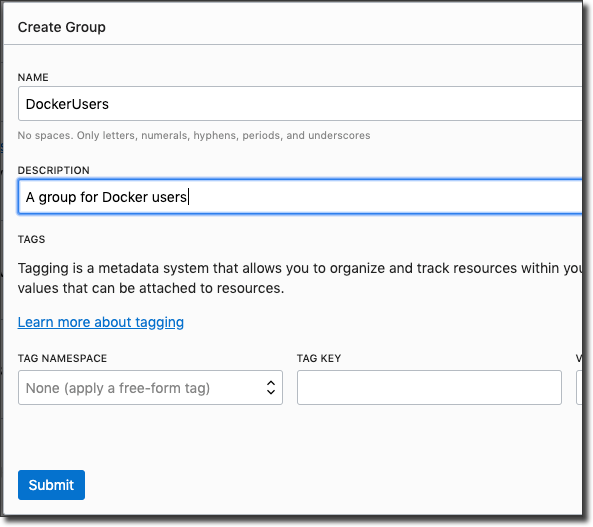
Next, create a group for Docker users by clicking on ‘Groups’ in the Identity sidebar and then clicking ‘Create Group’:
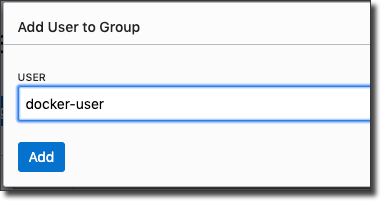
Click on the newly created group, click ‘Add User To Group’, then select the docker user to assign it to the docker group:
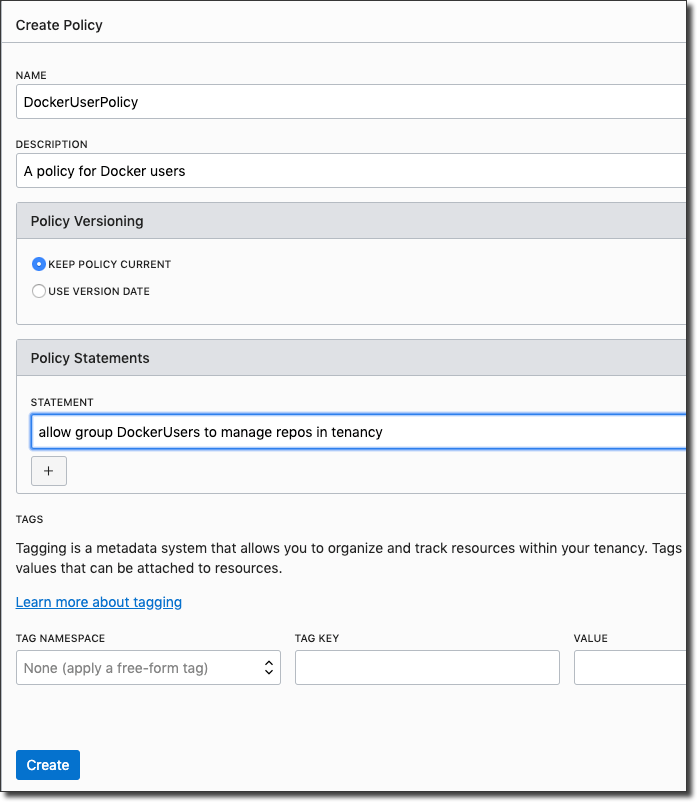
Next click ‘Policies’ in the sidebar, then ‘Create Policy’ to assign a registry policy for the newly created group:
Creating A Docker User Via CLI
To create a Docker user via the CLI, run:
You’ll receive a response similar to this:
To generate an auth token via the CLI, run:
The ‘token’ value of the response will be the password that you’ll use when logging in with Docker, so remember this value:
To create a group via the CLI, run:
Which will return a result similar to:
To add the docker user to the docker-users group, run:
To create a group policy, run:
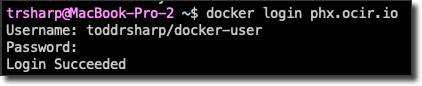
Login To Docker
Now we’re ready to test out logging in with Docker. The URL used for docker login will be in the form [region].ocir.io (dependent on the region that you’d like to use with OCIR), your Docker username will be [tenancy]/[user] and your password will be the auth token that we just generated. So, assuming a tenancy named ‘toddrsharp’, I’d login to Docker like so:
Before we move forward, let’s create a Docker repo.
Creating A Docker Repo in OCIR
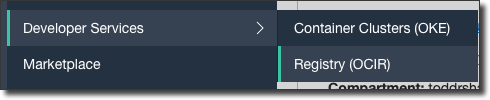
Select Developer Services -> Registry (OCIR) from the console sidebar menu:
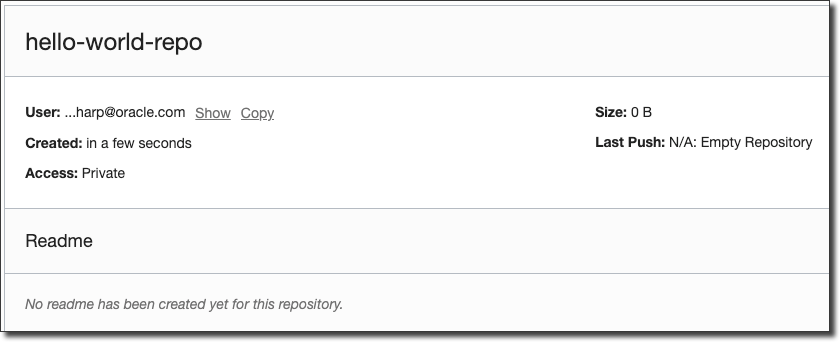
From the Registry page, click ‘Create Repository’, enter a repo name and choose ‘private’ for access:

Click on the newly created repo to view details:
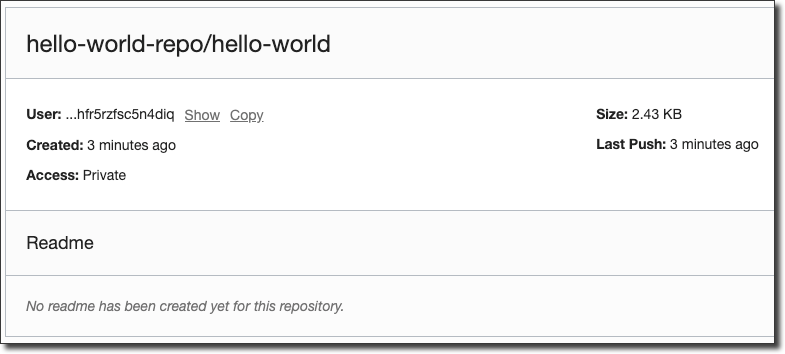
We can now test pushing a container to this repo with:
Which should result in a successful push:

Verify the container has been pushed to the registry via the console dashboard:
You’re now set up to use OCIR as a Docker Registry!
Summary
In this post we looked at creating a compartment, launching a Kubernetes cluster and configuring OCIR (Docker Registry) to get ready for our microservice deployment. In the next post we’ll talk about some microservice data management patterns and start writing some code.