A Better Way To Develop For The Raspberry Pi
Posted By: Todd Sharp on 3/20/2017 8:12 GMT
Tagged: Grails, Groovy, Groovy On Raspberry Pi, Raspberry Pi

In the last post in this series we took a look at creating a simple Groovy script using Pi4J to interact with the GPIO pins on a Raspberry Pi. It was a simple example, so writing the code in nano wasn't really a big deal, but as you get into more complex scripts having a true IDE to write our scripts will make a heck of a lot easier. Problem is, running a full blown IDE like IntelliJ IDEA and accessing it via VNC on the Pi is a pretty sketchy proposition. Trust me, I've tried. Technically, it works, but about as well as one of these:

So why not use IntelliJ on another machine on your home network (or any network, as long as the Pi is web accessible)? Unlike an elevator close button, it actually works (and quite well, thank you very much)! This post is going to be pretty heavy on screenshots because I think they tell the story pretty well.
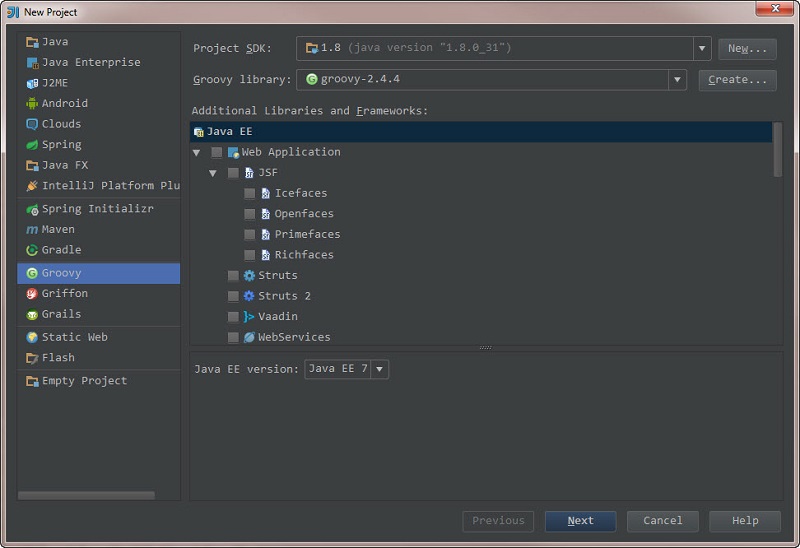
Step 1: Create a new Groovy project in IDEA:
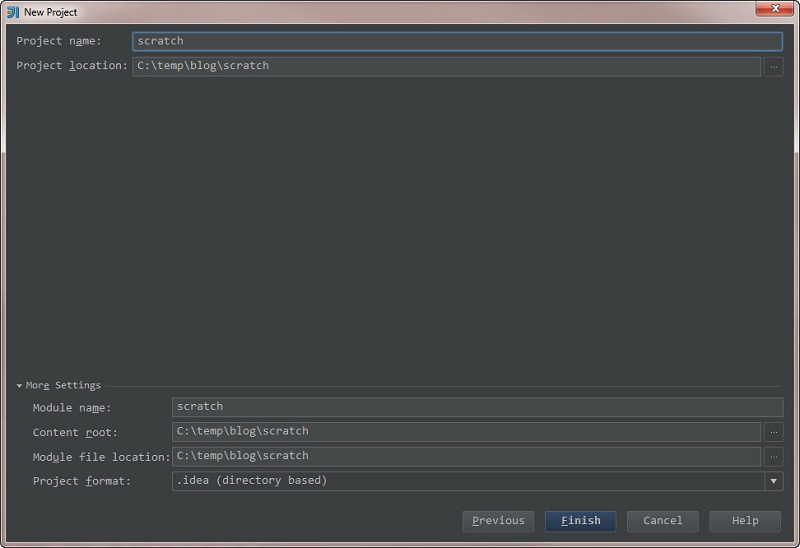
Step 2: Name it, and choose a location to store it.
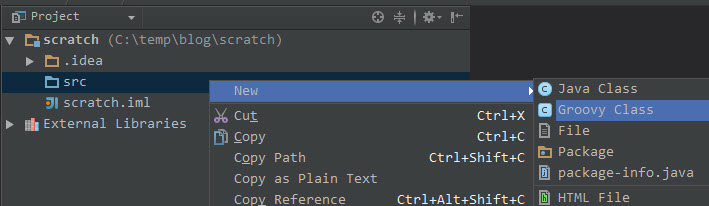
Step 3: Create a new Groovy class file. Delete whatever code IDEA automatically populates in the file. We're using this as a Groovy script, not a true class file. Like the last post, name it led-test.groovy.
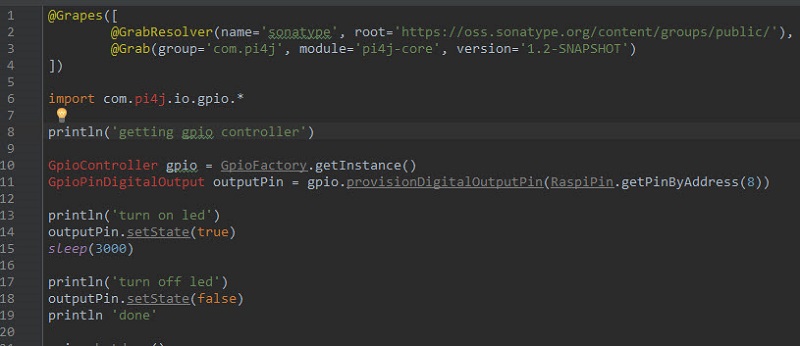
Step 4: Paste the code from the last post into our new Groovy script. Here it is again for your reference:
You'll notice in the screenshot below that we have some errors, we'll get to those in a second.
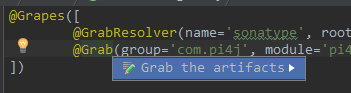
Step 5: Place your cursor right after the @Grab annotation and press ALT+ENTER, then select 'Grab the artifacts'. IDEA will download the Pi4J dependency.
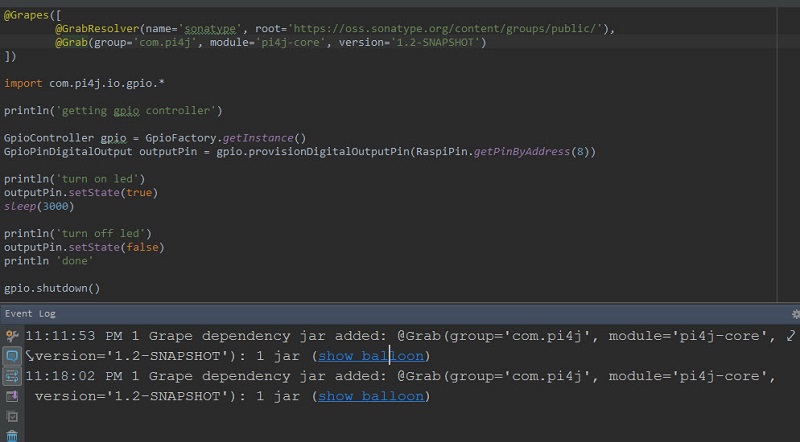
Step 6: Confirm in the Event Log that IDEA successfully downloaded the dependency. Observe the errors with class resolution are now resolved.
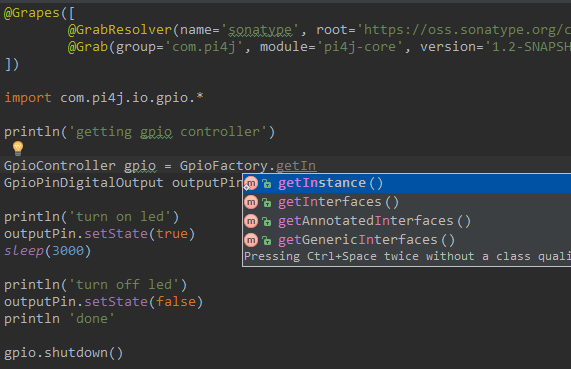
Step 7: Try code completion, notice that it works, nod your head and smile.
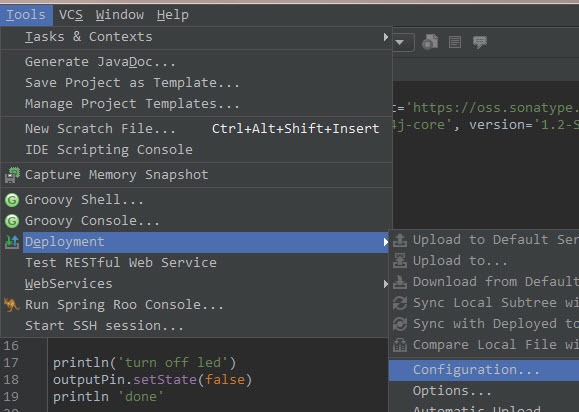
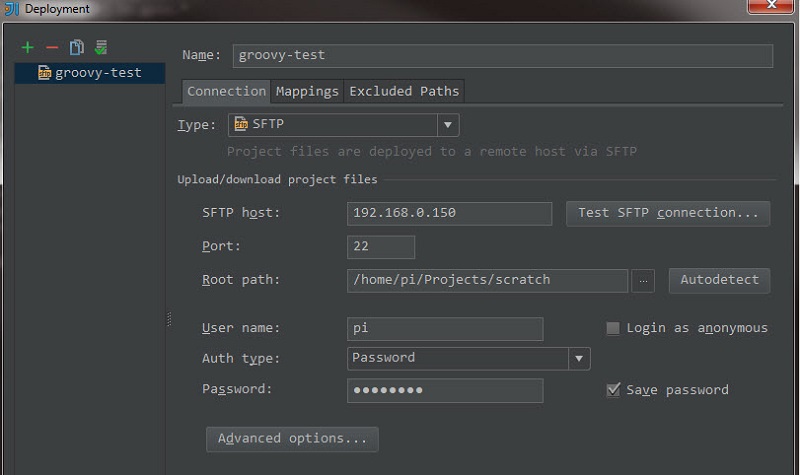
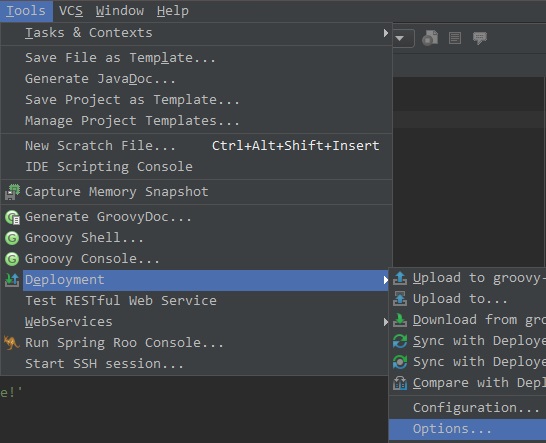
Step 8: Let's set up remote deployment. In IDEA, go to Tools - Deployment - Configuration.
Step 9: Set up the connection. Enter your Pi's local IP, use port 22, enter the root path for your project on the Pi and enter your credentials.
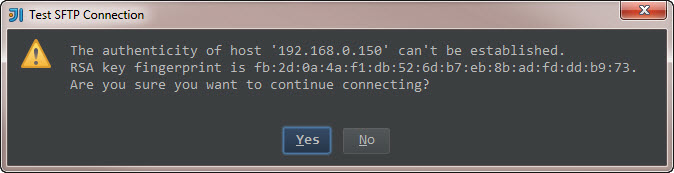
Step 10: Click 'Test SFTP connection', if you receive the following warning, click Yes.
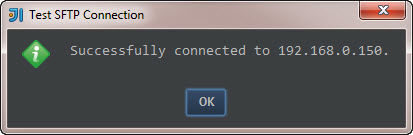
Step 11: Marvel in amazement with your jaw agape at the successful connection.
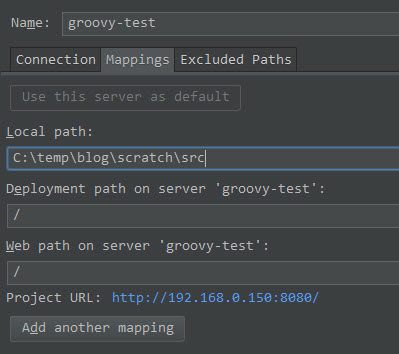
Step 12: Jump to the Mappings tab, if it is enabled click the 'Use this server as default' button. Enter or modify the local path if necessary. Make sure to add the 'src' directory if it's not there on the end. Click OK and exit the dialog.
Step 13: Back in IDEA, click Tools - Deployment - Options.
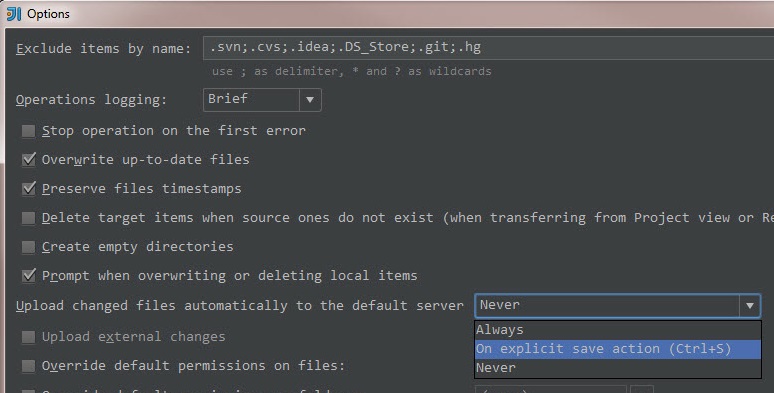
Step 14: Make sure that 'Upload changed files automatically to the default server' is set to 'On explicit save action (CTRL+S).
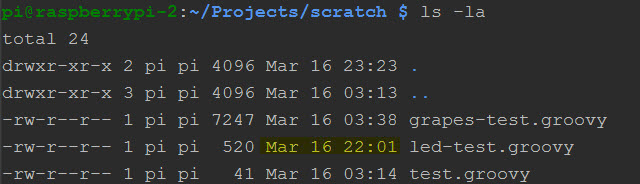
Step 15: Now we should be ready to test things out. SSH into your Pi (I use the Terminal window in IDEA for this). Take a look at the directory where you previously saved your script. Note that this script hasn't been changed since March 16 at 10:01 PM.
Step 16: Run the script from the SSH terminal. You'll see your LED light up just like it did in our last post.

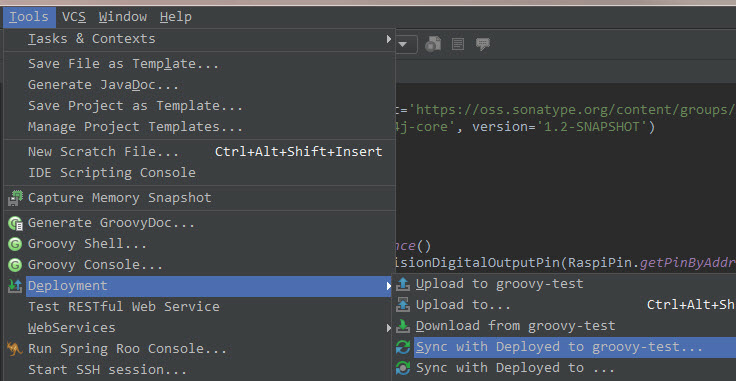
Step 17: It might not be necessary, but I like to go back and hit Tools - Deployment - Sync with Deployed... just to make sure the contents on both boxes match up before I change anything.
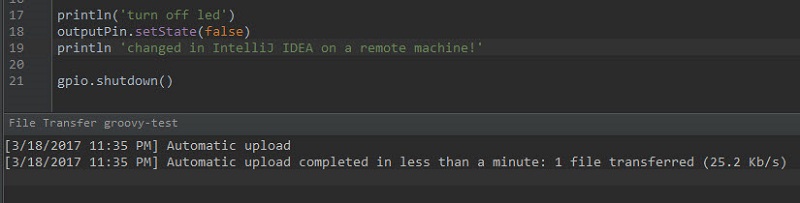
Step 18: Change the println statement on line 19 and save the file. Notice that IDEA immediately pushes the change up to the Pi.
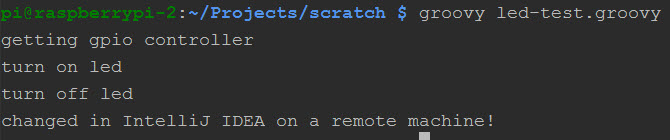
Step 19: List the contents of your directory (not shown in screenshot) and you'll notice the updated modified timestamp on the file. Run the script again on the Pi. You'll see the result of your change in the console.
And that's how you make your life super duper easy when writing code for the Raspberry Pi. When we get into writing Grails applications, we'll run Grails on the Pi as we develop remotely. Grails will automatically load the changes when running in development mode and our running application will immediately reflect them.
As a footnote, I should mention that a similar process should absolutely work with PyCharm if you're doing Python development for the Pi. Here is a blog post that outlines the steps involved, but they're almost identical to this process.
Image by ElinaElena from Pixabay
Related Posts

Simulating Texas Hold'em With Groovy
Last week I had a bit of free time and decided to see how difficult it would be to write a Texas Hold'em poker simulation in Groovy. My goal wasn't...

Spark Java "Flash" Scope
One of the handiest features of Grails is the "flash" scope. The flash scope is "A temporary storage map that stores objects within the session for...

Realtime GPIO On Raspberry Pi With Spark Java And WebSockets
One of the cooler things about the Spark Java framework is built in websocket support thanks to the embedded Jetty server. I've long been fascinated...