Easy Messaging With Micronaut's Kafka Support And Oracle Streaming Service
Posted By: Todd Sharp on 11/15/2019 1:00 GMT
Tagged: Cloud, Java, Open Source

Last month I wrote about an upcoming feature enhancement to make it very easy to use the Kafka SDKs to produce and consume messages from Oracle Streaming Service. In today's post, I want to show you an even easier way to work with Oracle Streaming Service by using Micronaut's built-in support for Kafka. It only takes a bit of set up and configuration and once that is complete you'll be pleasantly surprised at how few lines of code it takes to send and receive messages from your stream.
I'm going to repurpose some content from my last post for those who may not be familiar with Oracle Streaming Service. If you've already read that post then you can skip ahead to getting the Micronaut app up and running.
Note! The Kafka compatibility feature is currently in Limited Availability, but will soon be available for all projects (leave a comment here if you are interested in participating in the Limited Availability testing period).
First up, we'll set up a stream and create a user and token and collect some other info to be used to configure our Micronaut application later on.
Setting Up A Stream
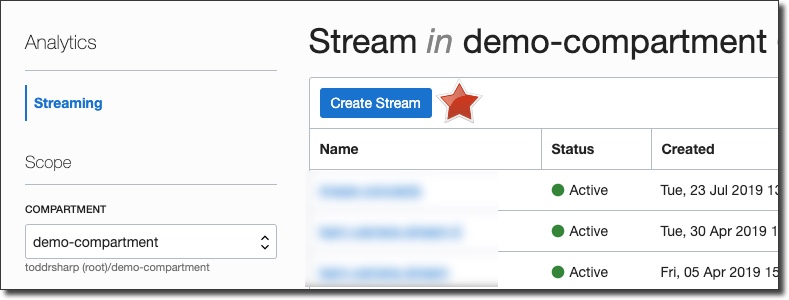
First things first, let's quickly set up a Stream topic for this demo. From the Oracle Cloud dashboard console, select 'Analytics' -> 'Streaming'.

On the Stream List page, click 'Create Stream' (choose the proper compartment to contain this stream in the left sidebar if necessary):
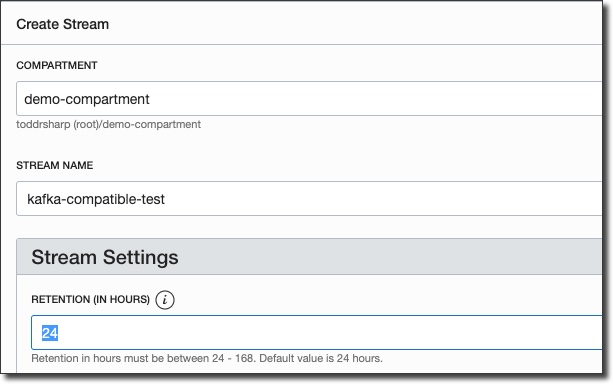
In the 'Create Stream' dialog, name the stream and enter a value for Retention (how long a message is kept on a topic before it is discarded):
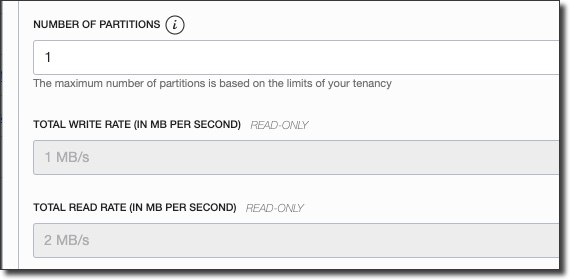
Enter the desired number of partitions and then click 'Create Stream'.
You'll be taken directly to the details view for the new stream, and in about 30 seconds your stream will be shown in 'Active' state.
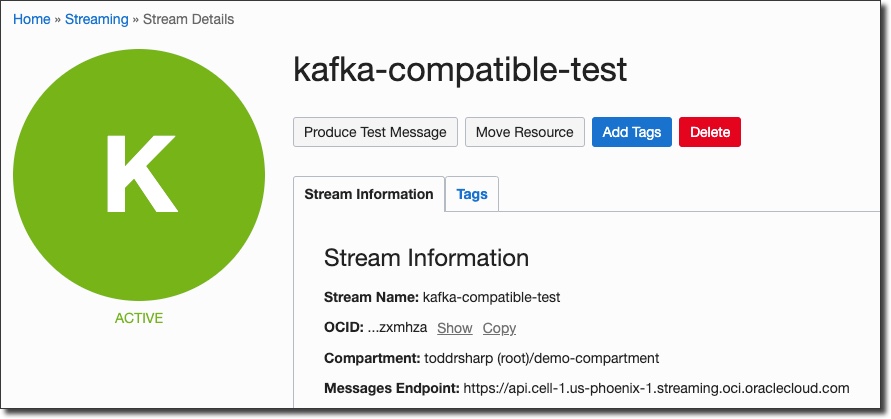
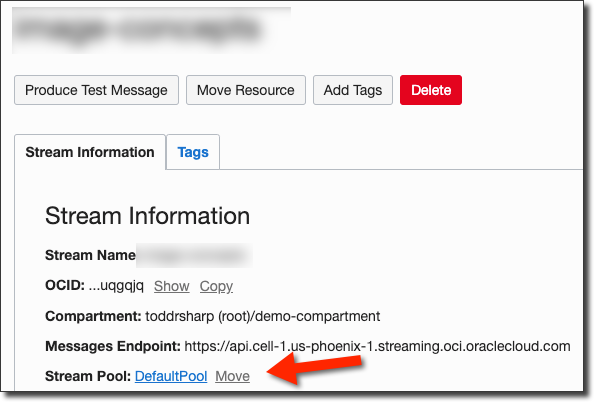
Now we'll need to grab the stream pool ID that our stream has been placed into. If you haven't specified a pool, your stream will be placed in a "Default Pool". Click on the pool name on the stream details page:
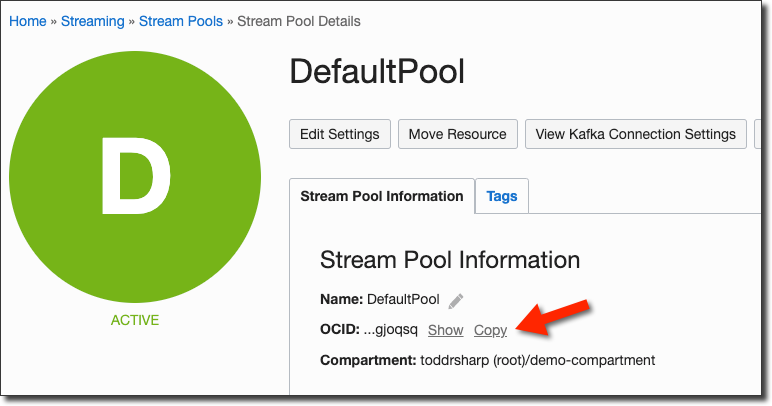
On the stream pool details page, copy the stream pool OCID and keep it handy for later:
Create A Streams User
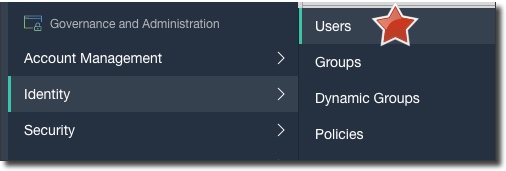
Next up, let's create a dedicated user for the streaming service. Click on 'Users' under 'Identity' in the console sidebar menu:
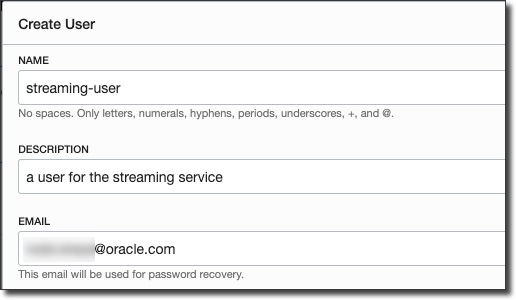
Click 'Create User' and populate the dialog:
After the new user is created, go to the user details page and generate an auth token:
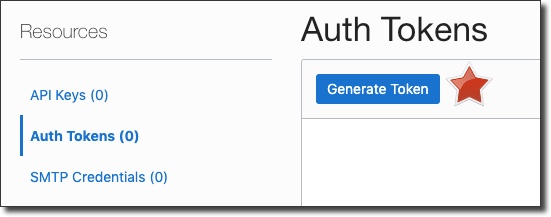
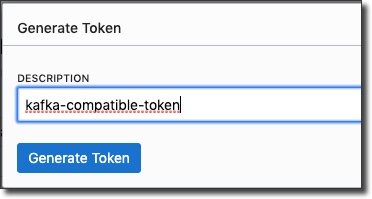
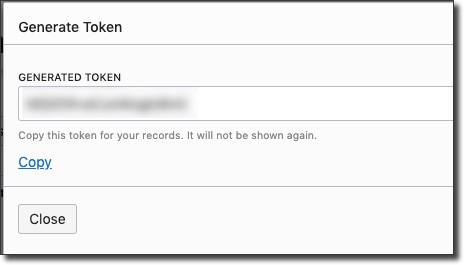
Copy the token and keep it handy - you can not retrieve it after you leave the 'Generate Token' dialog. Now, we'll need to create a group, add the new user to that group, and create a group policy:
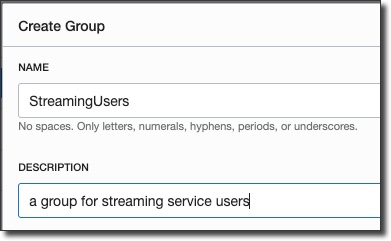
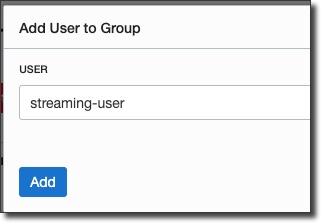
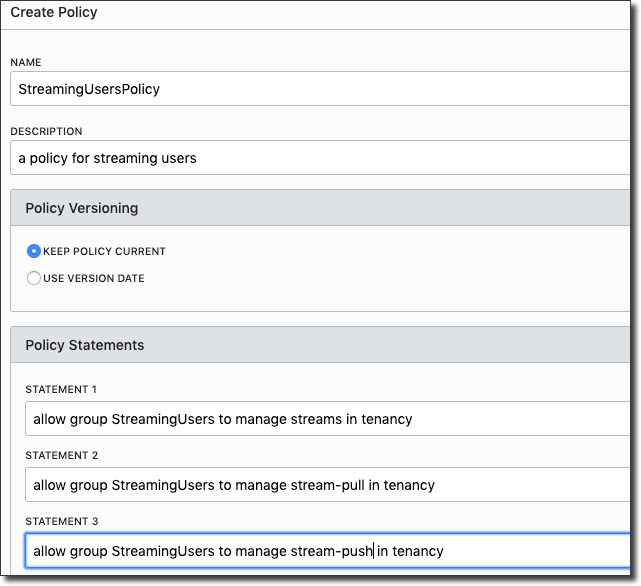
Great, now we have a user with an auth token, in a group that can work with streams. We also have our stream pool OCID, so we're ready to dig into some code.
Creating The Micronaut App
Now let's create our Micronaut application. By default, if we create an application using the Kakfa profile with the Micronaut CLI, we will not get an HTTP server. That's OK for this demo, but keep that in mind when you're building your applications as that may not be ideal for your particular requirements. You can certainly add the http-server-netty dependency (or add Kafka to an existing microservice) if that's what you need. So, let's create a simple app via the CLI by running:
Next, create an environment variable (I like to set up a 'Run/Debug Configuration' in my IDE that sets the ENV var for me) named KAFKA_SASL_JAAS_CONFIG and set the value by using the following format by substituting the proper values from above:
The rest of our configuration will take place in our application.yml file, so open it up (it's located at /src/main/resources) and modify it like so:
Note: You may need to change the region value in "kafka.bootstrap.servers" to the region in which your streaming topic was created.
Now, let's create our Producer and Consumer by running a few more CLI commands:
These CLI commands will create two new files in the mn.oss.kafka package: MessageProducer.java and MessageListener.java. Let's first open up MessageProducer.java which you'll notice is an interface. Micronaut will take this annotated interface at compile time and implement the proper concrete implementation that will be used at runtime based on the information we provide. We can simply add a method signature for sendMessage() that takes a key and a message like so:
And we'll be able to inject and utilize the producer in our application. To use the producer, open up Application.java and add a constructor and inject the MessageProducer. Then add an EventListener for the StartupEvent that we can use to produce some test messages. Once complete, your Application class should look like so:
At this point you can run the application with ./gradlew run:
Now head over to the Oracle Cloud console and refresh your topic to see the test messages:
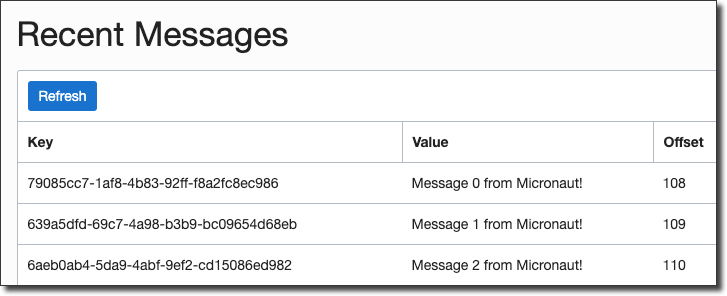
Awesome! We've very easily produced some messages to our Oracle Stream. But what about consuming? That's just as easy. Open up MessagerListener.java and add a method to be called when the topic has an incoming message. It'll receive several arguments including the key, message and more:
If you want, you can instead receive a ConsumerRecord object or even use Reactive types in your listener. Read the Micronaut docs for more info on that. Run the app again, and you'll see the listener in action:
And that's it! Full support for Oracle Streaming Service via Micronaut's Kafka annotations. I've barely scratched the surface of Micronaut's Kafka support. Please read the full documentation to learn what else is possible.
You can check out all of the code from this post on GitHub: https://github.com/recursivecodes/mn-oss-kafka
Related Posts

Querying Autonomous Database from an Oracle Function (The Quick, Easy & Completely Secure Way)
I've written many blog posts about connecting to an Autonomous DB instance in the past. Best practices evolve as tools, services, and frameworks become...

Sending Email With OCI Email Delivery From Micronaut
Email delivery is a critical function of most web applications in the world today. I've managed an email server in the past - and trust me - it's not fun...

Brain to the Cloud - Part III - Examining the Relationship Between Brain Activity and Video Game Performance
In my last post, we looked at the technical aspects of my Brain to the Cloud project including much of the code that was used to collect and analyze the...