Message Driven Microservices & Monoliths with Micronaut - Part 4: Using RabbitMQ for Messaging
Posted By: Todd Sharp on 2/8/2021 12:00 GMT
Tagged: Cloud, Developers, Java

Previously, we looked in-depth at messaging for your microservice and monoliths by using an e-commerce example. We first set up a Kafka broker and created an order microservice that published new orders to an order topic. In the next post, we created a shipping service to consume the order messages and then sent shipment messages back to the order service via a separate topic on the same Kafka broker. In the third post, we looked at how to use Oracle Streaming Service (OSS) instead of your own Kafka broker. We’ve covered quite a lot of information on messaging, but there’s one more option that I wanted to cover in this series - using RabbitMQ instead of Kafka or Oracle Streaming Service.
As I’ve previously mentioned, using Kafka or OSS are excellent choices for messaging. But there are certainly those developers who are more comfortable or familiar with using MQTT via RabbitMQ so I wanted to cover this topic quickly because Micronaut makes using RabbitMQ just as easy as it made Kafka. We won’t go into as much detail as we did in the previous posts because things would start to feel redundant, but I’ll show you how to use RabbitMQ in the same use case of an e-commerce application that includes order and shipping services. Instead of walking through the service details as we did before, I’ll assume you’ve either read those posts or can refer to the GitHub repos for this example to understand the “big picture” and we’ll look at creating our producers and consumers in RabbitMQ and Micronaut in this post. Please refer to the Micronaut RabbitMQ docs for further information beyond what is covered in this post.
Don’t Have RabbitMQ Setup? No problem! I published a guide last year about Getting Started with RabbitMQ in the Oracle Cloud!
Setting up RabbitMQ
Note! When setting up your RabbitMQ server, make sure that you have the rabbitmq_mqtt plugin enabled! Also make sure that TCP port 5672 is exposed in your Docker container (if using Docker), your OS firewall and in your network security list!
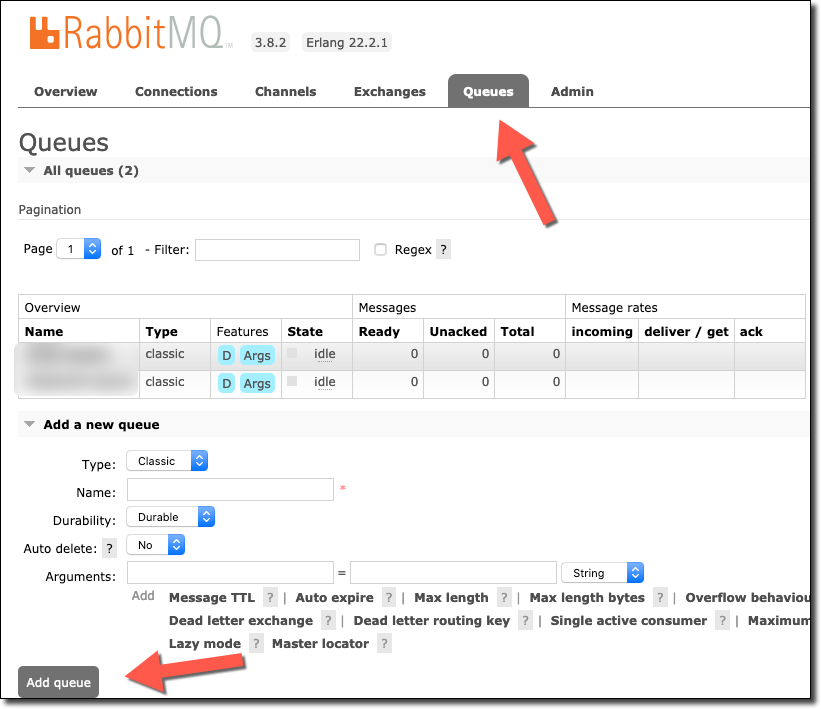
In your RabbitMQ management console, you’ll need to add a new “queue” for both orders and shipments. Click on ‘Queues’ and then ‘Add queue’.
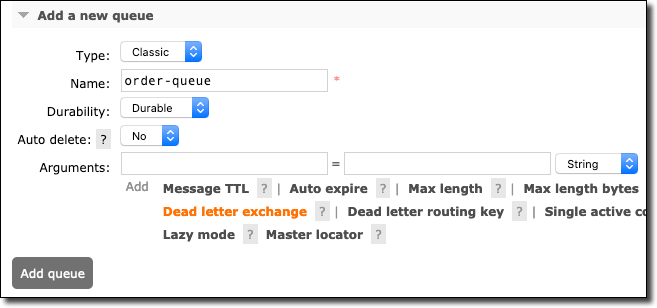
Create an order-queue.
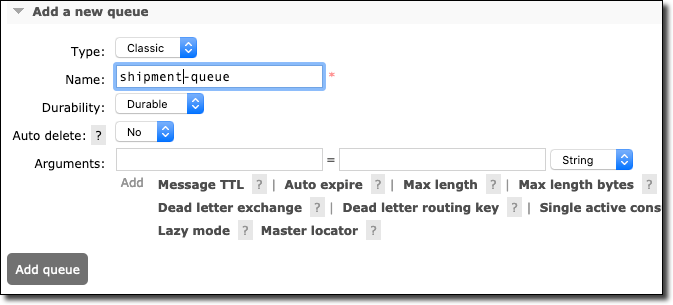
And a shipment-queue.
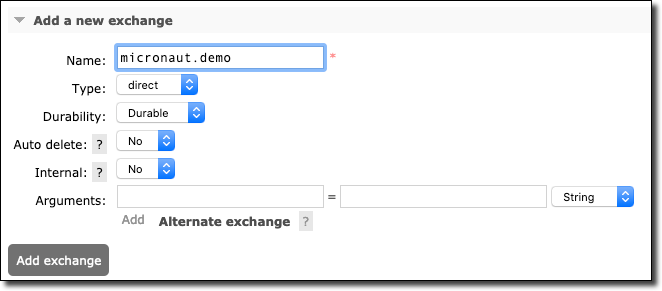
Now we’ll create an exchange by clicking on ‘Exchanges’ then ‘Add exchange’.
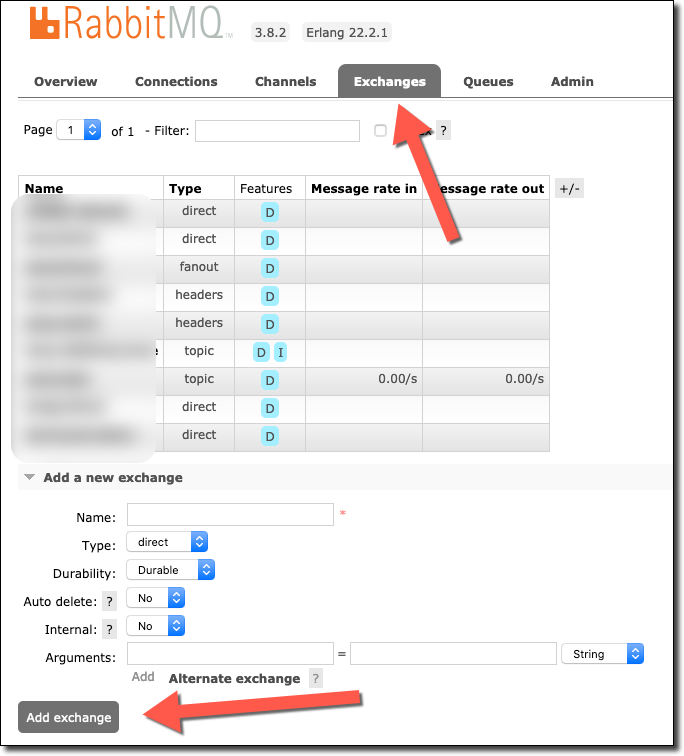
Name the exchange micronaut-demo and click ‘Add exchange’.
Now click on the new exchange and add a binding to the order-queue with the routing key order.
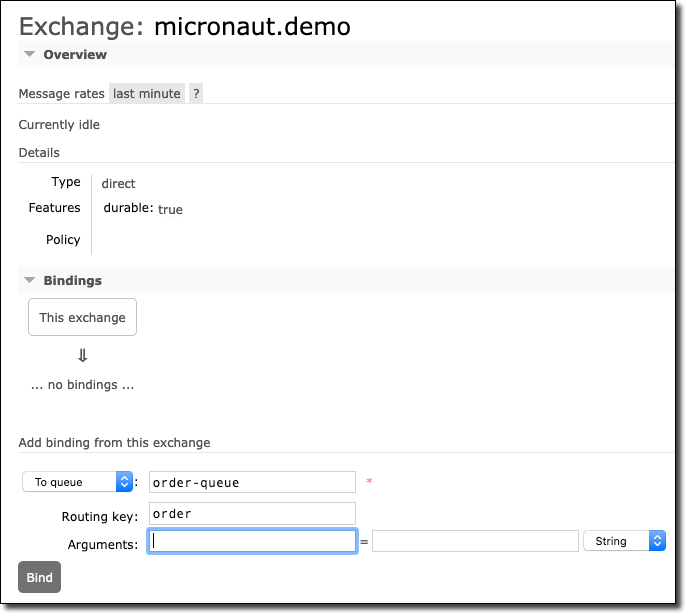
Do the same for the shipment-queue, using the routing key shipment.

OK, we’re all set up on the Rabbit MQ side.
Create an Order Service That Uses RabbitMQ
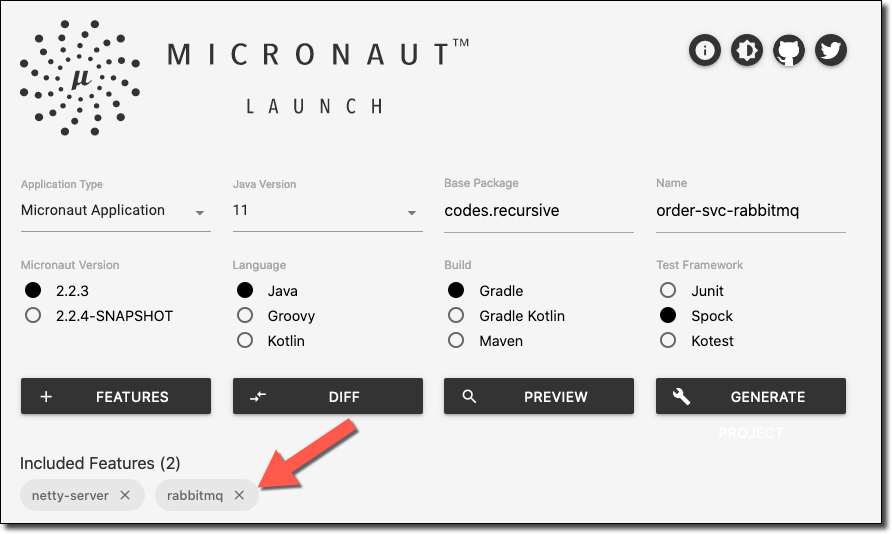
Using Micronaut Launch, bootstrap, download and unzip the order service. Be sure to include the ‘RabbitMQ’ feature.
The domain objects, controller and service for the order service will all look identical for the most part from the Kafka solution, so create those as you did in the first blog post of this series (or see the GitHub repo for this example).
Now with the Micronaut CLI we’ll create a ShipmentConsumer and an OrderProducer, but this time with the create-rabbitmq-listener command from the CLI.
Populate the OrderProducer as such. Take note that the value passed to the @RabbitClient annotation should be the name of the exchange we created earlier and the @Binding value is the routing key that we used in our queue binding earlier.
In the ShipmentConsumer, annotate the receive method with @Queue and point it at the shipment-queue that we bound to our exchange earlier.
Create a Shipping Service That Uses RabbitMQ
Create another project with Micronaut Launch for the shipping service, again adding the ‘RabbitMQ’ feature.
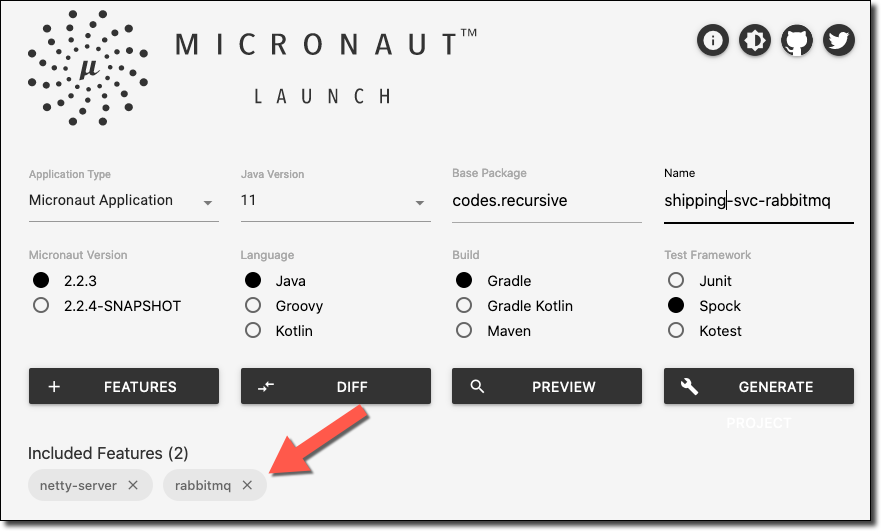
As with our RabbitMQ order service, this shipment service, controller, and the domain will all be the same as the Kafka example. Refer to the GitHub repository for this example for that code if necessary. The difference, again, is in the producer/consumer. Create a ShipmentProducer and an OrderConsumer with the CLI.
Now populate the OrderConsumer as such. Again, note the @Queue annotation that points at the order-queue we created earlier.
For the ShipmentProducer, again use the micronaut-demo exchange as the @RabbitClient and the shipment routing key as the @Binding.
RabbitMQ Configuration
Both the order and shipping microservice will require a slight addition to the resources/application.yml config file. Add the appropriate uri, username and password and you’re all set.
Test
At this point, we can launch both services, place an order and observe the same results that we did with our Kafka and OSS examples in the previous posts.
Place order:
Check order status:
Observe shipping console.
Check order service status to confirm it was updated.
Summary
In this post, we used RabbitMQ instead of Kafka or OSS to handle the messaging in our e-commerce example. This brings us to the end of this brief series on messaging in the cloud. I hope that you found this series useful. Please leave a comment below or contact me via Twitter with any feedback or to let me know what you’d like to read next here on the Developer Blog!
If you’d like to view the code used in this post, please see the repos on GitHub:
Image by Comfreak from Pixabay
Related Posts

Querying Autonomous Database from an Oracle Function (The Quick, Easy & Completely Secure Way)
I've written many blog posts about connecting to an Autonomous DB instance in the past. Best practices evolve as tools, services, and frameworks become...

Sending Email With OCI Email Delivery From Micronaut
Email delivery is a critical function of most web applications in the world today. I've managed an email server in the past - and trust me - it's not fun...

Brain to the Cloud - Part III - Examining the Relationship Between Brain Activity and Video Game Performance
In my last post, we looked at the technical aspects of my Brain to the Cloud project including much of the code that was used to collect and analyze the...