Back To The Database - Part 1: Preparing To Persist Data From A Stream
Posted By: Todd Sharp on 3/17/2020 11:00 GMT
Tagged: Cloud, Containers, Microservices, APIs, Database

In my last post, I talked about some of the reasons why it makes sense to take advantage of the power of our RDBMS to handle our data instead of manually implementing solutions in our application code. In the next few posts, I'm going to start backing up some of that reasoning with some actual examples so that you can see for yourself what I’m talking about and hopefully realize that it truly does make sense to trust the database to handle our data.
Before we dig in, I want to address the fact that there are a lot of developers who don’t exactly feel 100% comfortable with SQL or database systems in general. That’s OK, and trust me when I tell you that even after 16 years of developing applications I would say that I’m not fully comfortable working in the database myself at all times. But it takes a certain comfort level to be a successful backend (or full stack) developer, so it’s a skill that you’re going to have to pick up at some point. Especially now that we’re starting to see a lot of clients moving back towards trusting the database to handle the things that it is really good at handling instead of developing new solutions and protocols for data persistence. The bottom line is that you really need to be OK with writing some SQL and you need to understand some concepts like stored procedures, triggers, scheduled jobs, cursors among others. Again, you don’t have to be an expert, but if you’ve spent a lot of time elsewhere (maybe in NoSQL land?) you may have some catching up to do. It’s cool though, there are tons of resources to learn about these things and I’ll hopefully explain some of them in the next few posts well enough for you to understand.
Because part of the focus for this blog series is to familiarize developers who may not be completely comfortable with SQL or relational databases, some parts of these posts may be very introductory. I will do my best call out such portions and you may feel free to skip over that content if you feel comfortable jumping past beginner level content and explanations.
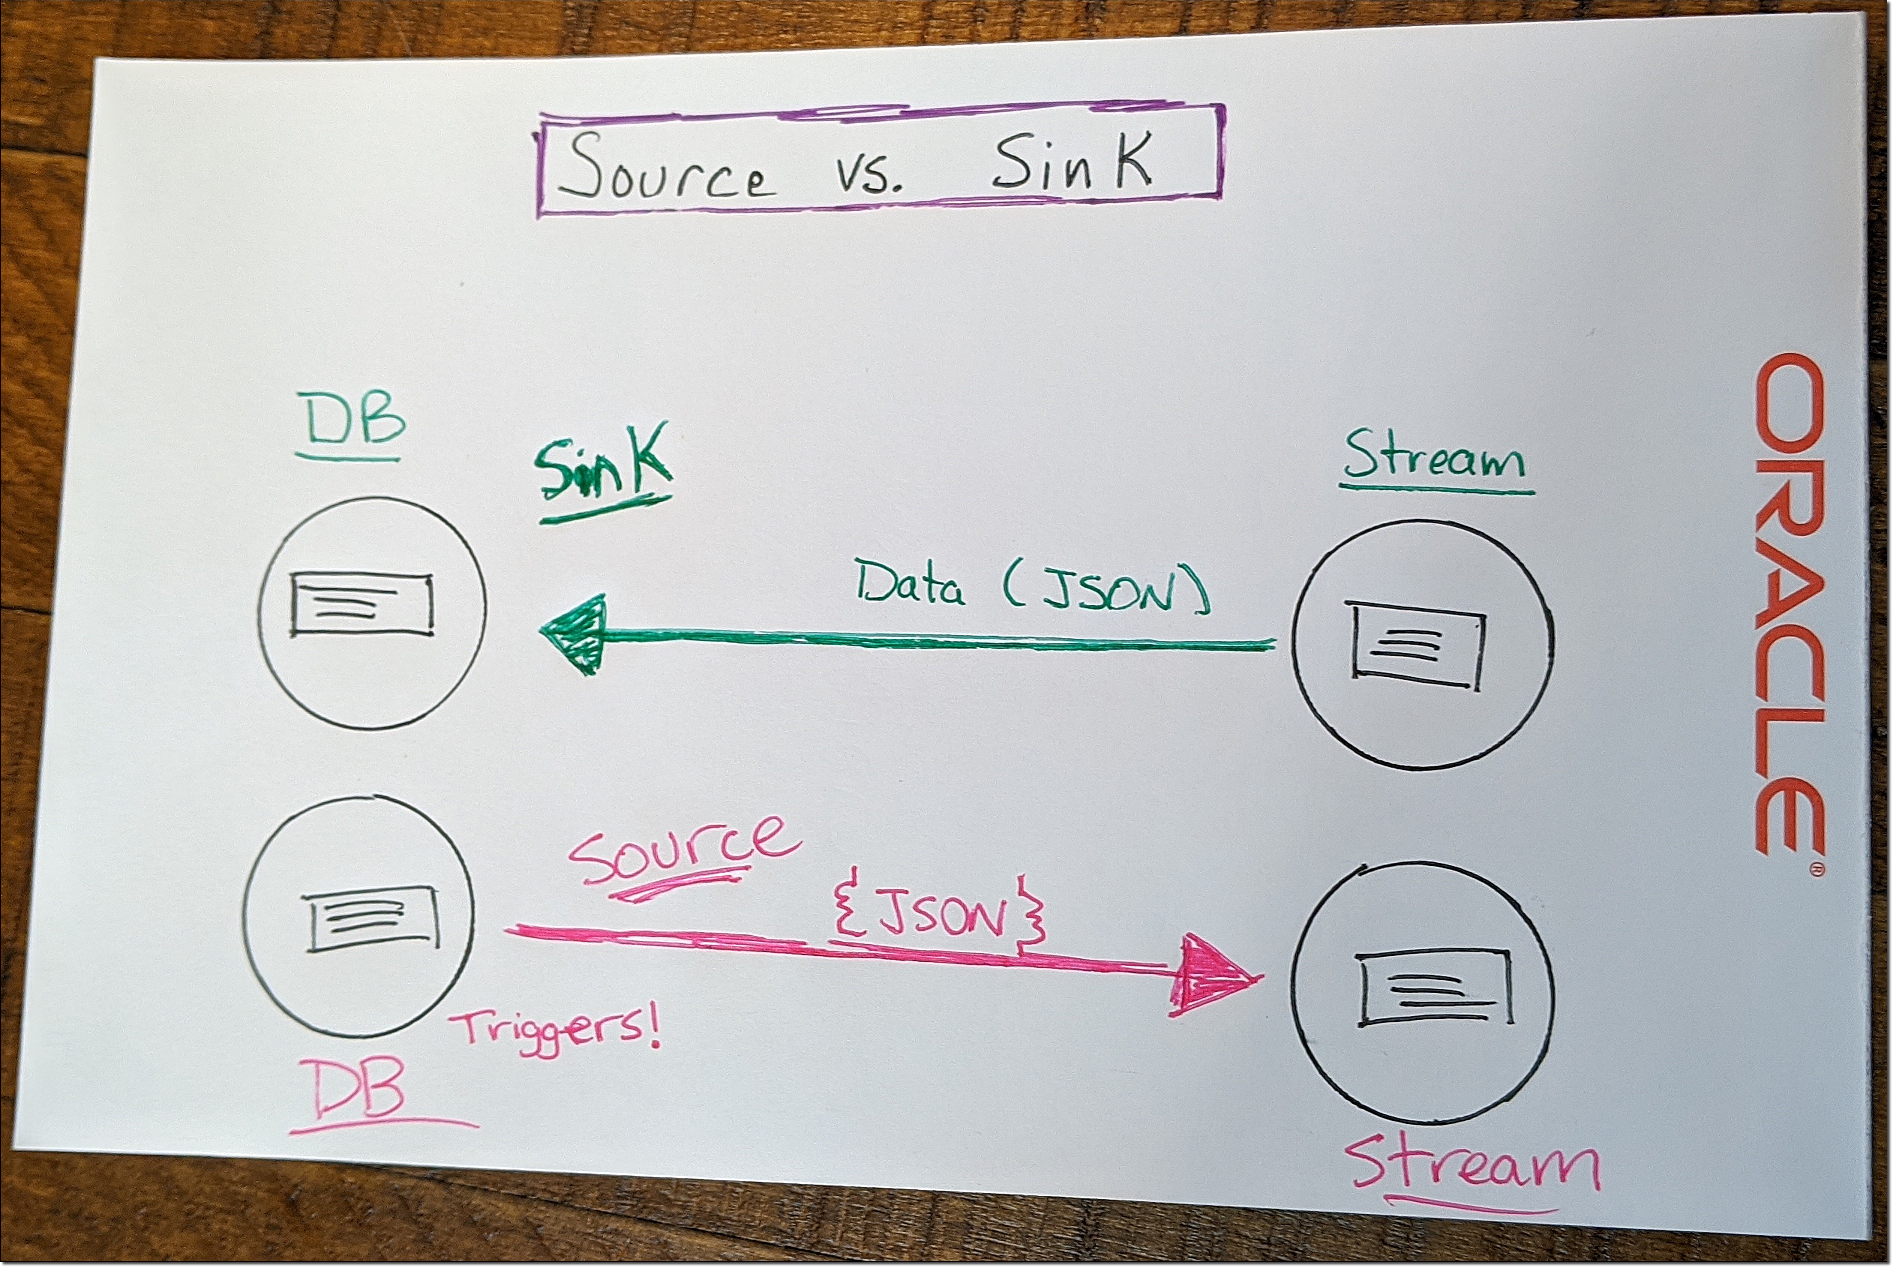
Let’s get on to the good stuff. In this post, we’re going to look at persisting data to a table from a stream. This is often called a “sink” or “data sink” which refers to a system or function that is designed to receive incoming data or events from another system or function. The inverse of “sink” is “source” which we’ll look at in a future post. In this post and the next, we’ll focus on the “sink” side of things.
For the demo we’re looking at today we will use Oracle Streaming Service (OSS), but since we’re living in the days of “multi-cloud” I should let you know that you don’t have to use OSS. Other cloud vendors have similar solutions, or you could roll your own with Kafka. You should use OSS, but you don’t have to and aren’t locked in to using OSS.
If you’re new to OSS (or streaming as a concept), check out some of my posts here on the developer blog:
- https://blogs.oracle.com/developers/getting-your-feet-wet-with-oci-streams
- https://blogs.oracle.com/developers/migrate-your-kafka-workloads-to-oracle-cloud-streaming
- https://blogs.oracle.com/developers/easy-messaging-with-micronauts-kafka-support-and-oracle-streaming-service
- https://blogs.oracle.com/developers/publishing-to-object-storage-from-oracle-streaming-service
There’s one more OSS post that I’ve written on the developer blog that was the inspiration for this series of posts: Using Kafka Connect With Oracle Streaming Service And Autonomous DB.
So now that you know a little bit more about streaming and OSS, we’ll need to create a stream. We’re going to publish messages to this stream that will ultimately end up in a table in our Autonomous DB instance. It should be able to handle all three phases: inserts, updates and deletes and should have some error handling in case something goes wrong.
To get started, create a new stream. Here’s a quick walkthrough on how to do that:
For this demo, I named my stream “atp-oss-sink”. This will be the stream that will be read by our PL/SQL code and ultimately result in insert, updates and deletes from our DB table.
New To SQL?
From here on out, most of what we’re going to be looking at is PL/SQL code. Don’t stress if this is new to you! There’s really not much to it and we’ll walk through each part of the process step-by-step to help you understand what is going on before we move on to the next bit.
If you’re really new to working with SQL, you may not even be sure how to get up and running with Autonomous DB. If that’s the case, check out this video or this blog post.
If you’re not sure how to run queries against your Autonomous DB instance, check out SQL Developer or SQL Developer Web!
Create Tables
The first step forward is to create a table that we can use to store the data that we’ll read from the stream later on. You can do that with the following DDL statement:
As you can see, it’s a very simple table with a few various data types so that we can make sure that we can properly import things like numbers and dates from the JSON coming from our stream.
We’ll need another very simple table that will be used to store the last offset processed from our stream so that subsequent runs of this procedure will only grab the latest messages and ignore the previously processed messages that may still be in the stream due to the retention window.
Now that we have our tables created, let’s move on.
Create Cloud Creds
The rest of the demos that we’ll be looking at rely very heavily upon the DBMS_CLOUD REST API’s. I suggest you read through the docs to become more intimately familiar with the APIs, but at the very least you’ll need to make sure that the user you are working with has EXECUTE privileges with the following statement:
This package will help us to make properly authenticated calls against the OCI REST APIs so that we can easily interact with the Oracle Streaming Service. As stated above, you’re not locked in to the OCI API - you can also use AWS or Azure endpoints as well.
Before we can start making calls to the REST API, we’ll need to create a named “credential” record in our database that we’ll use to make the properly authenticated calls later on. Much of the information required to create this credential will be obtainable from your existing OCI CLI configuration files, so you can refer to those files to gather the necessary info.
What’s that? You’re not yet using the OCI CLI? Then you should absolutely stop what you’re doing and install it now!
Alright then, let’s create our credential in the DB by calling the CREATE_CREDENTIAL function in the DBMS_CLOUD package!
Create A Stored Procedure
What’s a stored procedure? You can think of them as a “subroutine” or a way to package up one or more SQL statements into a bundle that can then be executed with a single call. Stored procs (as they’re commonly called) can have “input” variables and optionally produce “output” by returning a result set or even just a singular value. A “hello world” stored procedure would look like so:
To invoke this stored proc, declare a variable to store the output, call the procedure, passing the “person” value and the output variable and then output the response:
So far we’ve accomplished a lot here! We’ve created our cloud credentials, learned about streams and created one and created our tables for our demo. We’ve also learned what stored procedures are and how to invoke them. I think that’s a good place to stop for now. In the next post, we will look at populating our stored procedure to receive messages from our stream and manipulate our table from those messages.
Terabass / CC BY