Installing Node-RED In An Always Free VM On Oracle Cloud
Posted By: Todd Sharp on 10/16/2019 12:00 GMT
Tagged: Cloud, JavaScript

Last month at Oracle Open World we announced a very exciting "always free" tier for Oracle Cloud. I recently blogged about how you could use an "always free" VM to run a Minecraft server, and I thought that it would be good to do an ongoing series of posts that highlight some different projects that our "always free" VMs and Autonomous DB instances can be used for. In today's edition, we'll take a look at installing Node-RED.
Here's an outline of the sections below, feel free to skip ahead if you're already familiar with a specific step:
- Free Cloud Sign Up
- What Is Node-RED?
- Creating An Always Free VM
- Modifying Your Security List
- SSH Into Your VM
- Installing Node-RED
- Securing Node-RED
Let's get into it!
Free Cloud Sign Up
Before we get started, you'll have to sign up for a free account with Oracle Cloud. Sign up requires a credit card, but there are absolutely no charges at all if you follow the tutorial below.
If you're not yet the age of majority (usually 18), please have your parent sign up for a free Oracle Cloud account and help you with the steps below!
After you have created your free account and signed in, the first thing you'll need to do is create a virtual machine that will be used to host the Minecraft server.
What Is Node-RED?
If you're not familiar with Node-RED, their website describes the project as:
Node-RED is a programming tool for wiring together hardware devices, APIs and online services in new and interesting ways.
It provides a browser-based editor that makes it easy to wire together flows using the wide range of nodes in the palette that can be deployed to its runtime in a single-click.
Here's a quick intro video to help you understand what it is and how it
As you can see, it's a pretty powerful and fun application to play around with. Let's create a VM that we can use to install it!
Creating An Always Free VM
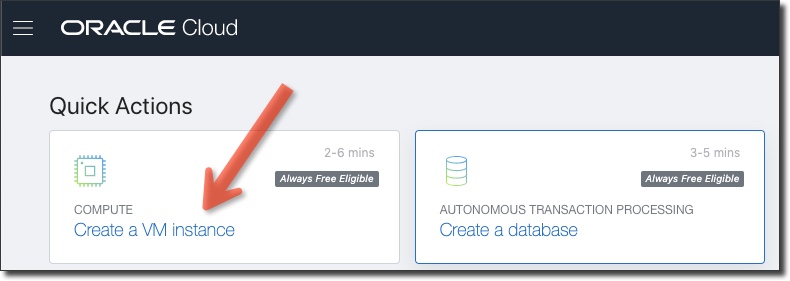
Log in to your Oracle Cloud account and head to the console. From the dashboard, select 'Create a VM Instance' to get started.
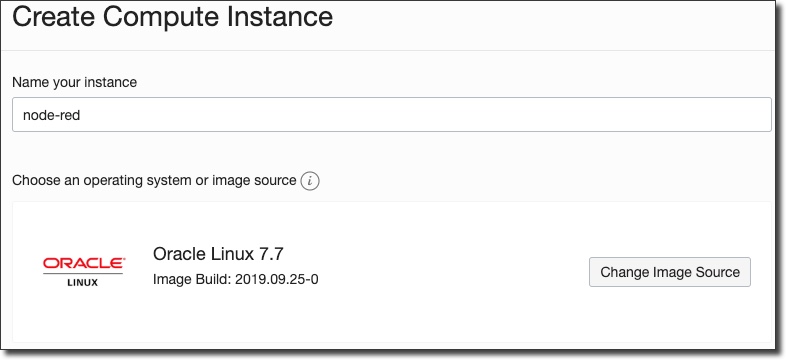
Next, enter a name for your instance and make sure that the Image Source is Oracle Linux 7.7.
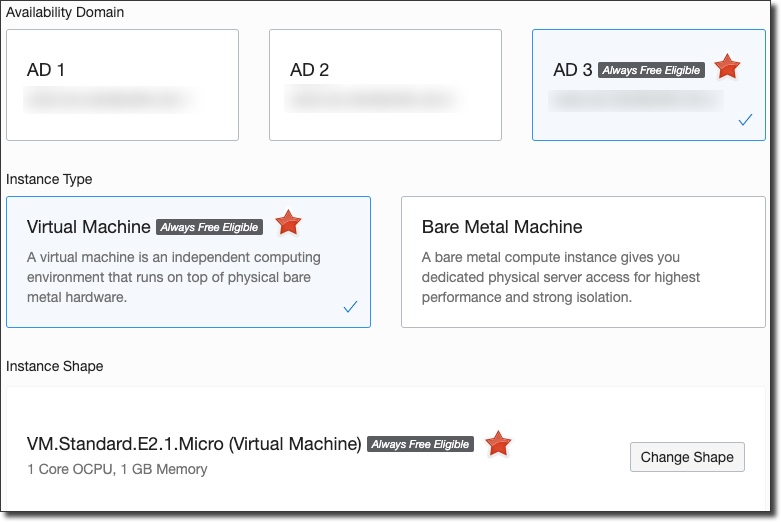
Make sure that the Availability Domain, Instance Type and Instance Shape are all "Always Free Eligible".
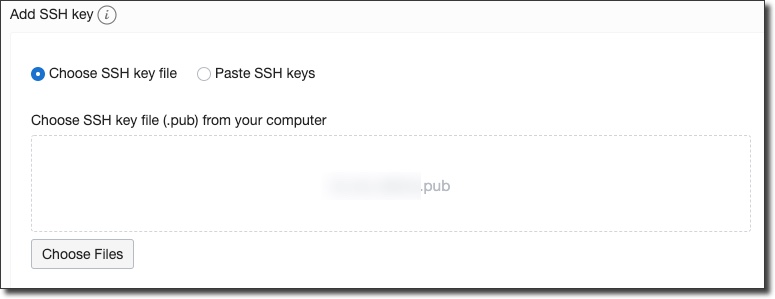
Now scroll down and upload a public SSH key that you can use later on to SSH in to the VM once it is running.
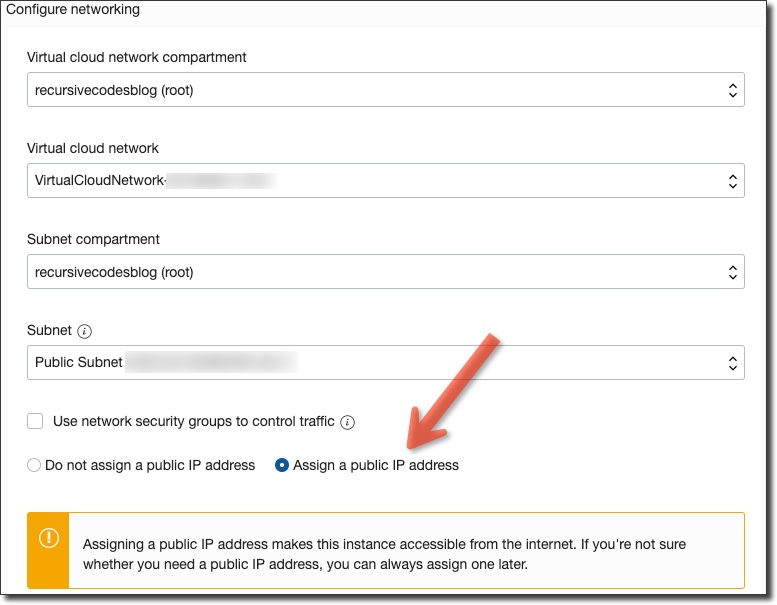
Scroll down and make sure that "Assign a public IP address" is selected.
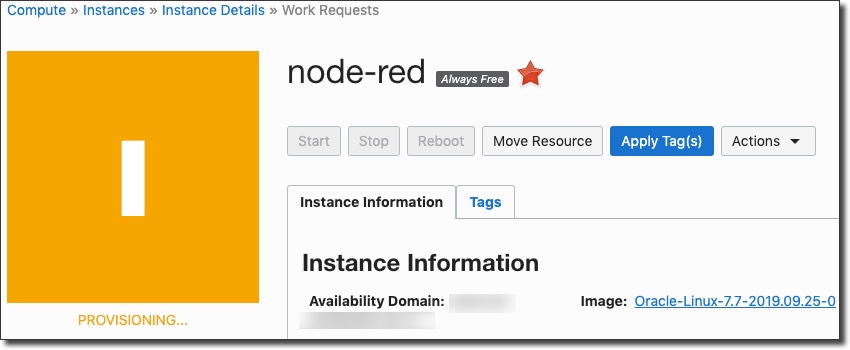
Click 'Create' and you'll be taken to the instance details where the VM will be in a "Provisioning" state.
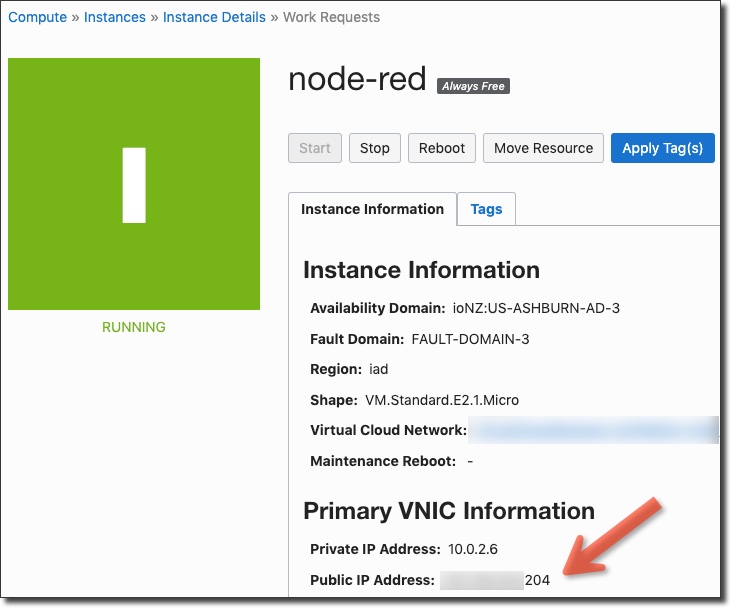
When the VM becomes "Active" you'll have a public IP address assigned. Copy this and keep it handy for later.
Modifying Your Security List
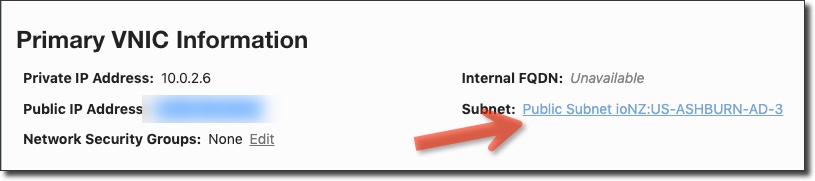
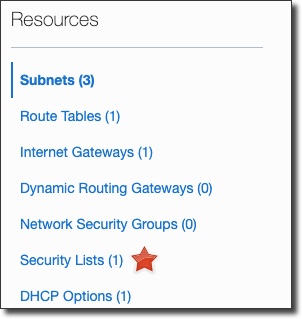
On the instance details page, click on your assigned subnet.
In the left hand sidebar on the subnet details page, click on "Security Lists":
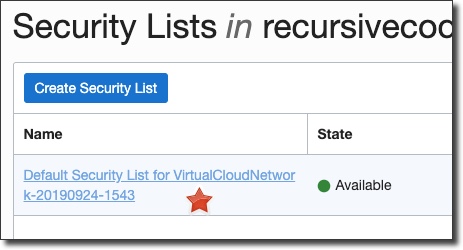
Then click on the default security list to edit it:
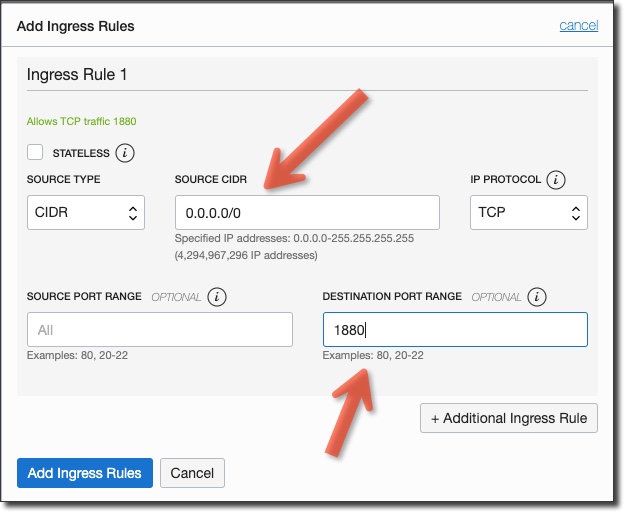
Add an ingress rule for port 1880, the port used by Node-RED:
SSH Into Your VM
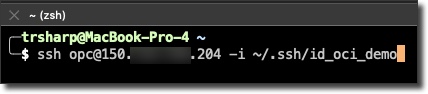
From a terminal window on your local machine, make an SSH connection into your VM using the private key associated with the public key you specified at instance creation and the IP address of your VM. Use opc as the username:
Installing Node-RED
There are a number of tutorials for installing Node-RED, but the one we'll use is the "manual install" method (just ignore any references to Raspberry Pi in this script). To run this script, first evaluate it on GitHub and then run:
bash <(curl -sL https://raw.githubusercontent.com/node-red/linux-installers/master/rpm/update-nodejs-and-nodered)
Note: This script will install Node.JS, Node-RED and optionally add a firewall rule that adds port 1880 to the public zone. Answer "y" to allow this firewall rule to be created when it asks you.
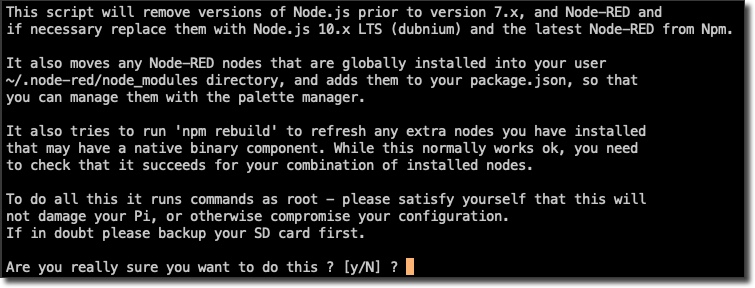
Once it is complete you will see output similar to this:

Start Node-RED with node-red-startand you will see output similar to the following:
You can ensure that Node-RED always starts at boot with:
sudo systemctl enable nodered.service
You're now ready to launch Node-RED in your browser at http://[public-IP]:1880
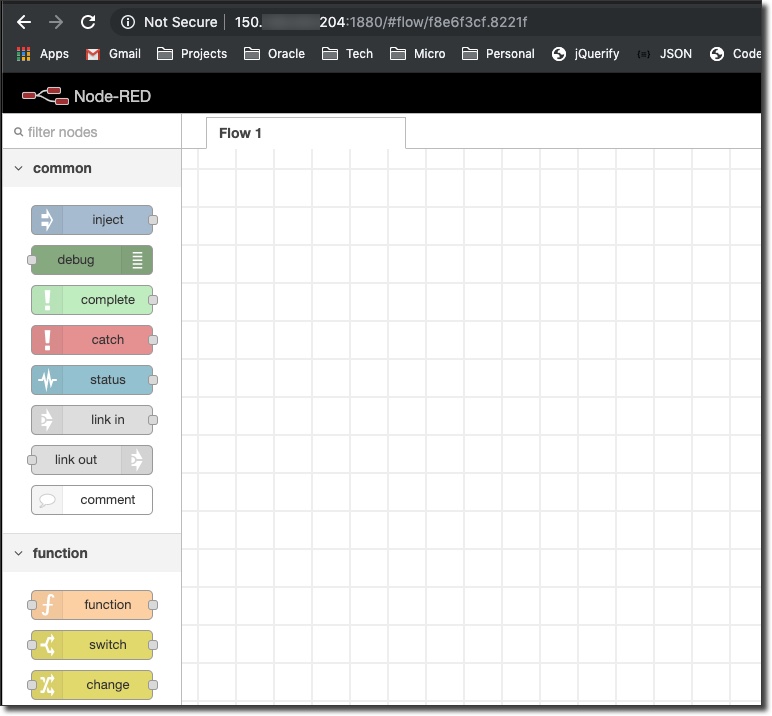
You're now ready to start creating and deploying flows in your "always free" VM on the Oracle Cloud. You can create your own flow from scratch or import a flow from the Node-RED Library. What great ideas do you have for Node-RED in your "always free" VM? Leave them in the comments below!
Securing Node-RED
Now that you're up and running, you'll need to secure your Node-RED install in a few ways. You should check out the Node-RED docs to learn how to properly secure your install with a username and password. Also, you'll want to use a SSL/TLS cert for HTTPS transport and encryption which is easy to configure in the Oracle Cloud.
Photo by Samuel Ferrara on Unsplash