Oracle Functions - Connecting To An ATP Database Revisited
Posted By: Todd Sharp on 2/11/2020 8:31 GMT
Tagged: Cloud, Java

Last August, I blogged about how to connect up your Oracle Function serverless functions to your Autonomous DB instance. Since that post was published a few things have happened to make this process quite a bit easier, so I wanted to put together an updated version of that post to show you the latest recommended method for getting data in and out of your cloud DB instances from your serverless functions.
Heads Up! This process is currently the recommended approach for connecting to your ATP instance from a serverless function, but is certainly subject to change. This post will be updated or superseded if things change again!
Here's how we'll tackle this challenge:
- Download ATP Wallet
- Upload wallet to a Private Bucket in Object Storage
- Configure Resource Principals for Oracle Functions
- Create function, including OCI SDK and OJDBC drivers
- Download wallet to function container at runtime
- Use wallet for connection
If you'd like to see a complete example, the full code for this blog post is available on GitHub
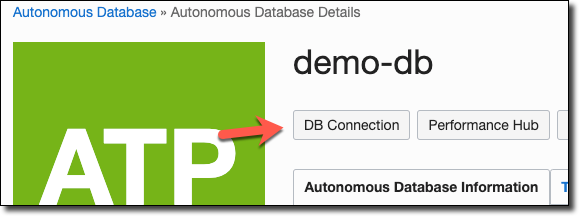
Download Wallet
So let's get started walking through the process. The first step is to download your ATP wallet. You can do this via the console dashboard:
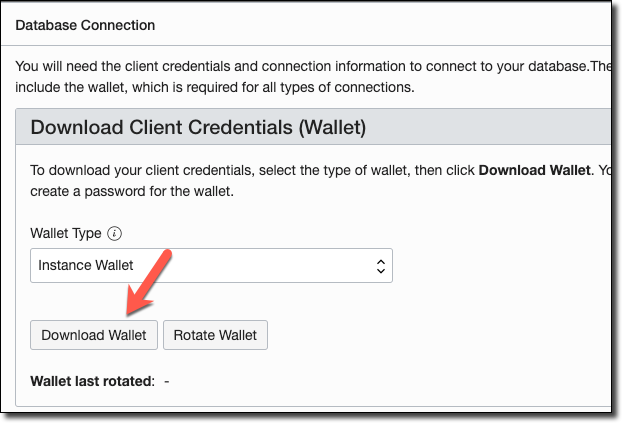
Or you can use the OCI CLI to download the wallet:
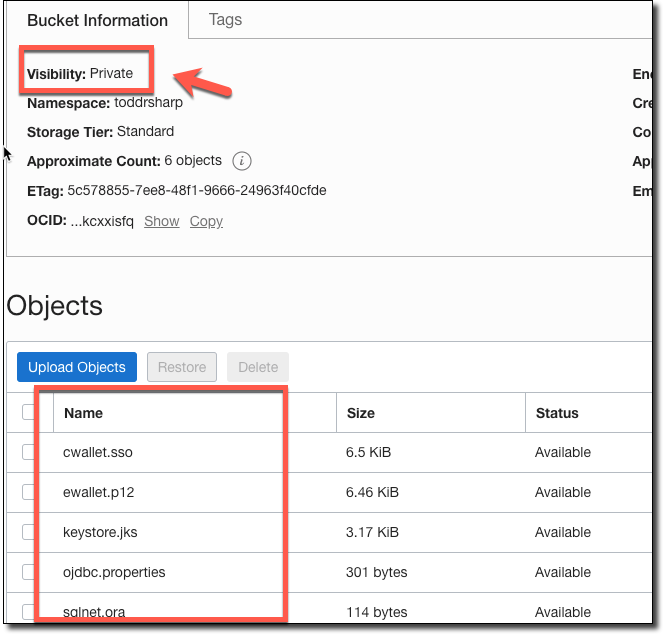
Upload Wallet Contents To Object Storage
Now that you've got a local copy of your wallet, create a private bucket in Object Storage, unzip the wallet and upload each file from the wallet into the private bucket.
Note: Did I mention that the bucket should be private?
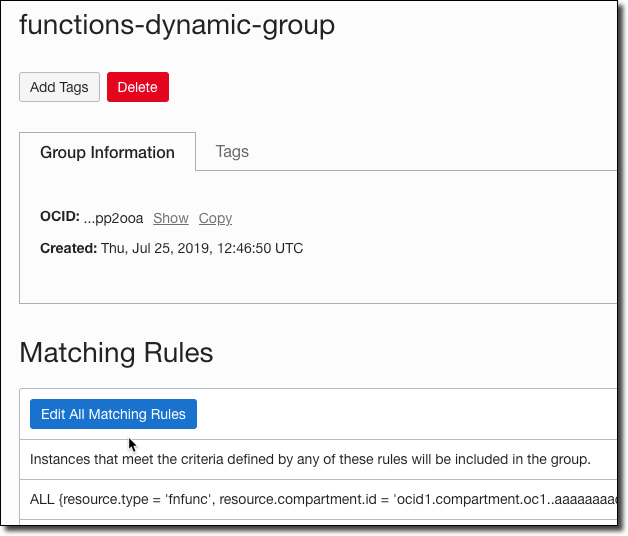
Configure Dynamic Group
We're going to take advantage of Resource Principals for our function so that we do not have to include any OCI credentials in order to use the OCI SDK. To do this, you'll need a Dynamic Group. I like to create one for the compartment that I use for all of my functions.
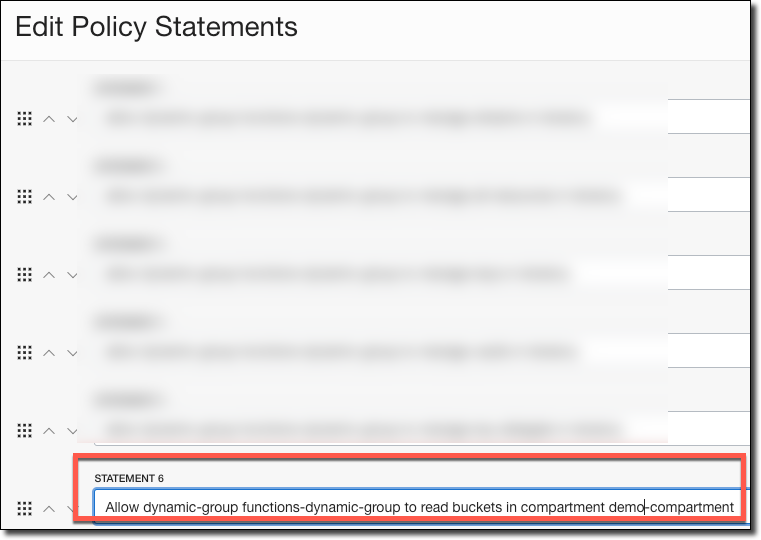
Next, assign a policy to the dynamic group so that it is able to read the bucket where your wallet files are stored.
Create Application & Function
Now let's create an application for our function and create the function itself:
Add some configuration to the application, substituting your values as appropriate. Of course, It's a better idea to use KMS to encrypt your password than to store it in a config variable in plain text. You can use the Oracle Cloud KMS service instead to keep your passwords encrypted.
Warning: Do not modify the path to TNS_ADMIN in the DB_URL config variable. This is the location within the Docker container that the wallet files will be downloaded to.
Now, open up your pom.xml file and add our dependencies:
Open up
func.yaml and add a few values for timeouts and memory to the existing config:
Write Function Code
Now that our setup and configuration is complete, let's move on to the code itself. Open up the HelloFunction.java file that was created with your application.
Let's declare some variables for use in our class:
Now, add a constructor. Here is where we will set up our pool datasource that will allow us to use connection pooling for our queries. This datasource (and the downloaded wallet) will live across invocations, making things quicker for "warm" invocations.
Inside of our handleRequest() function, the first thing we'll do is check for a wallet and download it if it does not yet exist in the container:
The needWalletDownload() function is just as simple as you'd expect it to be:
And here's the downloadWallet() method. As I mentioned earlier, we're using a Resource Principal as our auth provider. Here's how this function works:
- Create an Object Storage client
- List all objects in Wallet Bucket
- Loop over objects, downloading each object into the container's /tmp/wallet directory
Pretty simple! Here's the code:
And back in the handleRequest(), it's now just a matter of grabbing a connection, creating our statement and executing the query:
Deploy & Test Function
Once you've put it all together, invoke your function with:
If you've set up logging, you can take a look at the output:
The "cold start" invocation will take a few extra seconds to download the wallet and configure the connection pool, but subsequent invocations will be lightning quick!
Summary
That's what it takes to connect to your Autonomous DB instance from your Oracle Function. If you're unsure how it all comes together, take a look at the full example on GitHub.
If you'd like to see a complete example, the full code for this blog post is available on GitHub
Photo by sippakorn yamkasikorn on Unsplash