Creating Your First API Gateway In The Oracle Cloud
Posted By: Todd Sharp on 11/22/2019 3:56 GMT
Tagged: Cloud, Containers, Microservices, APIs

Microservices and serverless are more popular than ever with teams around the globe adopting these patterns and architectures at an extremely high rate. However, the first thing that many teams find out when working with microservices and serverless at scale is that you soon end up with a pretty complex series of endpoints that need to be managed for your front end and mobile APIs. For that reason, many teams adopt an API Gateway to simplify the backend and act as a "single point of entry" for all clients. API Gateways also give you the ability to easily implement things like rate limiting, CORS and authentication in your architecture since you can address those at the gateway level instead of the individual function or service.
In this post we will take a look at one of the newest offerings in the Oracle Cloud - API Gateway.
We'll do the following things:
- Create and deploy a "hello world" serverless function
- Create a subnet suitable for our API gateway
- Create a dynamic group and apply the necessary policies for API gateway
- Create the gateway
- Deploy a spec to the gateway
- Test the gateway
Create and deploy a "hello world" serverless function
I've blogged about Oracle Functions in the past: Getting Started (Quickly). The documentation is very helpful and there are plenty of other resources available to help you learn how to work with our hosted serverless option, so I won't go into how to set up your environment for serverless in this blog post. Please refer to those links if you need help and we'll move forward assuming you are familiar with Oracle Functions.
Let's create a simple serverless application and function and then deploy that function. The contents of this function don't matter at this time, we're just going to use the function to test out our gateway later on so we'll leave the "hello world" in the scaffolded function as is. The runtime doesn't matter much either here - it can be anything that is supported by Oracle Functions and the Fn Project.
fn create app gw-hello-world-app --annotation oracle.com/oci/subnetIds='["ocid1.subnet.oc1.phx..."]'
Successfully created app: gw-hello-world-app
We can invoke this function with the fn CLI at this point:
But we can't invoke the function directly via HTTP(s) without signing the request or using the OCI SDK. Try inspecting the function to get the invoke endpoint:

Note! Copy the id from the fn inspect call. This is the function OCID and we'll need it later!
Trying to invoke will end up returning a 401 Unauthorized:
But once we put our serverless function behind our gateway we can invoke it via HTTPS. Let's move on!
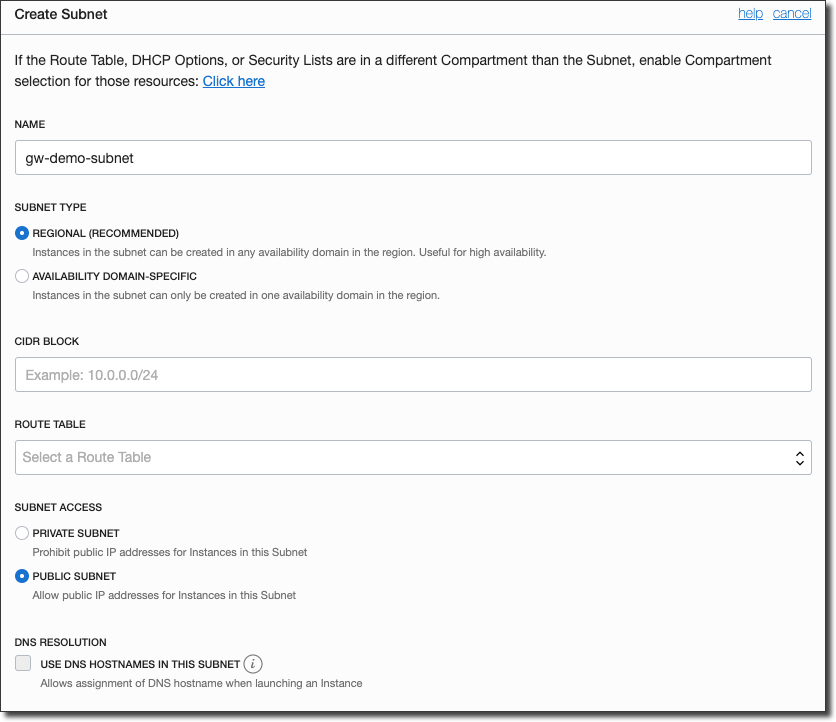
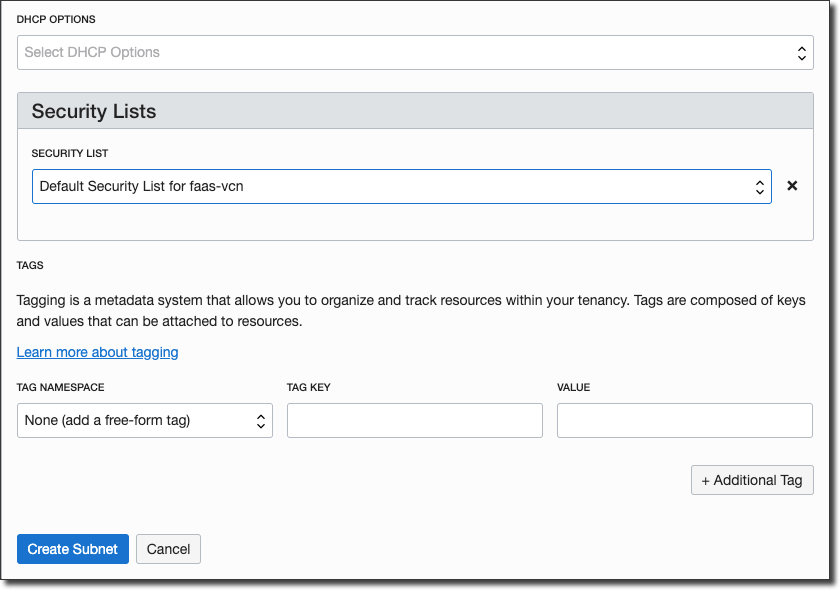
Create a subnet suitable for our API gateway
We'll need a regional subnet for our API gateway that has an ingress rule for HTTPS traffic, so let's create one now within an existing VCN.
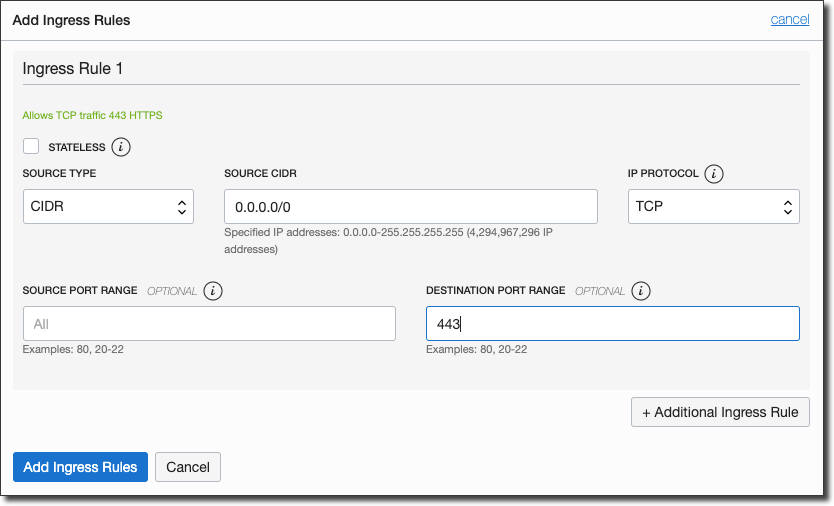
Now edit the chosen security list to add in ingress rule for port 443:
All done. On to security...
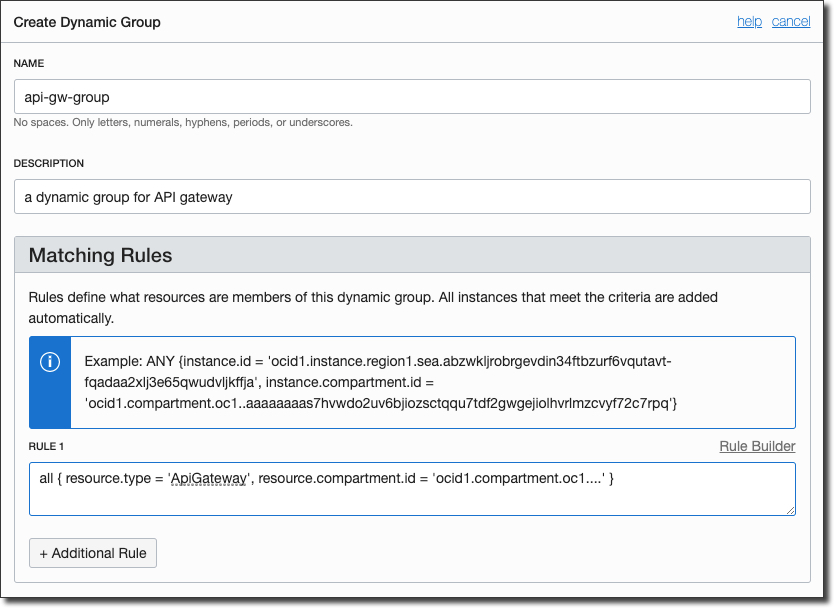
Create a dynamic group and apply the necessary policies for API gateway
The API gateway uses dynamic groups to manage access in your tenancy so we will need to create a new dynamic group and set some policies. We'll need the compartment OCID for the compartment that we're going to create our gateway within, so hit Identity -> Compartments and copy the OCID that you are planning to use. Next, create a new dynamic group with the following definition (substituting the proper compartment OCID):
Now we'll need to create a policy that is specific to your tenancy and the newly created dynamic group. You'll need to substitute your own group name and compartment name as appropriate:
For reference, here's how those statements look in my tenancy:
Update: You can now skip the dynamic group creation by changing your policy definition like so:
Now, let's create the gateway!
Create the gateway
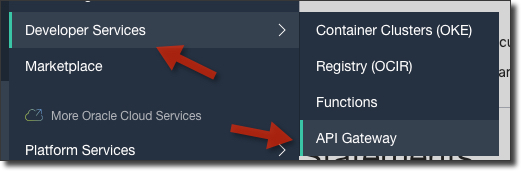
To create the gateway, first select 'API Gateway' under 'Developer Services' in the sidebar menu:
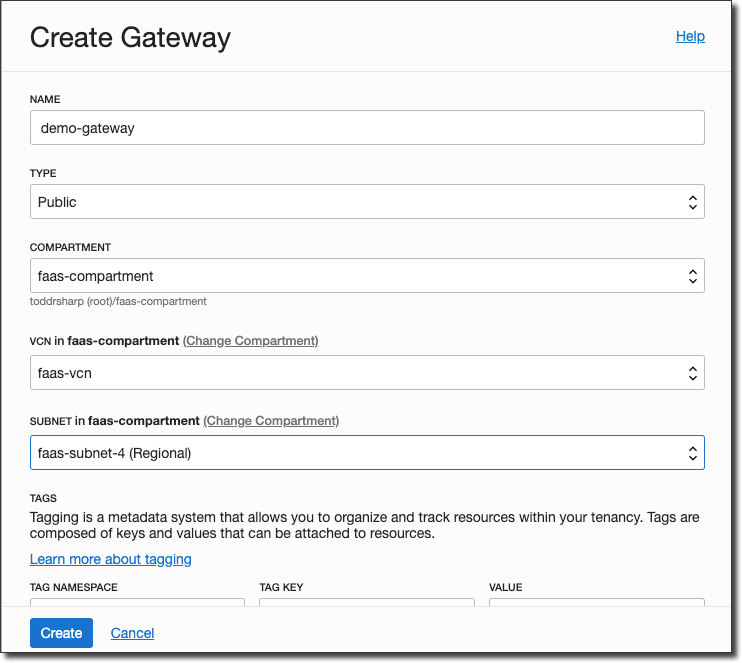
Click 'Create Gateway' and populate the dialog, making sure to choose the regional subnet that we created earlier.
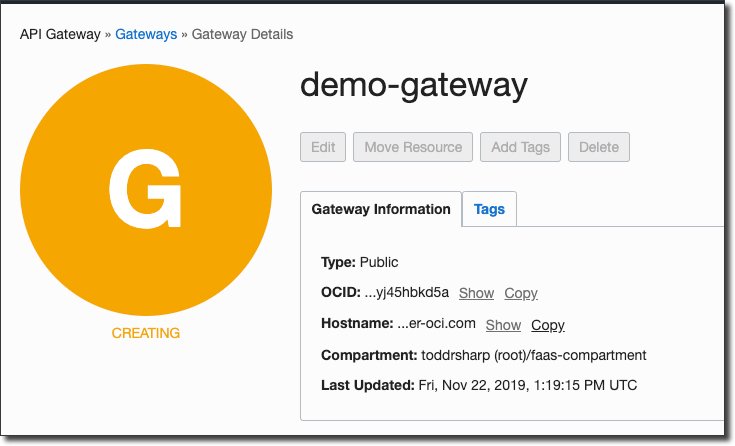
The gateway will initially be in a 'Creating' state.
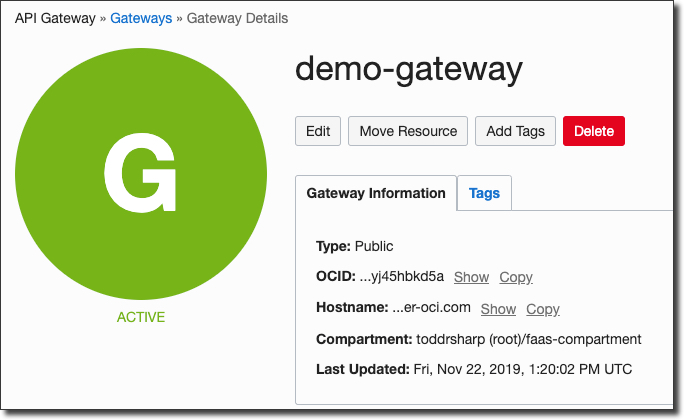
After a minute or so, the gateway will be 'Active'.
Deploy a spec to the gateway
Before we can create a deployment we will need to craft a deployment spec file in JSON format to define our endpoints. Make sure you have the function OCID from above handy. Now, create a file called spec.json in the root of your function and populate it as follows (substitute your function OCID):
There'll be a handy way to define your endpoints via console UI later on, but for now in the LA period we must define our endpoints via manual JSON.
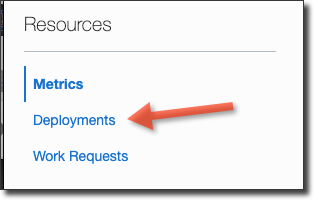
Next, click 'Deployments' in the sidebar of the gateway details page.
Then click 'Deploy API'.

Name the deployment, choose our spec.json that we created and enter a path prefix.
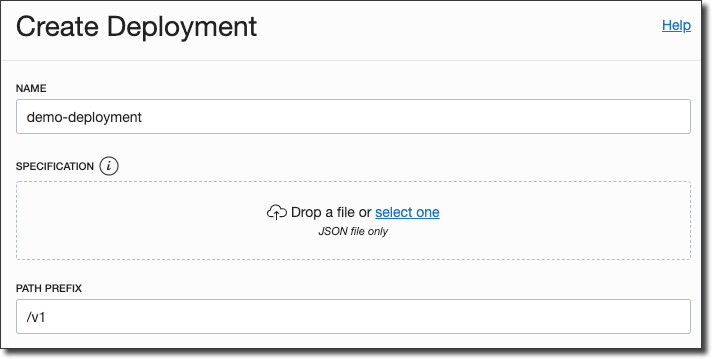
Click 'Deploy' and after a few moments your deployment is complete.
Test the gateway
On the gateway details page, take note of the endpoint.
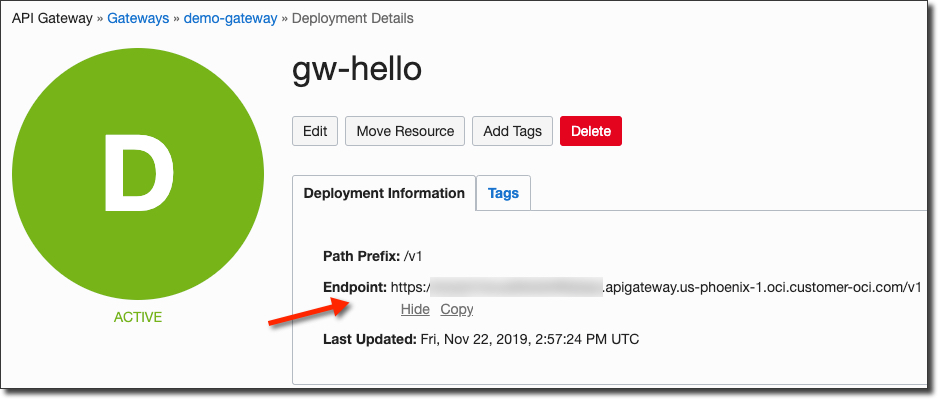
To test your function, copy the endpoint and append the path that we defined in the spec.json file and give it a shot!
This is just the beginning of what can be done with API Gateways. You can extend your deployment spec with additional functions, HTTP endpoints (on the Oracle Cloud or external), rate limiting, authentication and much more.
Photo by Masaaki Komori on Unsplash
Related Posts

Querying Autonomous Database from an Oracle Function (The Quick, Easy & Completely Secure Way)
I've written many blog posts about connecting to an Autonomous DB instance in the past. Best practices evolve as tools, services, and frameworks become...

Brain to the Cloud - Part III - Examining the Relationship Between Brain Activity and Video Game Performance
In my last post, we looked at the technical aspects of my Brain to the Cloud project including much of the code that was used to collect and analyze the...

Brain to the Cloud - Part II - How I Uploaded My Brain to the Cloud
In my last post, we went over the inspiration, objectives, and architecture for my Brain to the Cloud project. In this post, we'll look in-depth at the...