Blast Off To The Cloud: Free Team Chat With Rocket.Chat In The Oracle Cloud
Posted By: Todd Sharp on 11/4/2019 1:00 GMT
Tagged: Cloud, Open Source

Just about every single company these days uses some sort of chat application for team-based communications. And it's not just our workplaces. Conferences, organizations, colleges, schools - you name it, and I'm willing to bet they are using something to keep in touch. There are a few major players in the world of communications apps, but most of them aren't free or open source. But that doesn't mean you're stuck paying licensing fees for your organization. There are a handful of really nice alternatives out there that are both free and open source if you're willing to install it yourself and maintain the installation (it's not hard - trust me). So that means for the price of a VM, some storage and bandwidth you can get a team chat solution online quickly and easily. And if you've read any of my other blog posts recently then you'll know what I'm about to tell you. That's right, with the Oracle Cloud "always free" tier you can get up and running for absolutely nothing. Zero dollars.
Today we're going to look at one of the major players in the free, open source, team-based communication and collaboration market: Rocket.Chat. We're going to do the following (but feel free to skip ahead if you know how to create a VM already):
- Create An Always Free VM
- Before You Install Rocket.Chat
- Install Rocket.Chat
- Configure Oracle IDCS As An Auth Provider
- Use Oracle Object Storage For Upload Storage
Create An Always Free VM
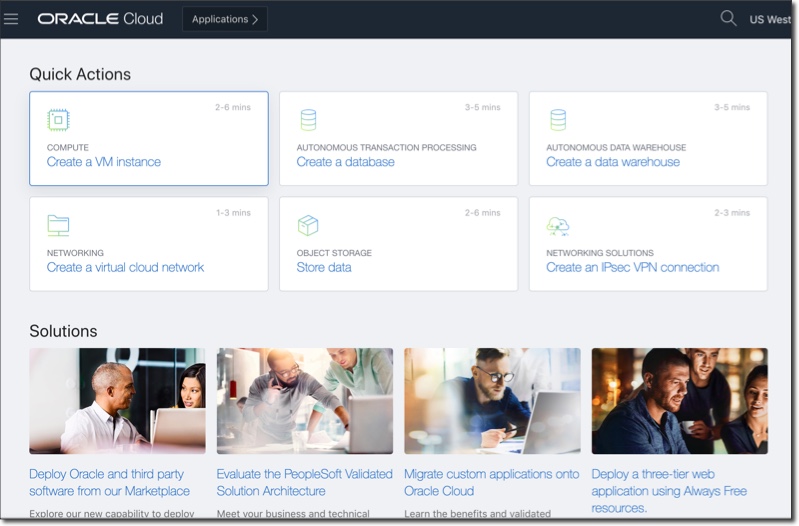
If you're new to Oracle Cloud, you'll have to first sign up for a completely free account. You'll need to have a credit card on file, but you'll absolutely never be charged if you stick to the "always free" services. Once you've signed up for your free account, log in and head to the Oracle Cloud dashboard. It looks like this:
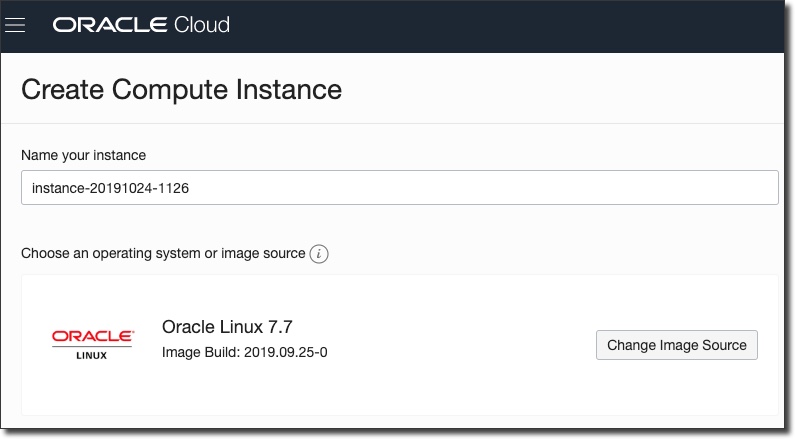
Let's create a VM. Click on 'Create a VM instance':

Give your instance a name and optionally change the image source. The instructions below will be for the default OS which is Oracle Linux, so it's probably best to stick with the default.
If necessary, click 'Show Shape, Network, Storage Options' and make sure the Availability Domain and Instance Type are both 'Always Free Eligible'.
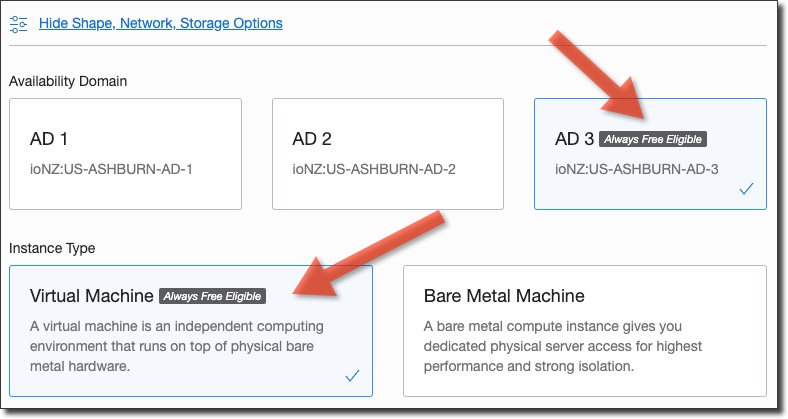
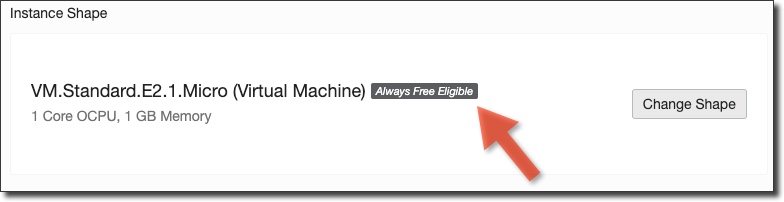
Same thing goes for the instance shape - choose the 'Always Free Eligible' option.
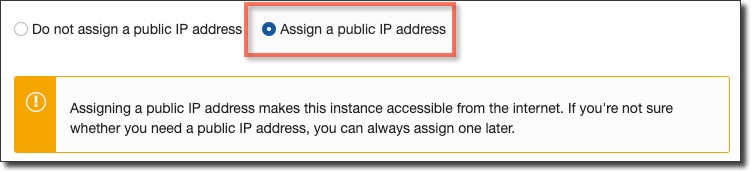
Make sure to check 'Assign a public IP address' otherwise you will not be able to access the VM via the web!
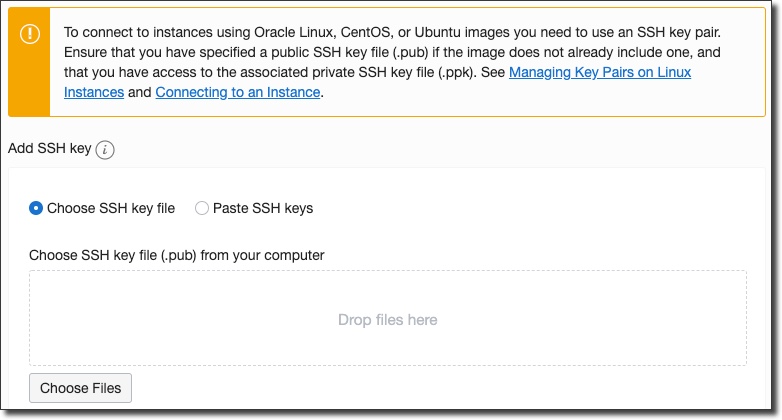
Next, choose a public key file that has an associated private key that can be used to access this VM after it is created.
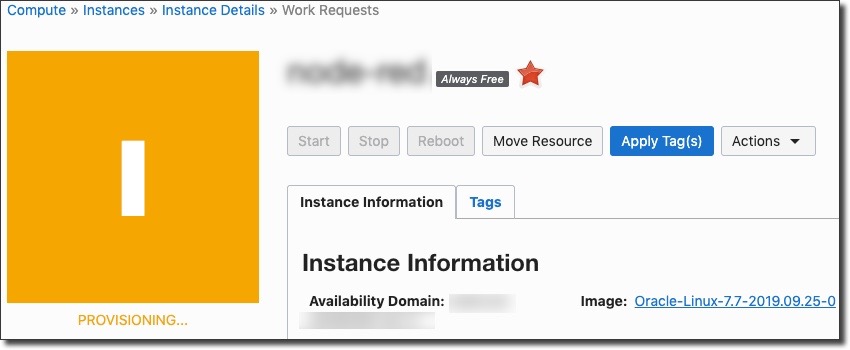
Click on 'Create' and you'll be directed to the instance details page and the VM will be in a 'Provisioning' state:
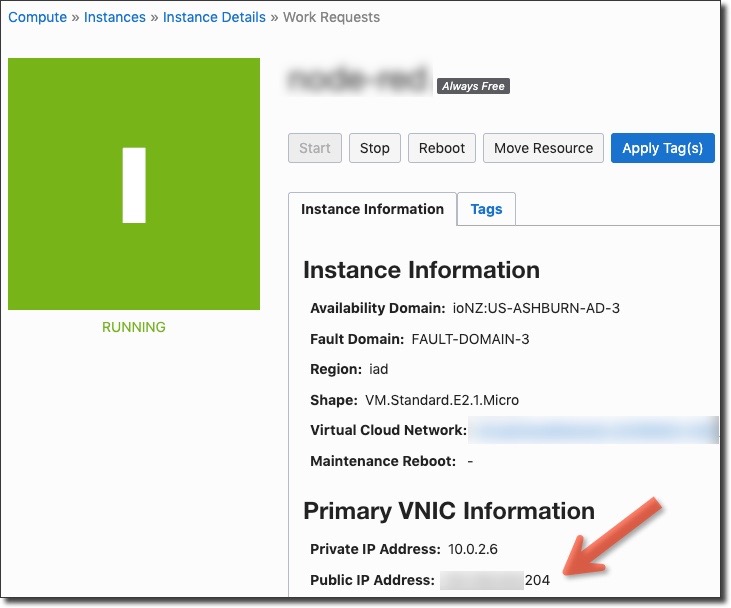
After a short wait the instance will become 'Available'. Copy the public IP address that has been assigned to the VM. We'll need this as we move on in this tutorial.
Your VM is now ready to go. You can now SSH in to the machine using the private key associated with the public key you uploaded when you created the VM.
Before You Install Rocket.Chat
We'll need to take care of a few items before we can start the Rocket.Chat install. If you skip this step your install will certainly fail.
Domain Name Record Set
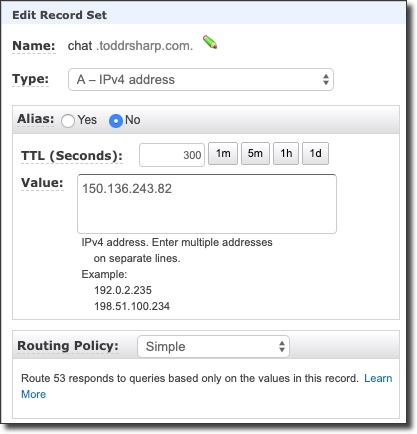
The first thing we'll need to do is associate our VM's public IP address with a domain name. Rocket.Chat will give us free SSL out of the box by creating a reverse proxy with Caddy which makes use of Let’s Encrypt to automatically provide you SSL protection for your communications. In my case, I'm going to use the URL chat.toddrsharp.com, so I'll add an A record with my DNS host to point at my VM's IP address:
Follow the directions of your particular hosting provider to point a domain (or subdomain) at your VMs IP address and you're ready to SSH in to the VM and continue the process.
Configure Firewall And Security List
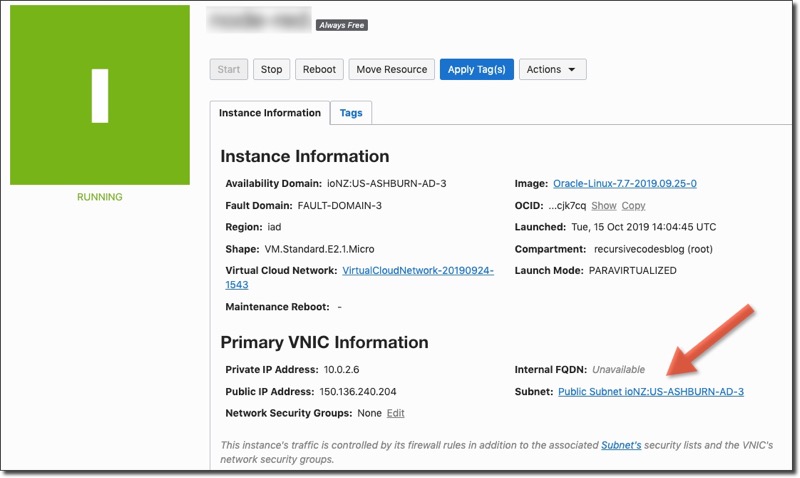
We'll need to open some ports in our firewall and security list to expose the Rocket.Chat application to the web, so let's start by add some ingress rules to our VM security list in the Oracle Cloud dashboard. From the VM details page, click on the subnet:
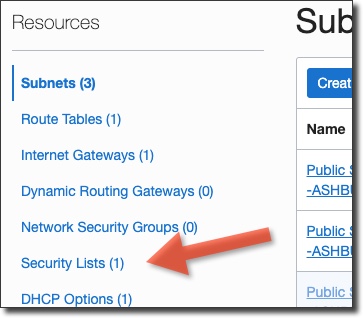
On the subnet details page, click on 'Security Lists'.
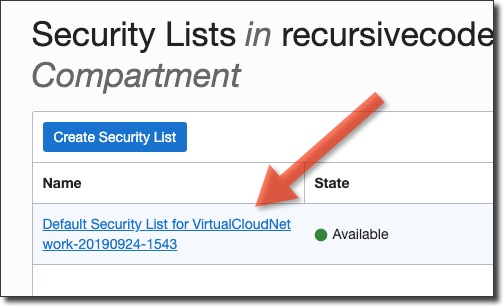
Click on the default security list to edit the rules.
Click 'Add Ingress Rule' and enter a rule to open ports 80,443 to the 'Source CIDR' 0.0.0.0/0 (all IP addresses):
 Ø
Ø
Install Rocket.Chat
At this point we've got a VM up and running with a security list that allows ports 80 and 443. Let's SSH in to the VM and handle a few quick tasks before we start the install process. The first task will be to make sure everything is up to date with a sudo yum update -y. Next, make sure the VM firewall has an opening for the same ports that we created ingress rules for:
Prepare For Install
We'll be using Snappy to install Rocket.Chat, so let's get that installed first. Enable EPEL with the following:
Now we'll install snap with the following instructions (via):
With the EPEL repository added to your installation, simply install the snapd package:
sudo yum install snapd
Once installed, the systemd unit that manages the main snap communication socket needs to be enabled:
sudo systemctl enable --now snapd.socket
To enable classic snap support, enter the following to create a symbolic link between /var/lib/snapd/snap and /snap:
sudo ln -s /var/lib/snapd/snap /snap
Either log out and back in again or restart your system to ensure snap’s paths are updated correctly.
Install Rocket.Chat Server
The install process is really easy. If you need to refer to the official install instructions you can refer to them here, but to start the install you just need to run:
sudo snap install rocketchat-server
And just wait a few minutes for the install to complete.
Configure Caddy For HTTPS
Because everyone loves TLS, we'll take the next step and configure our Rocket.Chat install to use HTTPS for communications by using the Caddy integration. Again, the official documentation can be referred to if you get stuck, but here is what it takes (assuming you've opened the necessary firewall ports, created ingress rules and have a proper domain pointed at your VM IP):
The official docs would have your run a different command at this point, but I found that it failed on Oracle Linux, so if you did not receive any errors run the following to complete the configuration:
If the init ran without error, restart the services:
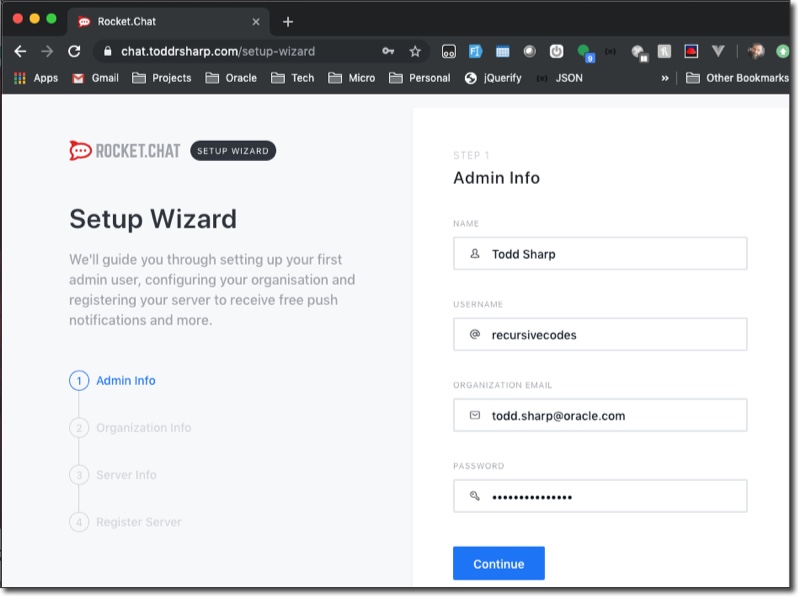
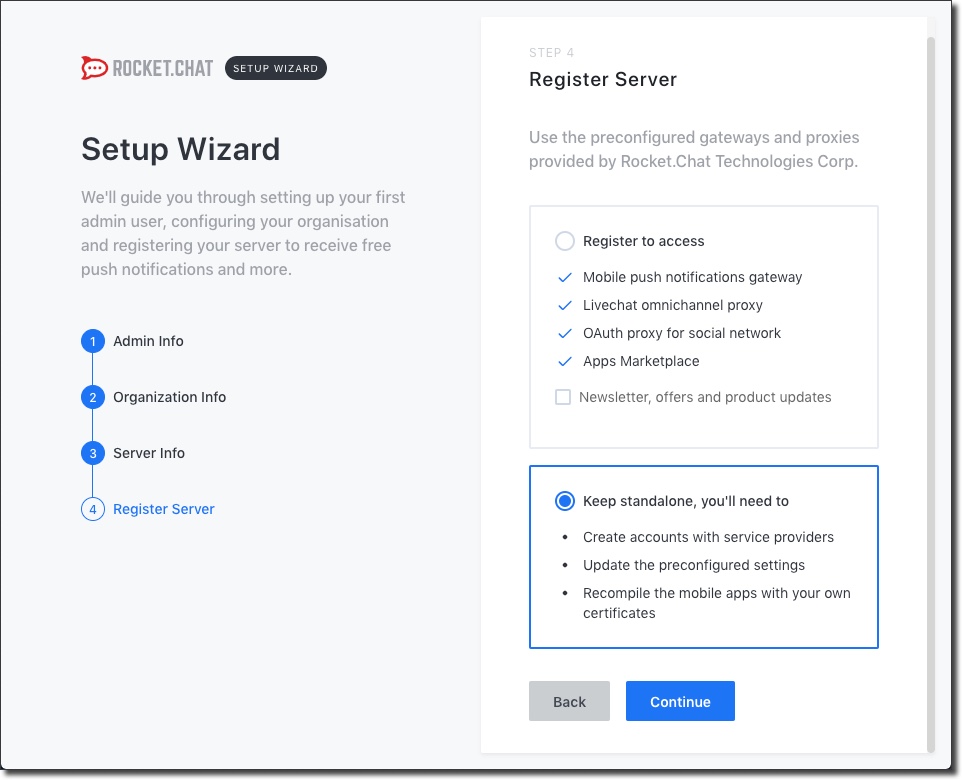
At this point your install should be ready to go at the domain you specified. Visit it in the browser and continue the setup.
In step 4, select 'Keep standalone':
Configure Oracle IDCS As An Auth Provider
This is certainly optional - you can use the built in user registration for Rocket.Chat if you would like to, but if your team or organization uses Oracle IDCS you can setup Rocket.Chat to use SAML. Follow the steps below (which are almost identical to the official docs) to configure SAML and IDCS.
Enable SAML In Rocket.Chat
You'll have to enable SAML in Rocket.Chat to get started.
Note: In this step, we'll enter a few values but leave some other values as their default. We'll come back to those other values later on.
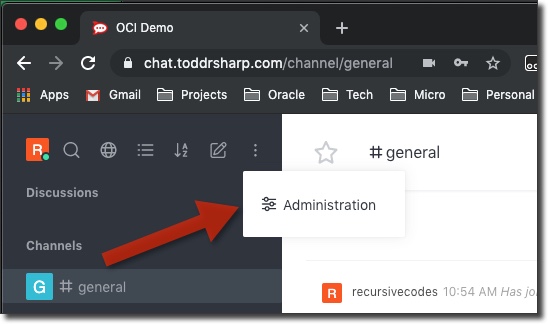
Log in to Rocket.Chat as an admin and go to the Administration section:
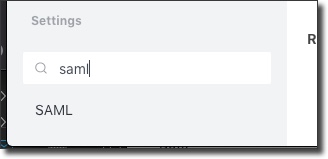
Search for SAML in the sidebar:
In the SAML settings, enable SAML. Next, enter a Custom Provider which is a simple name for your service, but it will be used in URL paths so avoid spaces. Finally, enter a Custom Issuer URL which follows the format https://[your domain]/_saml/metadata/[custom provider]. Save these changes.
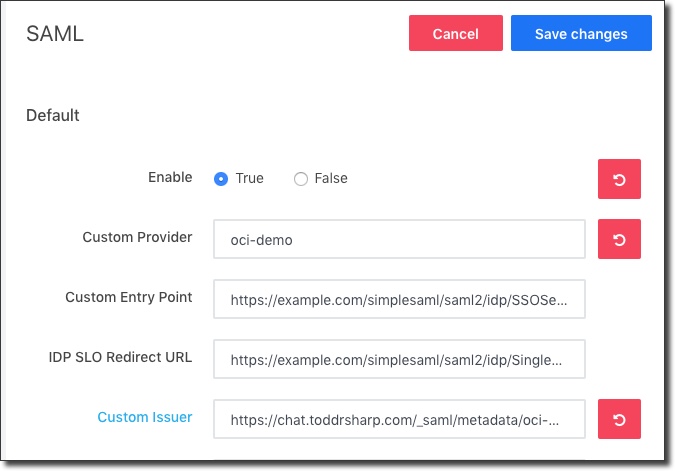
Next, open the exact URL that you used for the Custom Issuer in a new tab. We'll need some of the values from this XML file in the next step.
Create Application In IDCS
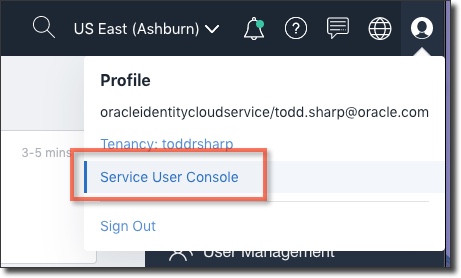
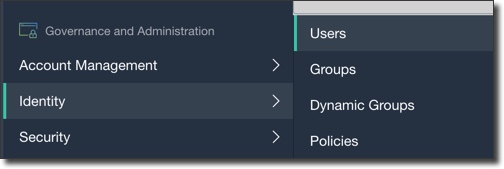
Let's head over to IDCS to add our application. If you're not sure how to get there, in the Oracle Cloud console, click on your user icon in the top right and select 'Service User Console':
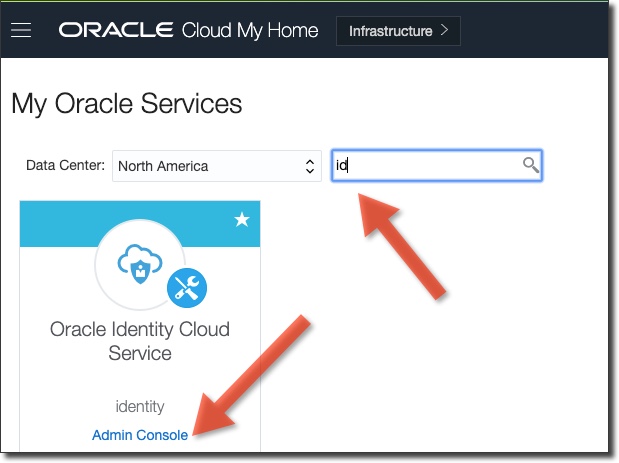
Next, search the list of services for 'id' and once you find the Oracle Identity Cloud Service select 'Admin Console'.
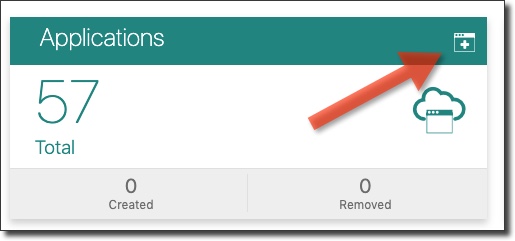
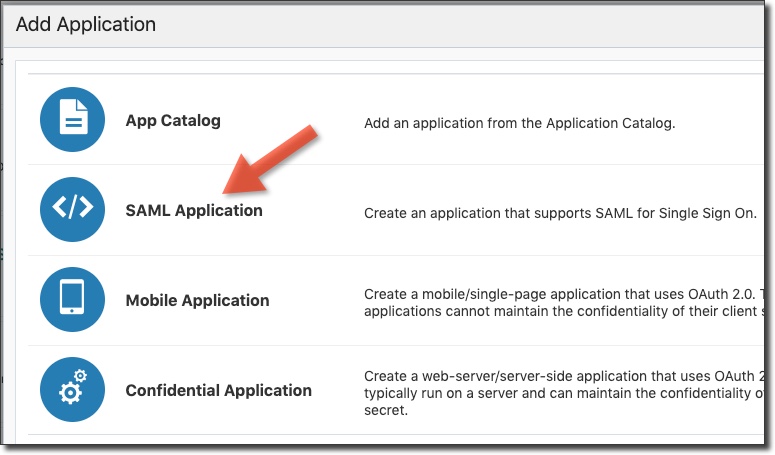
From the IDCS console, click on the 'Add Application' icon:
Choose 'SAML Application'.
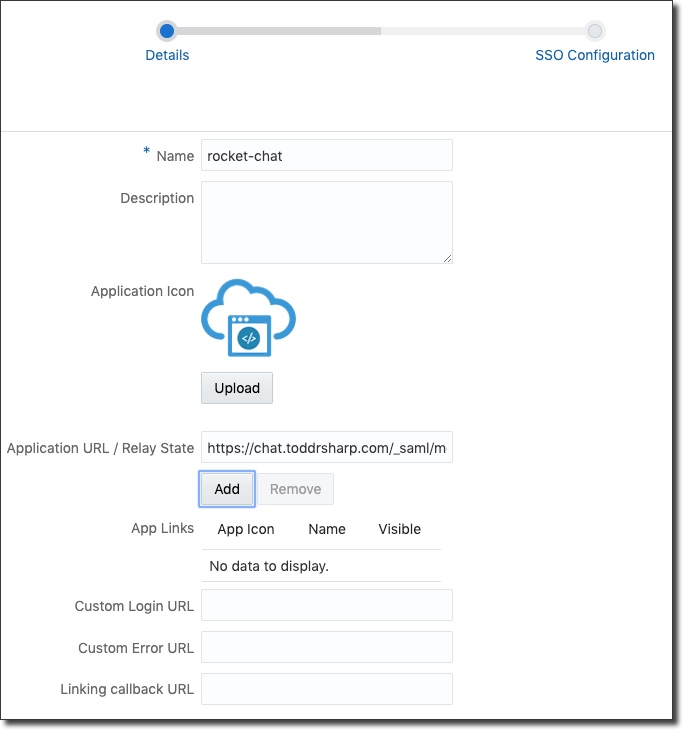
In your new application, give it a name and use the Custom Issuer as the Application URL/Relay State:
Click 'Next' to get to the SSO Configuration state. We're going to now look at the XML available at the Custom Issuer URL to grab the values for this section:
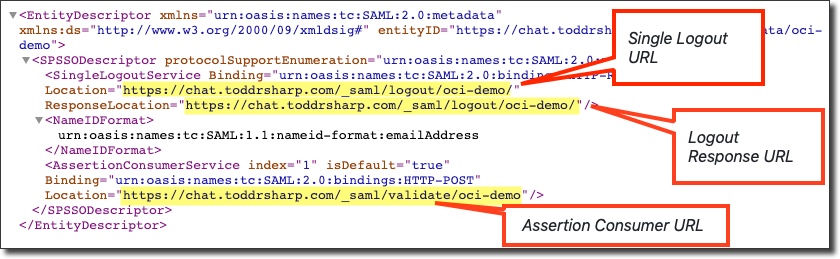
The entity ID is again the link to the Custom Issuer from earlier, and the Assertion Consumer URL, Single Logout URL and Logout Response URL can all be obtained from viewing the XML from the Custom Issuer (as shown in the image above).
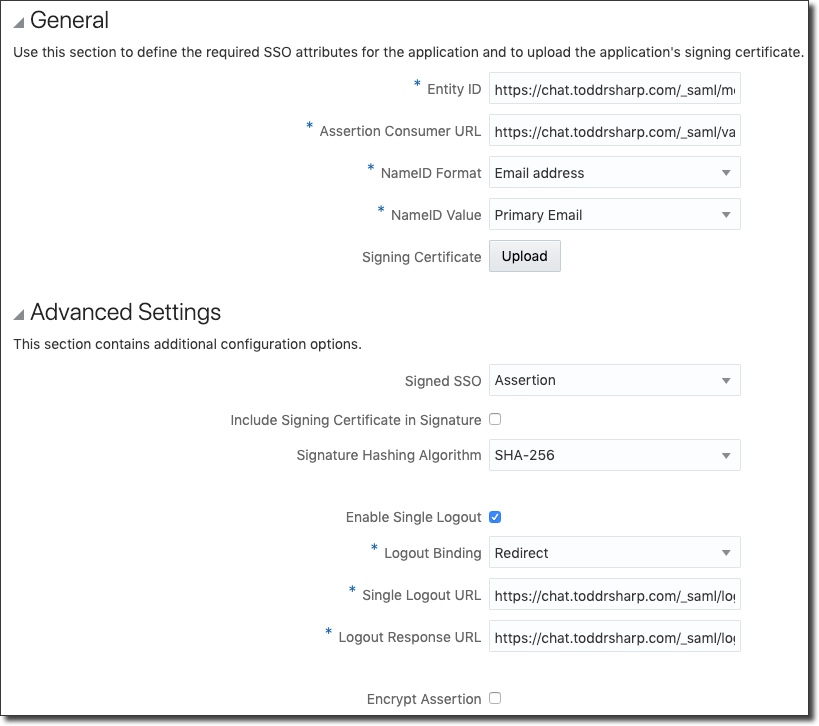
Before you click 'Finish', download the Identity Provider Metadata by clicking the button:
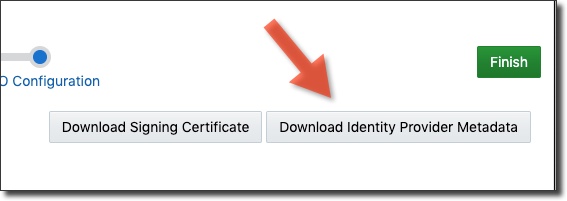
We'll use this XML file in the next step.
Update Rocket.Chat SAML Settings
Open the SAML settings back up. We're ready to populate the Custom Entry Point and IDP SLO Redirect URL:
Let's look at the identity provider metadata XML file that we just downloaded to grab the last two URL values and update the settings. Find the node labeled md:SingleLogoutService (highlighted yellow below) and grab the "Location" attribute and use it for the IDP SLO Redirect URL. Next, grab the "Location" attribute from the md:SingleSignOnService (highlighted green) and use that for the Custom Entry Point.
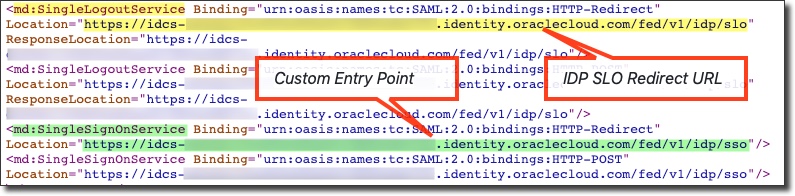
Note: There may be multiple nodes that match these, so make sure your grab URLs that contain /idp/sso and /idp/slo and not /sp/sso and /sp/slo in them.
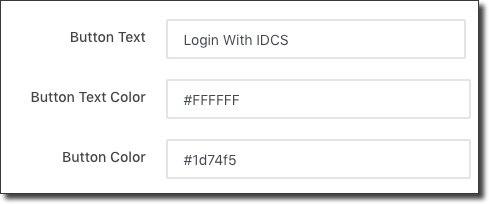
Scroll down a bit and customize the SAML button:
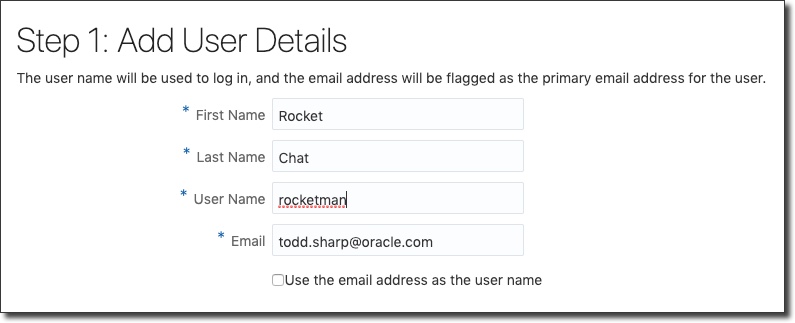
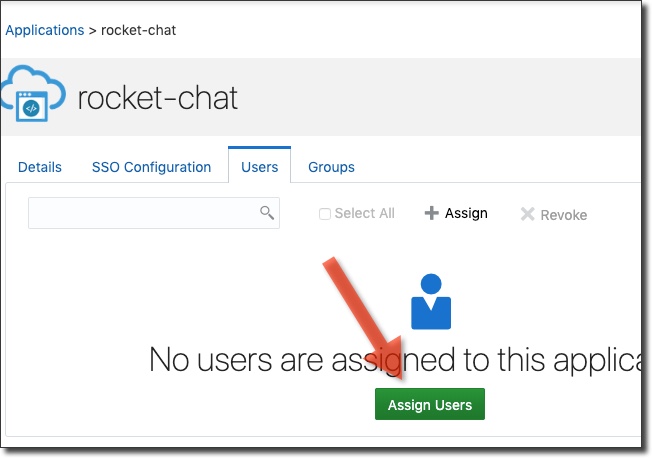
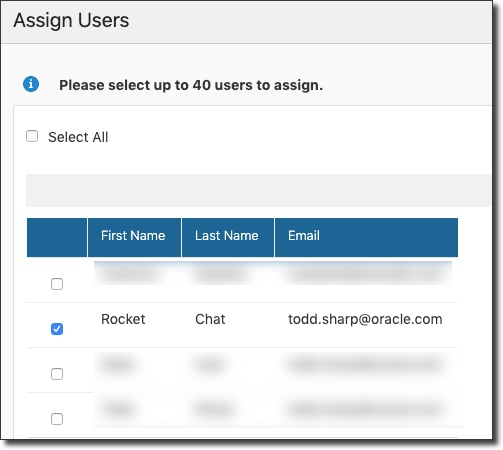
You're now ready to add users to your IDCS application.
And assign them to the application.
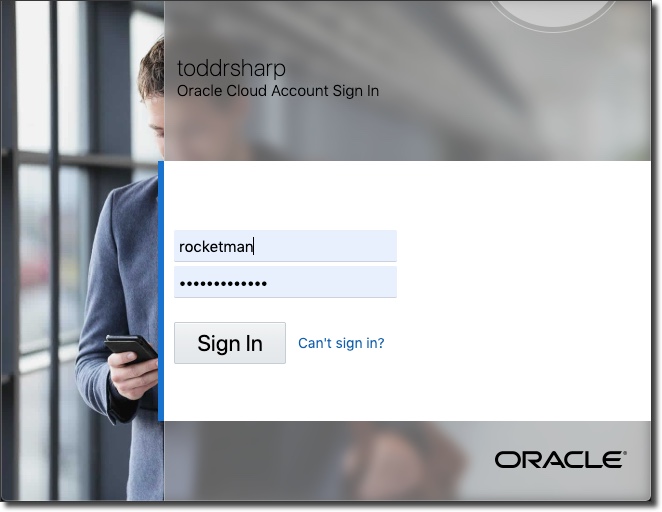
And use them to log in to Rocket.Chat:
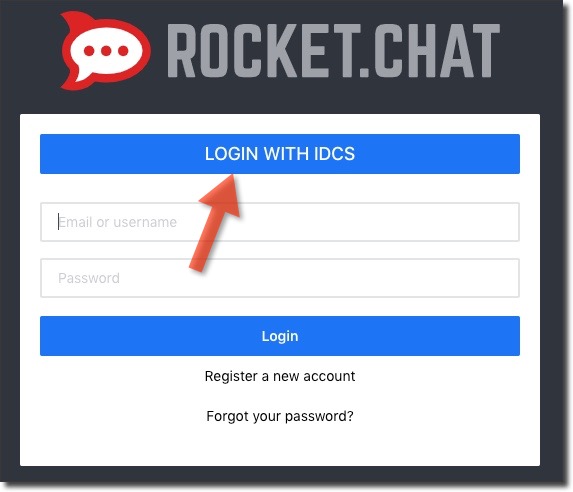
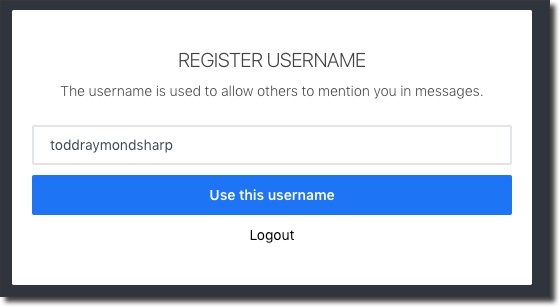
Upon first login, you'll be asked to register a username for Rocket.Chat.
Use Oracle Object Storage For Upload Storage
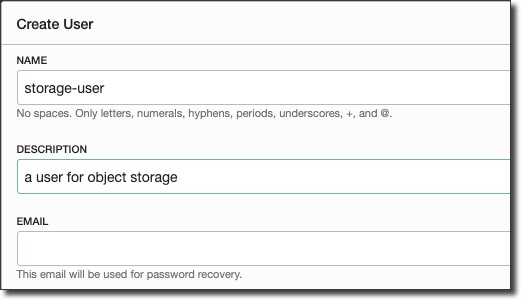
The always free includes 10GB of Object Storage. Rocket.Chat can utilize the OCI S3 compatible API to store uploads in your Oracle Cloud Object Storage buckets. Let's create a user for Object Storage, create a S3 compatible token.
Create Storage User & Credentials
Create a user:
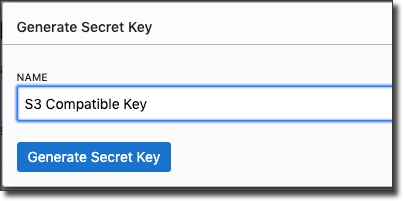
Click 'Customer Secret Keys' and then 'Generate Secret Key'.
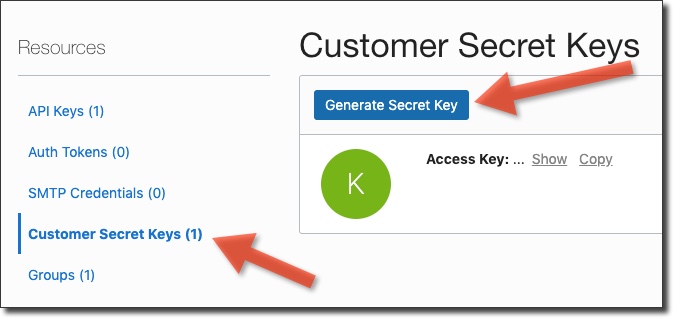
Enter a description for the key.
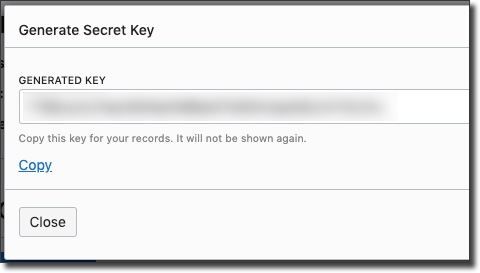
Copy the generated secret key (it won't be shown again):
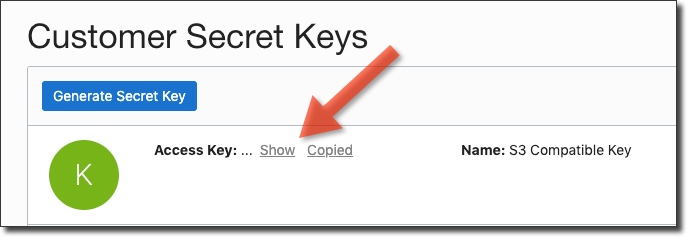
Then copy the corresponding access key:
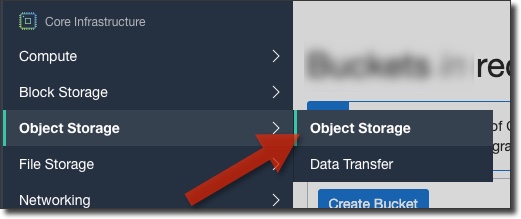
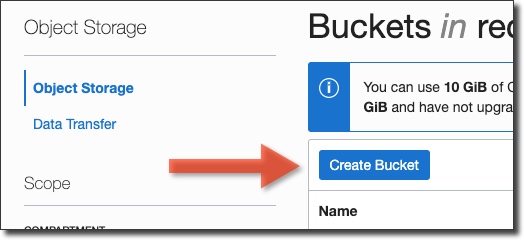
Create Object Storage Bucket
Click 'Create Bucket'.
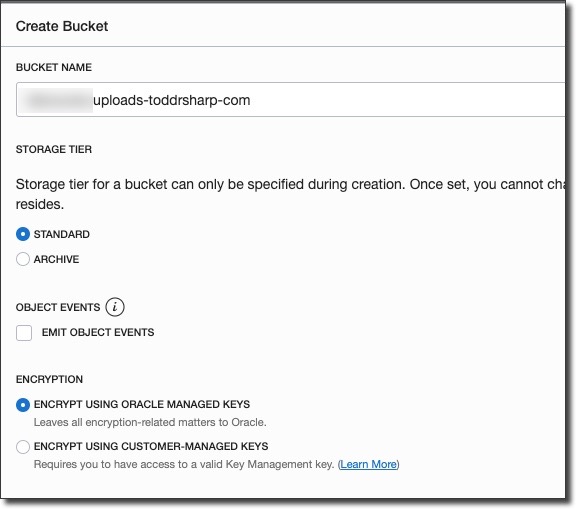
Enter a bucket name.
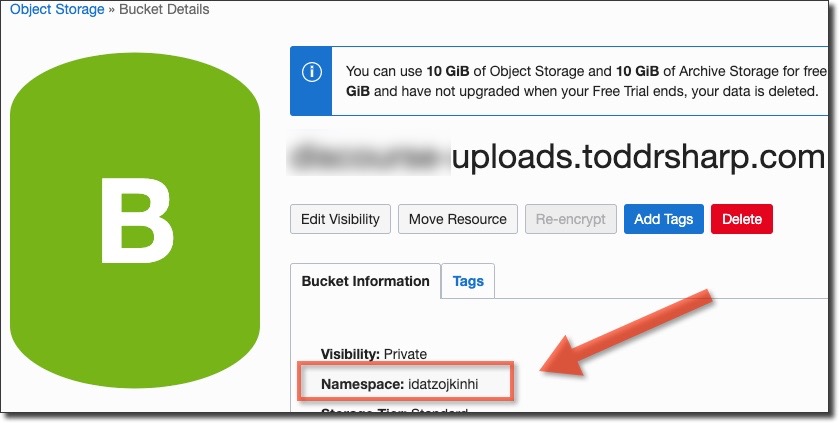
When your bucket is created, grab the 'namespace' from the bucket details.
Your upload endpoint will use the following format:
https://[namespace].compat.objectstorage.[region].oraclecloud.com
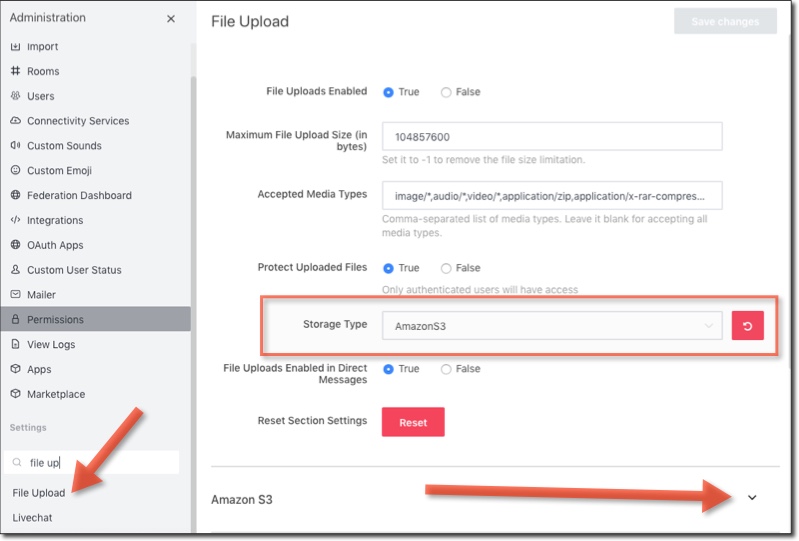
Now head to the Rocket.Chat admin and search for the 'File Upload' settings. Choose 'Amazon S3' as the Storage Type and expand the Amazon S3 section below:
Enter your Access Key, Secret Key, Region, Bucket URL (in the format shown above) and select True for Force Path Style:
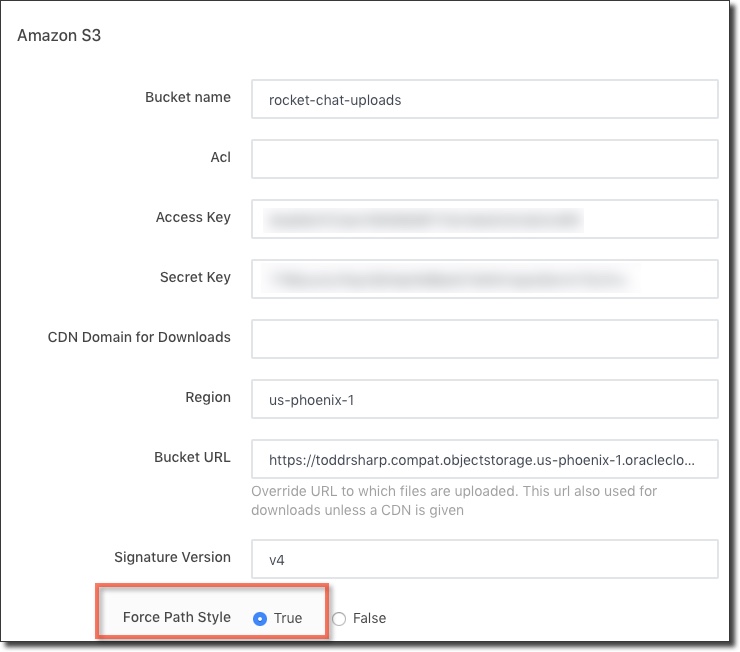
Save your settings and you're all set! All user file uploads will be stored and served from your Oracle Cloud Object Storage bucket.
Summary
In this post we created an always free VM, installed Rocket.Chat, configured it to use IDCS for authentication and Oracle Cloud Object Storage for uploads. If you'd like to see a demo of Rocket.Chat in action, register for an account and join the following channel:
https://chat.toddrsharp.com/channel/oci-chat
Chat with you soon!
Photo by John Baker on Unsplash
Related Posts

Querying Autonomous Database from an Oracle Function (The Quick, Easy & Completely Secure Way)
I've written many blog posts about connecting to an Autonomous DB instance in the past. Best practices evolve as tools, services, and frameworks become...

Brain to the Cloud - Part III - Examining the Relationship Between Brain Activity and Video Game Performance
In my last post, we looked at the technical aspects of my Brain to the Cloud project including much of the code that was used to collect and analyze the...

Brain to the Cloud - Part II - How I Uploaded My Brain to the Cloud
In my last post, we went over the inspiration, objectives, and architecture for my Brain to the Cloud project. In this post, we'll look in-depth at the...