Microservices The Easy Way With ORDS And Micronaut - Part 1
Posted By: Todd Sharp on 7/15/2019 12:00 GMT
Tagged: Cloud, Containers, Microservices, APIs, Java

What if I told you you could write a microservice that doesn't use ORM without a single SQL statement in your application code?
I have to admit, I've been pretty excited to write this next few posts in this microservice blog series. It's not that I haven't been excited about the content so far - I have - but, the next approach that I'll be sharing I fully believe is quite different than any approach being used today. I believe it has great potential to make your microservices very easy to write, manage and deploy and it involves very little SQL code at all (and none in the application itself). To change things up, we're going to use Micronaut instead of Helidon. You'll see later on what makes Micronaut a perfect choice for this approach.
If you are new to this blog series, you may want to catch up on some of the previous posts before we dig into the next topic. Here is what we have looked at so far:
- Intro
- Getting Started With Kubernetes And Docker
- Getting Started With Autonomous DB
- Building A Helidon Microservice Part 1
- Building A Helidon Microservice Part 2
- Building A Helidon Microservice Part 3
At the very least, make sure you've got a Kubernetes cluster, Docker registry and ATP instance ready to go.
Intro To ORDS
OK, let's dig in! For this part of the series we're going to utilize something called Oracle REST Data Services (ORDS) to expose our SQL table with secured REST endpoints that can be used to read and write to and from that table. Much has been written about ORDS and it is not a new product, but the ability to utilize ORDS on an Autonomous DB instance is new. If you're looking for a deep dive on ORDS then I highly suggest you check out Jeff Smith's blog as he has a great deal of content on the product including a complete intro and overview of ORDS on Autonomous DB. Don't worry, I'll cover some of the same material here that Jeff covers, but it will be more focused on our specific application that we're going to create.
We're going to recreate the same service - a simple user service - that we created in the Helidon part of this series, but this one will utilize ORDS instead of Hibernate for persistence. To get started, open up SQL Developer Web (instructions here) so we can create and configure everything. Right, let's get to it then.
The first thing we need to do here is create our database schema/user. You may have already done so if you've followed the Helidon posts, and if so please note that you'll need two additional GRANT statements (CONNECT and RESOURCE) for this approach.
Now we'll create the table. Again, you may have done this already if you followed the previous series of posts. If so, drop that table and re-create it with the following DDL as it is slightly different (but won't negatively affect your previous microservice other than wiping the data you may have already persisted).
Now we need to REST enable both the schema and the users table. We can do that with the following:
Note: The argument p_auto_rest_auth being set to FALSE means that all unauthenticated requests will return a 401 Unauthorized meaning we'll have to send credentials with each REST call. Let's create some privileges and register a client so that we can obtain the necessary credentials:
Next, create an oauth client associated with the privilege:
Grant the SQL Developer role to the client application:
You can now grab the client_id and client_secret with:
The client_id and client_secret can be used to generate an auth token for REST calls (the application code will handle this for you). To run the microservice, we'll need the client_id and client_secret set as environment variables to run the application, but we'll handle that later on. For now, save them somewhere and we'll come back to them.
Checkpoint
At this point we've Auto REST enabled our table and secured it so that it can only be accessed via OAUTH. So what does this mean? Well, out-of-the-box, Auto REST enabling a table will give you endpoints to perform the following actions:
* GET (by ID)
* GET (all - with pagination support)
* POST (new record)
* PUT (update record)
* DELETE (by ID)
In addition to the "out-of-the-box" support for CRUD operations, we can add our own custom services to perform additional operations. For example, if we wanted to return a single user based on their username, we could define a service for that operation like so:
Testing Our Endpoints
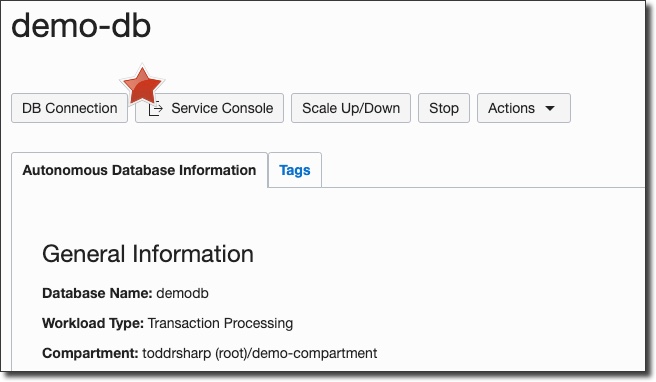
We can test these out before we start writing our application code. Start by logging in to our Oracle Cloud console and viewing the details of our ATP instance. From the details page, click on 'Service Console':
Within the service console, click on 'Administration' (#1) and then SQL Developer Web (#2).
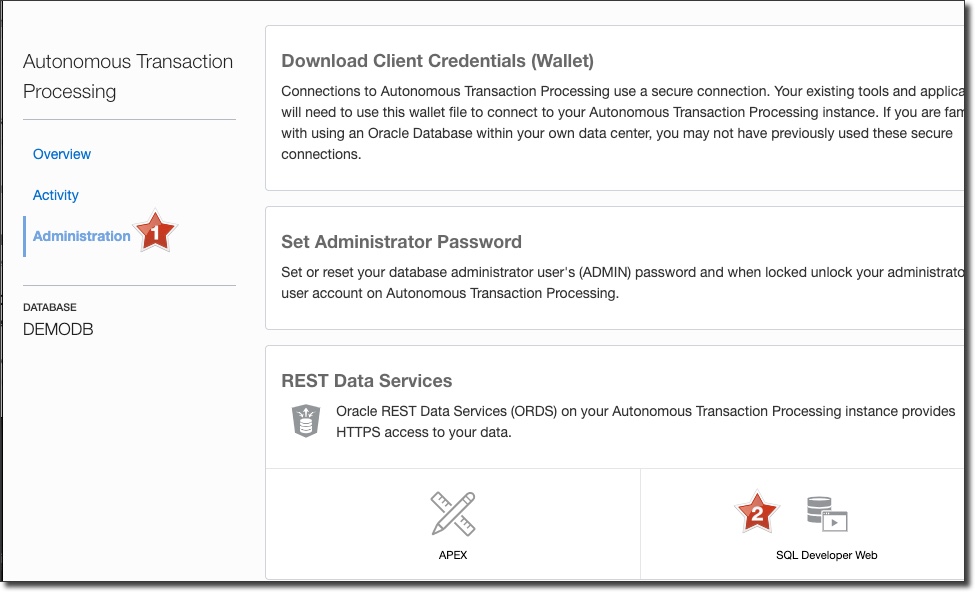
Your SQL Developer Web url should look something like this:
https://[random chars]-demodb.adb.us-phoenix-1.oraclecloudapps.com/ords/admin/_sdw/?nav=worksheet
From here we can grab out ORDS base URL, so copy everything before /admin:
https://[random chars]-demodb.adb.us-phoenix-1.oraclecloudapps.com/ords/
This is the base URL for our ORDS services. Let's grab an auth token first with a CURL call. We'll need our client_id and client_secret from earlier:
Which will return a response similar to this:
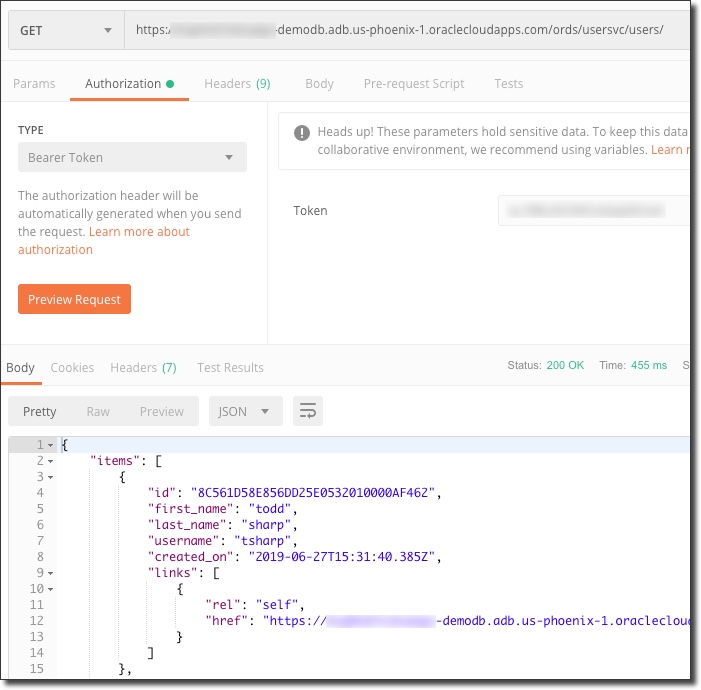
This auth token expires in one hour and can now be used to make calls against the REST endpoints. Let's test those out before we move on to the application code. It's easiest to use a tool like Postman so that we can visualize the results. Set the auth token as a "Bearer" token in Postman and try each endpoint.
To get all users (GET request to /ords/usersvc/users/) returned as an array within the 'items' key. Note, by default you'll only get 25 records. See the next example for how to control pagination.
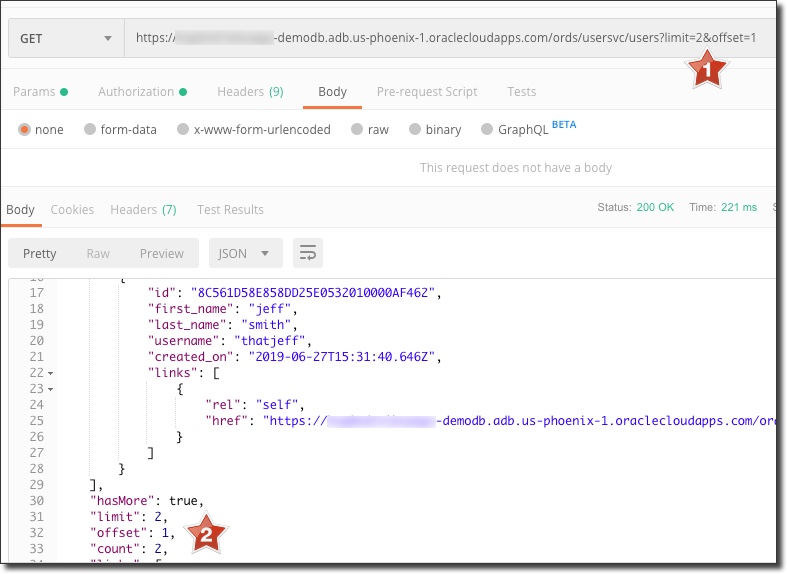
To use pagination (GET request to /ords/usersvc/users?limit=2&offset=1) returns an object containing items and pagination related information:
To get a single user (GET request to /ords/usersvc/users/{userid}) returned as a JSON representation of the user:
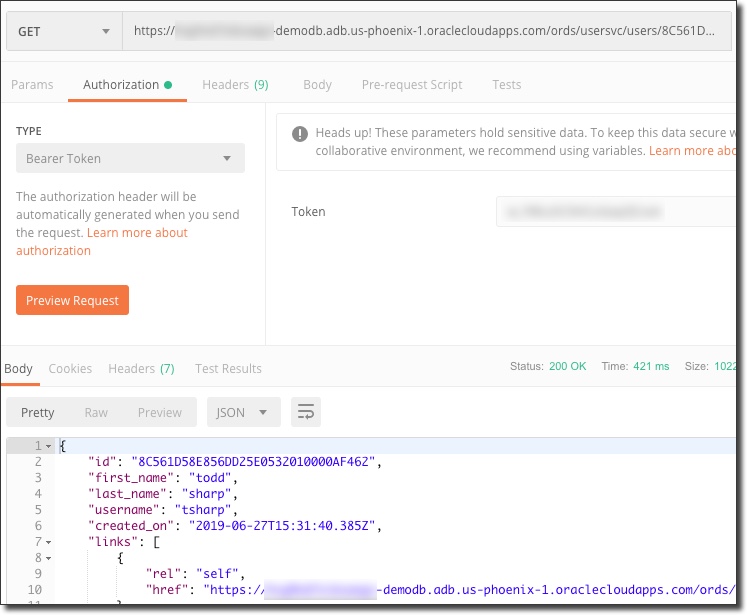
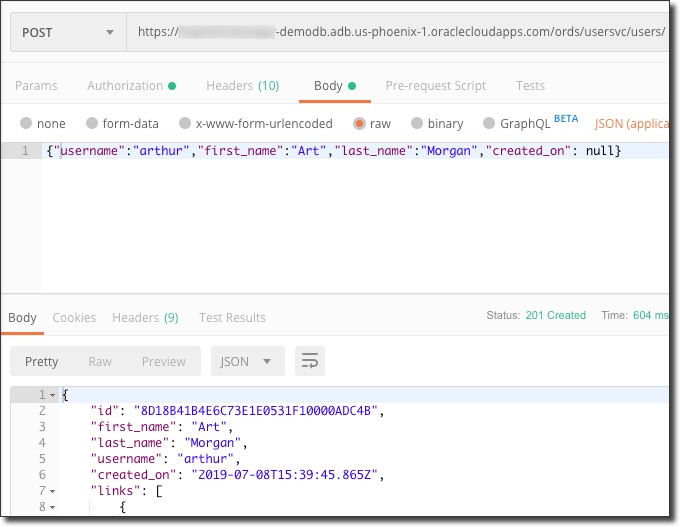
To create a new user (POST a JSON representation of the user in a request to /ords/usersvc/users/) returns with 201 Created as a JSON representation of the user:
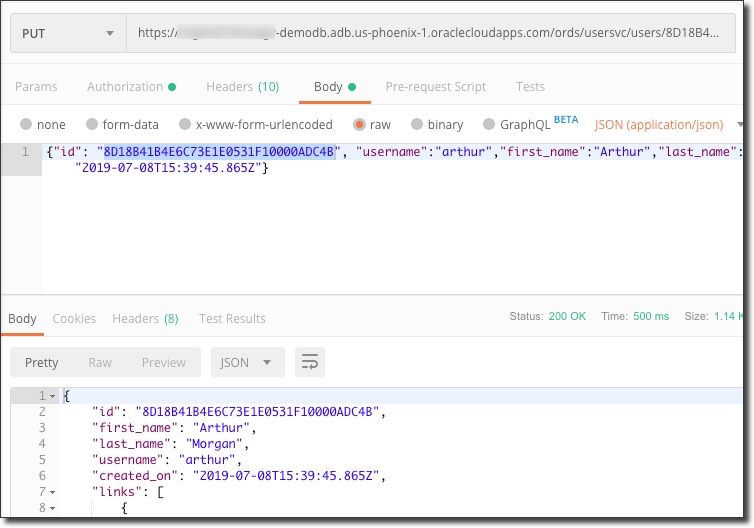
To update a user (PUT request a JSON representation of the user to /ords/usersvc/users/{userid}) returns 200 OK:
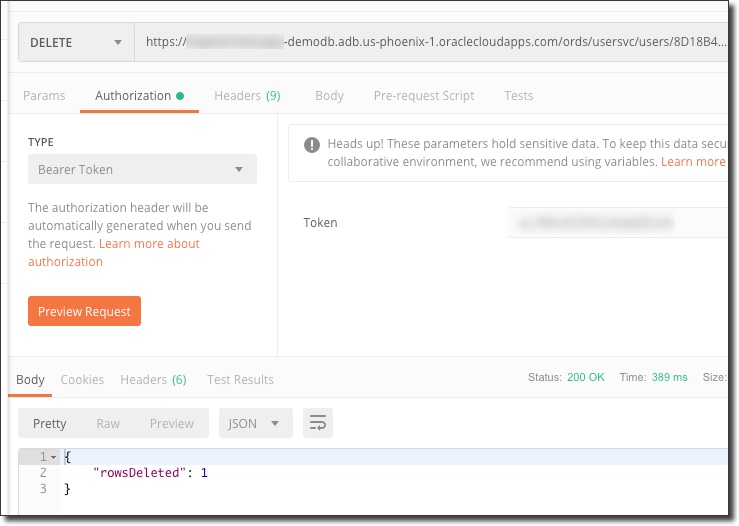
To delete a user (DELETE request to /ords/usersvc/users/{userid}) returns 200 OK and the count of rowsDeleted:
Summary
At this point we have a fully functioning set of REST endpoints that we can use to perform CRUD operations on our user object. In the next few posts we'll create the Micronaut application that interacts with these endpoints, performs validation and exposes them as a Kubernetes deployed microservice.
Photo by Shiro hatori on Unsplash
Related Posts

Querying Autonomous Database from an Oracle Function (The Quick, Easy & Completely Secure Way)
I've written many blog posts about connecting to an Autonomous DB instance in the past. Best practices evolve as tools, services, and frameworks become...

Sending Email With OCI Email Delivery From Micronaut
Email delivery is a critical function of most web applications in the world today. I've managed an email server in the past - and trust me - it's not fun...

Brain to the Cloud - Part III - Examining the Relationship Between Brain Activity and Video Game Performance
In my last post, we looked at the technical aspects of my Brain to the Cloud project including much of the code that was used to collect and analyze the...