Building And Deploying A Helidon Microservice With Hibernate Part 3
Posted By: Todd Sharp on 7/9/2019 12:00 GMT
Tagged: Cloud, Containers, Microservices, APIs, Developers, Java

We've taken quite a journey in this blog series so far - from getting our cloud tenancy ready for our microservice deployment, to writing our first microservice application using Helidon. In this post we'll finally get our microservice deployed to the Oracle Cloud, but if you're new to the series then you might want to catch up on where we've been so far.
- The Complete Guide To Getting Up And Running With Docker And Kubernetes On The Oracle Cloud
- The Complete Guide To Getting Up And Running With Autonomous Database In The Cloud
- Building And Deploying A Helidon Microservice With Hibernate Part 1
- Building And Deploying A Helidon Microservice With Hibernate Part 2
The first step in deploying our microservice to the Oracle Cloud is to build a Docker image containing our application and push that image to our OCIR Docker Registry that we configured previously. When we scaffolded the Helidon application from the Maven archetype you may or may not have noticed, but Helidon gave us a Dockerfile and app.yaml out of the box that looked similar to this:
If we had made no changes to the application we could have used that Dockerfile to build and push an image, but since we've made some changes we'll need to modify it a bit to work with our application. We're going to add and install the OJDBC dependencies locally so they can be included in our build. The other modification we'll need to make is to ensure that our wallet files make it into the container (alternatively we could mount these as a volume, but since this is more of a "beginner" series I want to keep things as simple as possible) and modify the CMD so that our configuration values get set properly when we launch the JAR.
The modified Dockerfile looks like this:
You can now build the image with:
docker build -t phx.ocir.io/toddrsharp/cloud-native-microservice/user-svc-helidon:latest .
This command tags the newly built image with the proper format for pushing to our OCIR registry. Note that I'm using the Phoenix region - if you're using a different region then your URL will change. Remember that the OCIR URL format works like so:
[region].ocir.io/[tenancy]/[repository-name]/[docker-image-name]:[tag]
We can run this image locally with:
The app is now up and running in a local Docker container just as it did when we ran the JAR file locally in the last post. Stop the local container and let's move on to pushing the image to our OCIR registry. That's pretty simple too:
docker push phx.ocir.io/toddrsharp/cloud-native-microservice/user-svc-helidon:latest
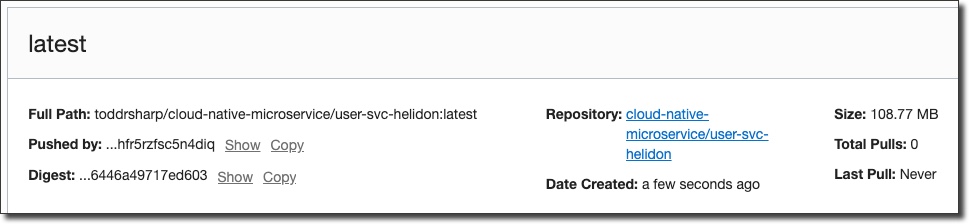
We can confirm the image in the OCIR dashboard:
Let's move on to deploying the Docker image in our Kubernetes cluster. We'll need two Kubernetes secrets created for our deployment. One for our Docker registry credentials so that Kubernetes can authenticate when pulling the image, and another that contains our application credentials so that we can pass them into our Docker container when the app is deployed instead of hard coding them in the Dockerfile.
Create the registry credentials secret like so (the password in this secret is not Base64 encoded):
Now for the application secrets, create a filed called secret.yaml and populate it as follows (using your own Base64 encoded values):
To create the secret in the cluster, run:
kubectl create -f secret.yaml
We can now modify the app.yaml file to complete our Kubernetes deployment. We'll modify a few things from the generated file, but it's a pretty simple format. Note that we need to override the Docker container's CMD with our own here to make sure that the values from our secret are properly used when starting the container. Otherwise, what we're doing here is creating a Kubernetes service to expose our service on the cluster and a deployment that represents our Docker container. We tell Kubernetes the location where the image is (in OCIR), point the config to our secrets and put in some placeholders that will be replaced with the secret values when the image is deployed.
Here's my modified app.yaml:
Which we can deploy with:
kubectl create -f app.yaml
And verify the deployment with:
kubectl get deployments

Verify the pod was created:
kubectl get pods

Finally, verify the service was created and assigned an IP address (this will take a minute or two to complete for new services):
kubectl get services

Let's try making a request to see if everything works:

Unfortunately, we've got an error! To figure out what's going on let's take a look at the pod logs:
kubectl logs user-svc-helidon-69688b4fd6-l5gqt

It looks like our code used a Java 9 feature, but we deployed the application in a Docker image based on Java 8. It's a simple fix, just modify the Dockerfile to use the openjdk:9-jre-slim runtime image, rebuild the Docker image and push it again. To redeploy our app we do not have to create the deployment again, simply delete the existing pod and a new pod will be pulled using the latest image from OCIR:
kubectl delete pod user-svc-helidon-69688b4fd6-l5gqt
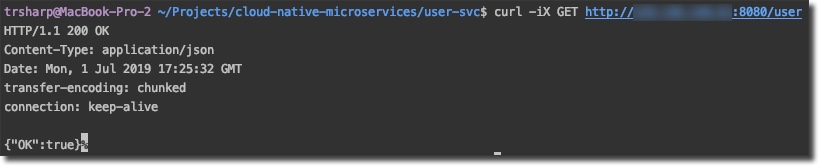
Now if we try our request again, everything should be good to go!
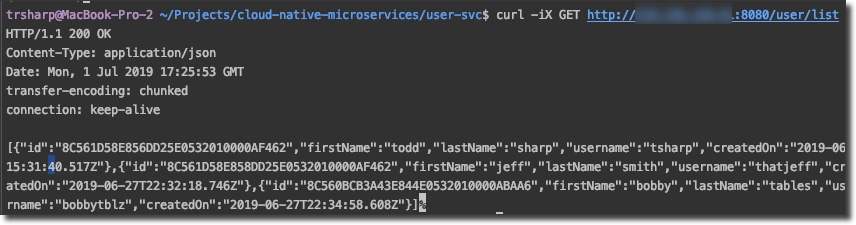
And listing users should give us a proper response (assuming we've created users in the DB already) confirming that our connection to ATP is solid:
And that's it! In this series, we've prepared our Oracle Cloud tenancy for microservices and written and deployed our first service. In future posts I'm going to examine some other interesting options for creating microservices to make life a little easier on the code side of things.
Photo by photo-nic.co.uk nic on Unsplash
Related Posts

Querying Autonomous Database from an Oracle Function (The Quick, Easy & Completely Secure Way)
I've written many blog posts about connecting to an Autonomous DB instance in the past. Best practices evolve as tools, services, and frameworks become...

Sending Email With OCI Email Delivery From Micronaut
Email delivery is a critical function of most web applications in the world today. I've managed an email server in the past - and trust me - it's not fun...

Brain to the Cloud - Part III - Examining the Relationship Between Brain Activity and Video Game Performance
In my last post, we looked at the technical aspects of my Brain to the Cloud project including much of the code that was used to collect and analyze the...