Deploying A Micronaut Microservice To The Cloud
Posted By: Todd Sharp on 4/23/2019 3:17 GMT
Tagged: Cloud, Developers, Java, Open Source
So you've finally done it. You created a shiny new microservice. You've written tests that pass, ran it locally and everything works great. Now it's time to deploy and you're ready to jump to the cloud. That may seem intimidating, but honestly there's no need to worry. Deploying your Micronaut application to the Oracle Cloud is really quite easy and there are several options to chose from. In this post I'll show you a few of those options and by the time you're done reading it you'll be ready to get your app up and running.
If you haven't yet created an application, feel free to check out my last post and use that code to create a simple app that uses GORM to interact with an Oracle ATP instance. Once you've created your Micronaut application you'll need to create a runnable JAR file. For this blog post I'll assume you followed my blog post and any assets that I refer to will reflect that assumption. With Micronaut creating a runnable JAR is as easy as using ./gradlew assemble or ./mvnw package (depending on which build automation tool your project uses). Creating the artifact will take a bit longer than you're probably used to if you haven't used Micronaut before. That's because Micronaut precompiles all necessary metadata for Dependency Injection so that it can minimize/reduce runtime reflection to obtain that metadata. Once your task completes you will have a runnable JAR file in the build/libs directory of your project. You can launch your application locally by running java -jar /path/to/your.jar. So to launch the JAR created from the previous blog post, I set some environment variables and run:
Which results in the application running locally:
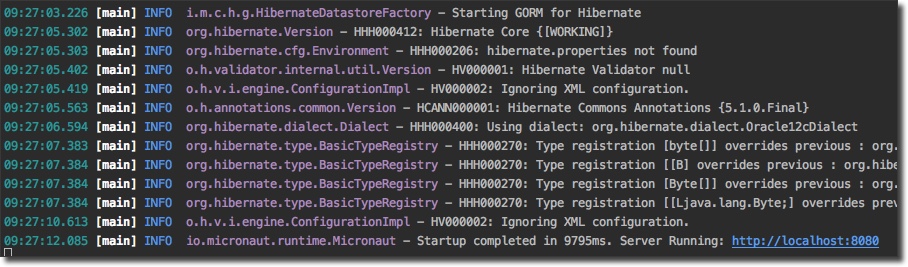
So far, pretty easy. But we want to do more than launch a JAR file locally. We want to run it in the cloud, so let's see what that takes. The first method I want to look at is more of a "traditional" approach: launching a simple compute instance and deploying the JAR file.
Creating A Virtual Network
If this is your first time creating a compute instance you'll need to set up virtual networking. If you have a network ready to go, skip down to "Creating An Instance" below.
Your instance needs to be associated with a virtual network in the Oracle Cloud. Virtual cloud networks (hereafter referred to as VCNs) can be pretty complicated, but as a developer you need to know enough about them to make sure that your app is secure and accessible from the internet. To get started creating a VCN, either click "Create a virtual cloud network" from the dashboard:

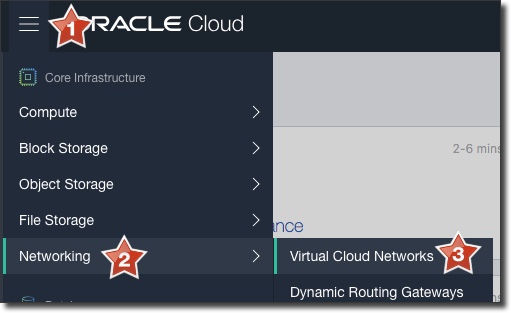
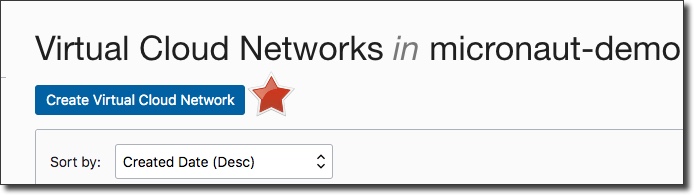
Or select "Networking" -> "Virtual Cloud Networks" from the sidebar menu and then click "Create Virtual Cloud Network" on the VCN overview page:
In the "Create Virtual Cloud Network" dialog, populate a name and choose the option "Create Virtual Cloud Network Plus Related Resources" and click "Create Virtual Cloud Network" at the bottom of the dialog:
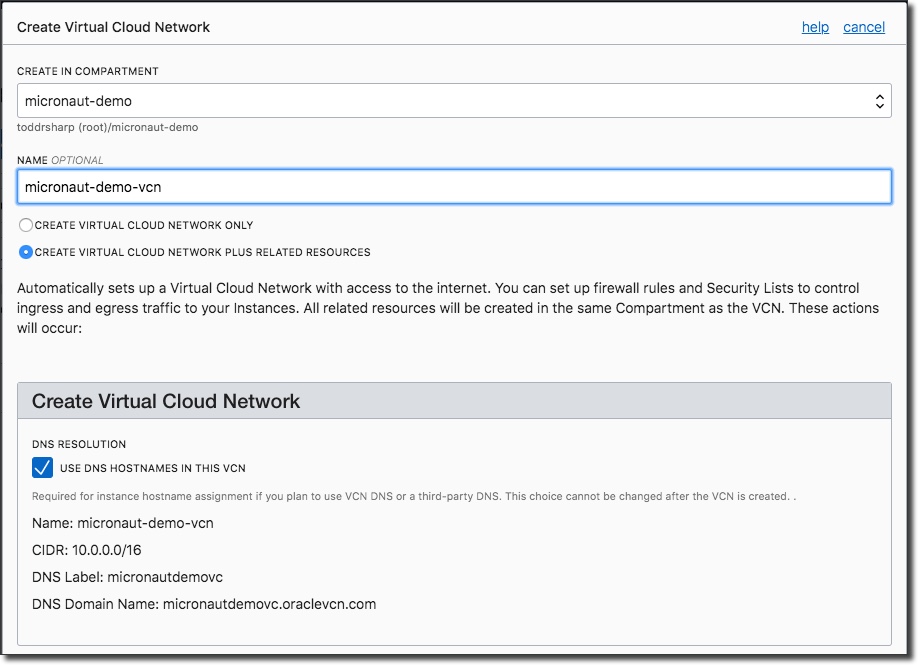
The "related resources" here refers to the necessary Internet Gateways, Route Table, Subnets and related Security Lists for the network. The security list by default will allow SSH, but not much else, so we'll edit that once the VCN is created. When everything is complete, you'll receive confirmation:
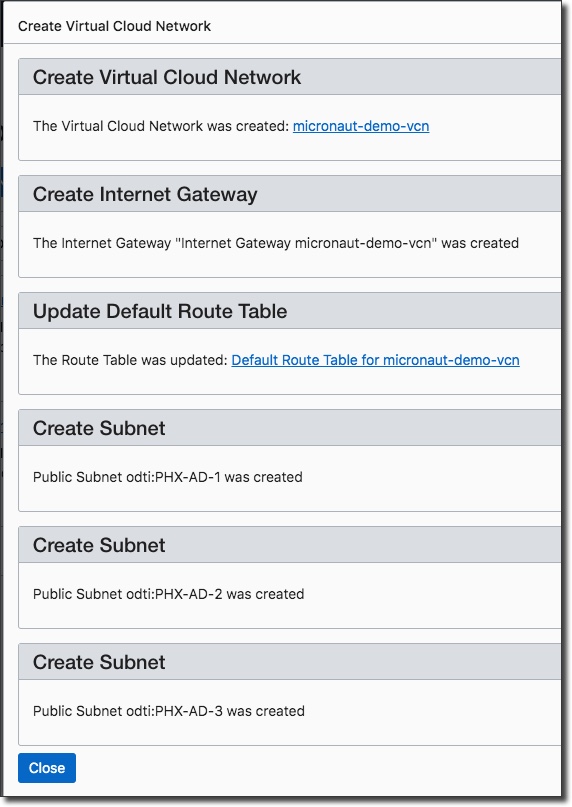
Close the dialog and back on the VCN overview page, click on the name of the new VCN to view details:
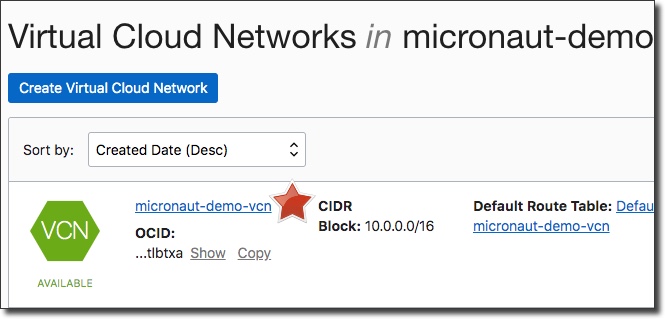
On the details page for the VCN, choose a subnet and click on the Security List to view it:

On the Security List details page, click on "Edit All Rules":
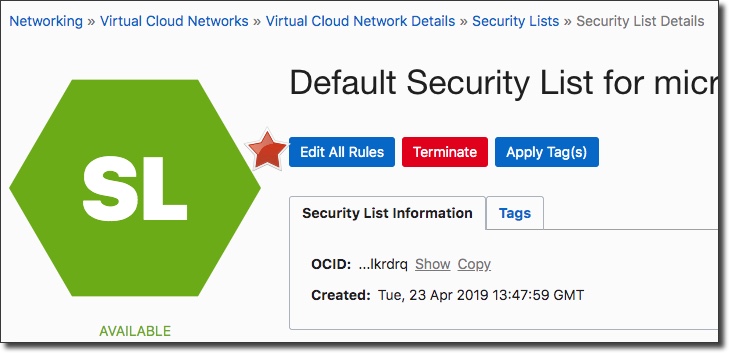
And add a new rule that will expose port 8080 (the port that our Micronaut application will run on) to the internet:
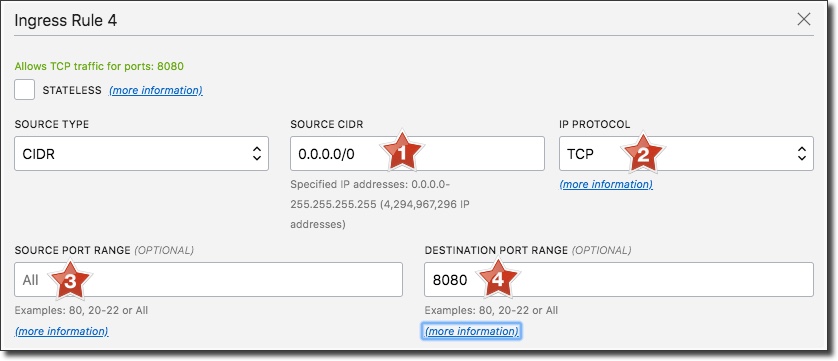
Make sure to save the rules and close out. This VCN is now ready to be associated with an instance running our Micronaut application.
Creating An Instance
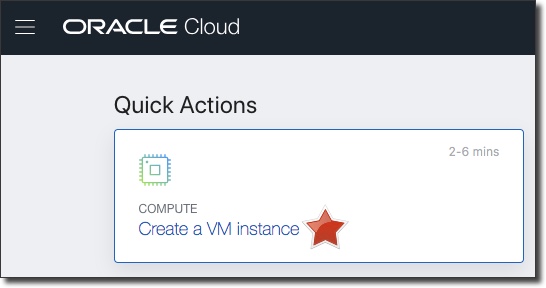
To get started with an Oracle Cloud compute instance log in to the cloud dashboard and either select "Create a VM instance":
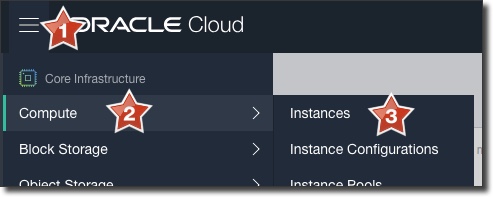
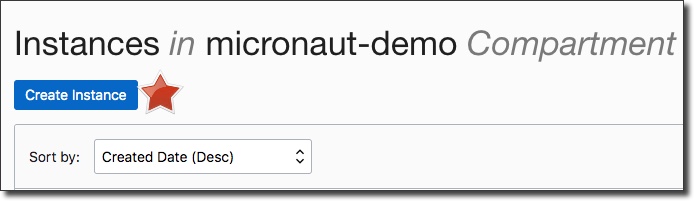
Or choose "Compute" -> "Instances" from the sidebar and click "Create Instance" on the Instance overview page:
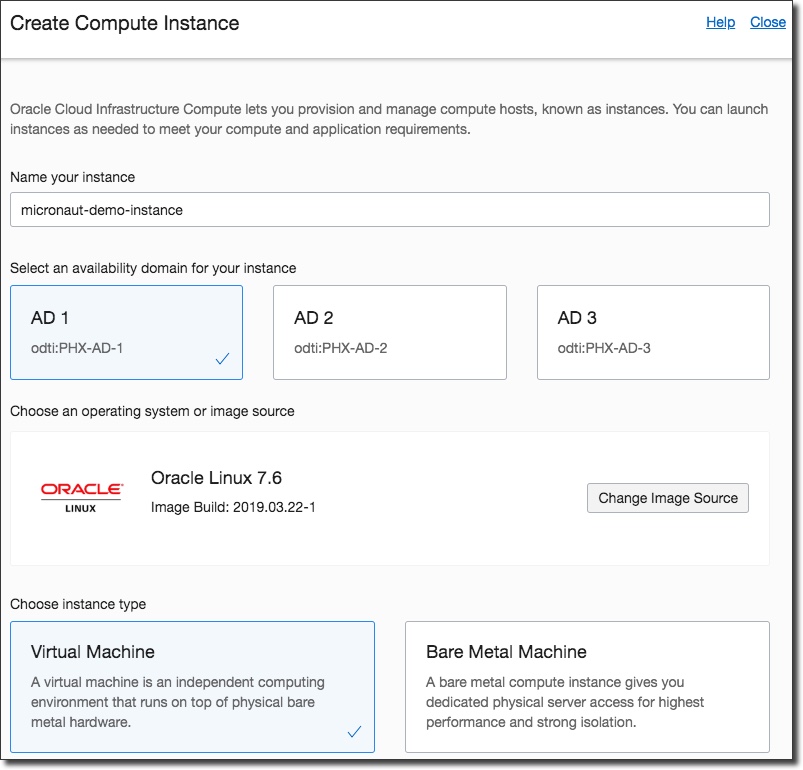
In the "Create Instance" dialog you'll need to populate a few values and make some selections. It seems like a long form, but there aren't many changes necessary from the default values for our simple use case. The first part of the form requires us to name the instance, select an Availability Domain, OS and instance type:
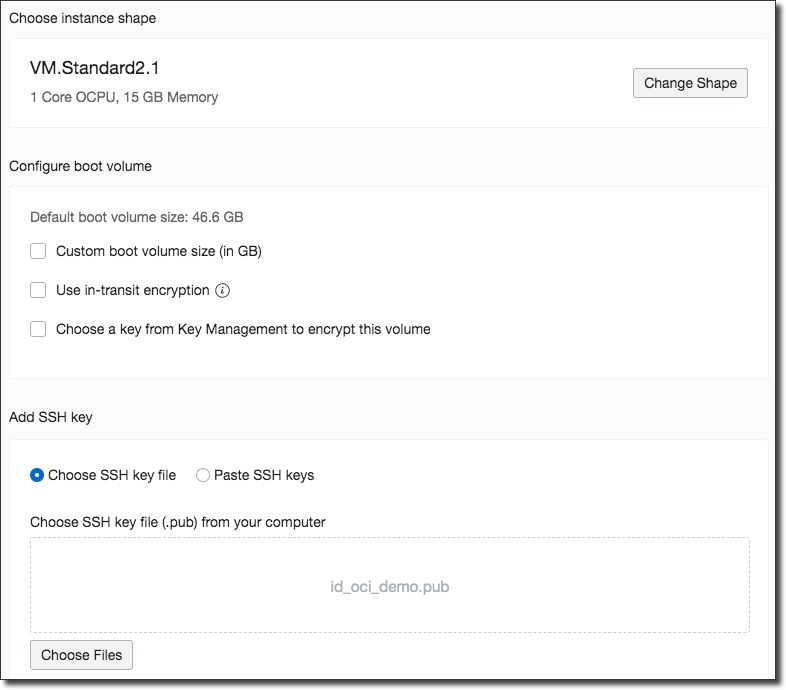
The next section asks for the instance shape and boot volume configuration, both of which I leave as the default. At this point I select a public key that I can use later on to SSH in to the machine:
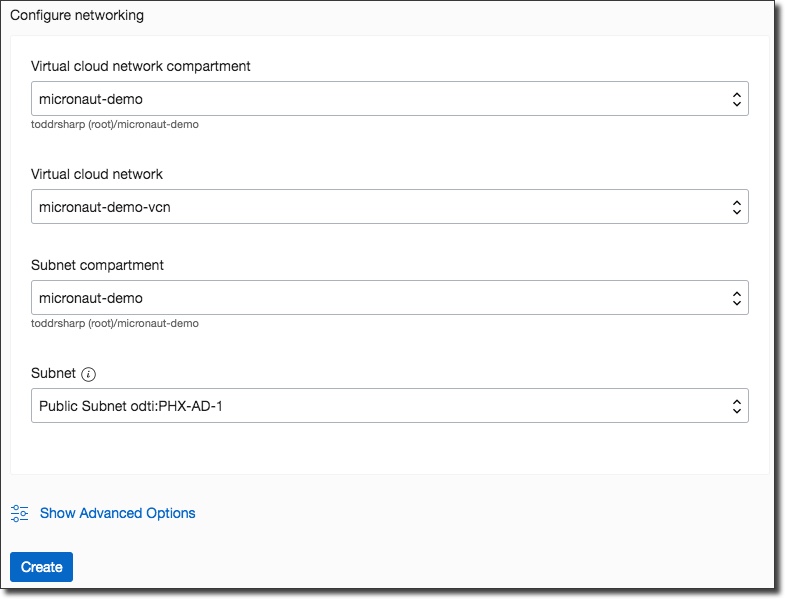
Finally, select the a VCN that is internet accessible with port 8080 open:
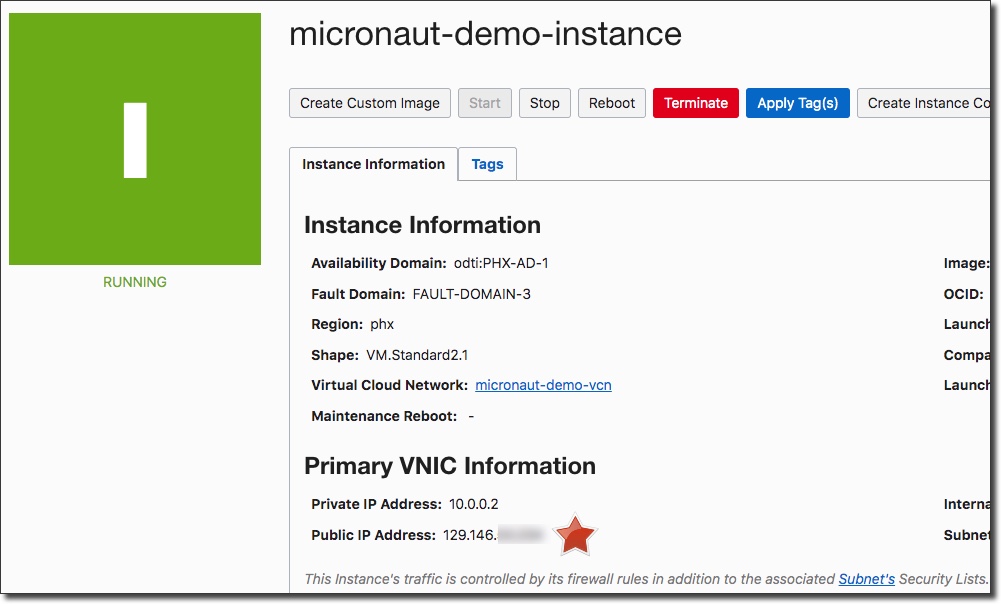
Click "Create" and you'll be taken to the instance details page where you'll notice the instance in a "Provisioning" state. Once the instance has been provisioned, take note of the public IP address:

Deploying Your Application To The New Instance
Using the instance public IP address, SSH in via the private key associated with the public key used to create the instance:

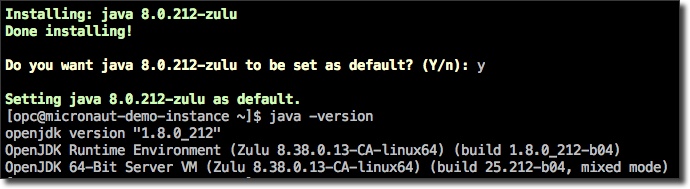
We're almost ready to deploy our application, we just need a few things. First, we need a JDK. I like to use SDKMAN for that, so I first install SDKMAN, then use it to install the JDK with sdk install java 8.0.212-zulu and confirm the installation:
We'll also need to open port 8080 on the instance firewall so that our instance will allow the traffic:

We can now upload our instance with SCP:
I've copied the JAR file, my Oracle ATP wallet and 2 simple scripts to help me out. The first script sets some environment variables:
The second script is what we'll use to launch the application:
Next, move the wallet directory from the user home directory to the root with sudo mv wallet/ /wallet and source the environment variables with . ./env.sh. Now run the application with ./run.sh:
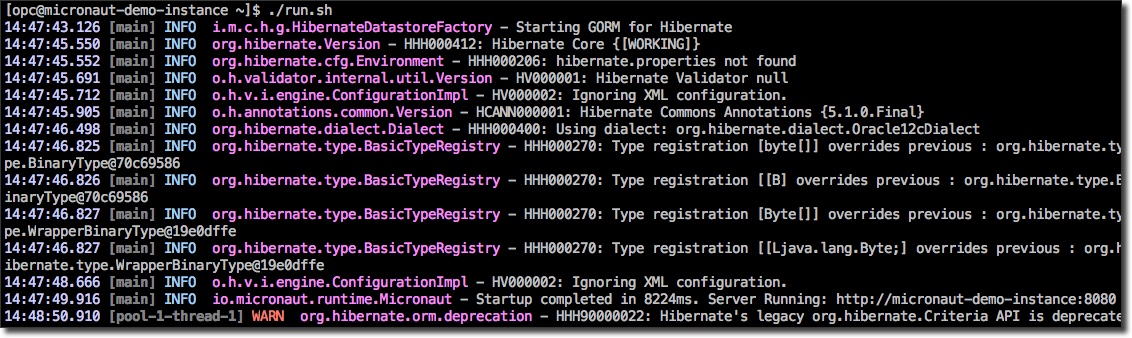
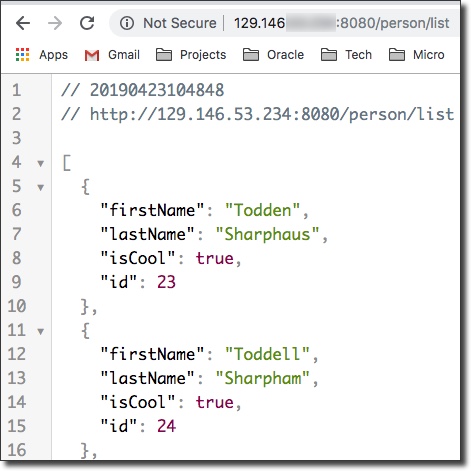
And hit the public IP in your browser to confirm the app is running and returning data as expected!
You've just deployed your Micronaut application to the Oracle Cloud! Of course, a manual VM install is just one method for deployment and isn't very maintainable long term for many applications, so in future posts we'll look at some other options for deploying that fit in the modern application development cycle.
Related Posts

Querying Autonomous Database from an Oracle Function (The Quick, Easy & Completely Secure Way)
I've written many blog posts about connecting to an Autonomous DB instance in the past. Best practices evolve as tools, services, and frameworks become...

Sending Email With OCI Email Delivery From Micronaut
Email delivery is a critical function of most web applications in the world today. I've managed an email server in the past - and trust me - it's not fun...

Brain to the Cloud - Part III - Examining the Relationship Between Brain Activity and Video Game Performance
In my last post, we looked at the technical aspects of my Brain to the Cloud project including much of the code that was used to collect and analyze the...