IaC in the Cloud: Getting Started with Resource Manager
Posted By: Todd Sharp on 3/5/2021 1:00 GMT
Tagged: Cloud, Cloud, Cloud Native, Cloud Native

Welcome back to this series where we looking at using Terraform to manage our cloud infrastructure. In the first post of this series, we looked at the very basics of Terraform for developers. In part two, we installed Terraform and wrote, planned and applied a script that created a resource in our Oracle Cloud Infrastructure (OCI) cloud tenancy. In this post, I’d like us to take a look at how our OCI Engineers have integrated Terraform into our cloud via a tool called Resource Manager.
Since this post is a bit long, here's a quick table of contents:
What is OCI Resource Manager
Resource Manager is a way to plan and execute Terraform scripts via the cloud. Now, you may ask why this is necessary if Terraform can be executed locally or via a CI/CD pipeline via the Terraform CLI or various plugins. The answer to that question is, as we so often say, “it depends”. Certainly there are times when you won’t need (or want) to run your Terraform plans from the cloud. But, there are other times where it can be handy and helpful to do so and as you’ll see below, Resource Manager has some fancy features that enhance your Terraform projects that will provide a benefit to you and the users who deploy the infrastructure you define. Remember, sometimes we’re defining infrastructure in such a way that we intend to distribute that infrastructure definition. That could mean that you need to share it with an internal/external team, or perhaps you’re creating an open source project that others will deploy to the Oracle Cloud. Resource Manager has got your back on this - trust me.
Tip: When using Resource Manager, the only field necessary in your provider block is the given region that you are working in. This is because the jobs are securely executed in your tenancy which inherits the permissions and policies of your logged-in user.
We should get a few terms defined up front here to avoid confusion later on. Read more in the official docs, but here’s the high-level:
Configuration Source Provider
Info related to an external source control system that is used for version control of your Terraform configuration files. These are super helpful because they allow you to build directly from a version control system instead of packaging and manually uploading your stack as a .zip file.
Stacks
A fancy term for a bundle of scripts that’ll be executed together as a single plan. These can be uploaded as a .zip file, or pulled directly from a configuration source provider.
Jobs
An execution that runs against a stack; a plan, apply or destroy job.
Drift
The difference between real-world state and the state as saved by the last executed job on the stack. For example - if you manually change a resource in your tenancy that was created/updated by a Resource Manager job, you’ve introduced drift into the state. Drift detection reports are available to help with this.
Resource Manager is available in the OCI console, through any of our SDKs and via the OCI CLI.
Using Resource Manager
To learn about Resource Manager, I think it will be best if we use a project for our configuration and use that project to create a stack and execute our plan/apply jobs.
Create GitHub Repo
For this demo, let’s store our code in GitHub so that we can take advantage of the OCI configuration source provider to automatically pull our latest Terraform configuration from our repo. This will prevent us from having to zip and upload the stack each time that we want to run it.
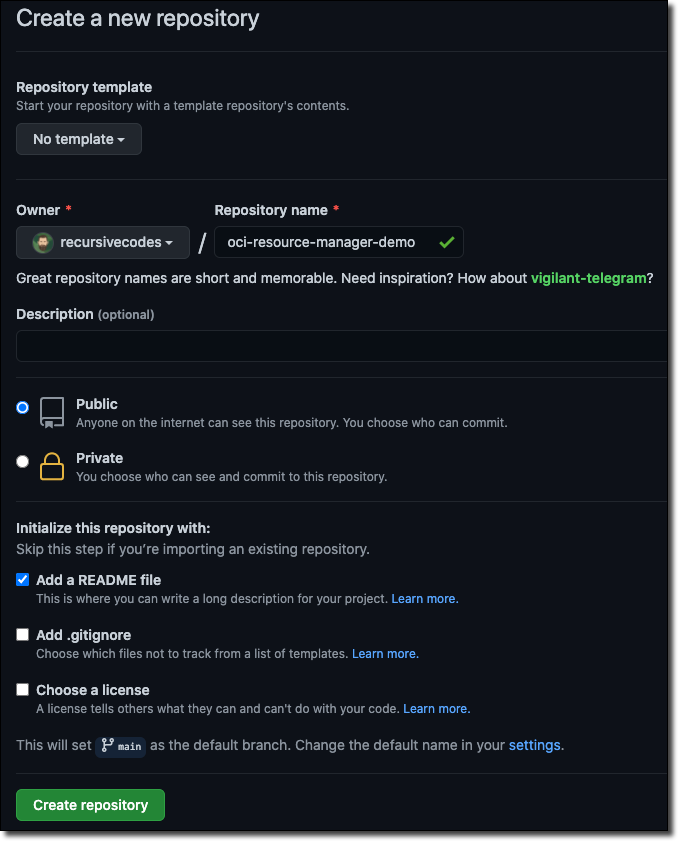
Create a new repository in GitHub at https://github.com/new.
Now check out that new repo locally.
We’ll add our configuration files in just a bit.
Creating Configuration Source Provider
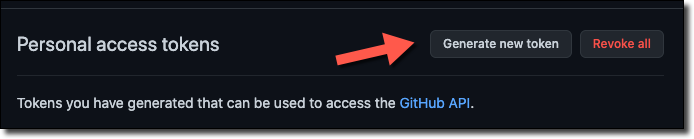
Now let’s set up a configuration source provider so that we can build our stack directly from our GitHub project later on. We’ll need a ‘personal access token’ from GitHub, so head to https://github.com/settings/tokens and click ‘Generate new token’.
Name your token and select read:packages for the scope.

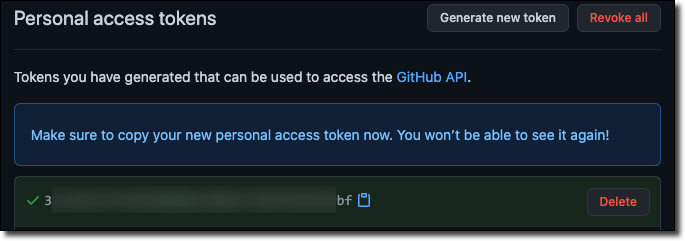
Click ‘Create’ and copy the token from the next page.
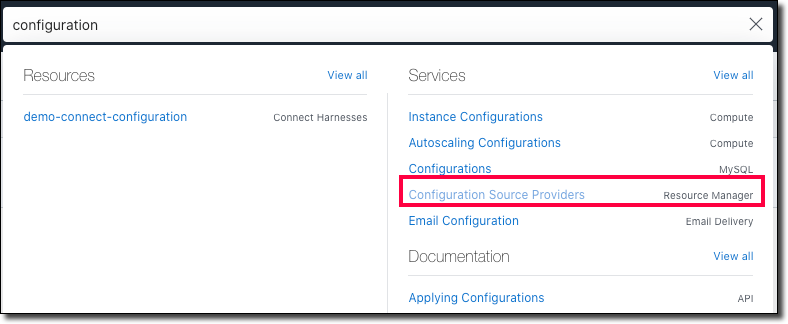
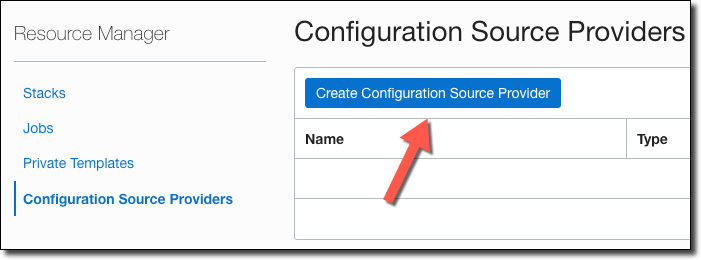
In the OCI console, search for and navigate to “configuration source provider”.
Click ‘Create Configuration Source Provider’.
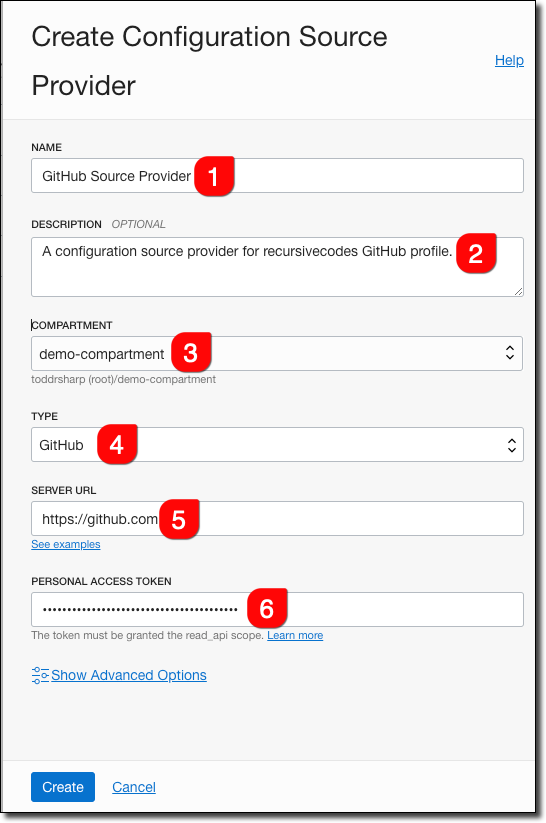
In the create dialog, name it (#1), provide an optional description (#2), choose the compartment (#3), select ‘GitHub’ for type (#4), enter https://github.com for the Server URL (#5), and paste your GitHub Personal Access Token (#6).
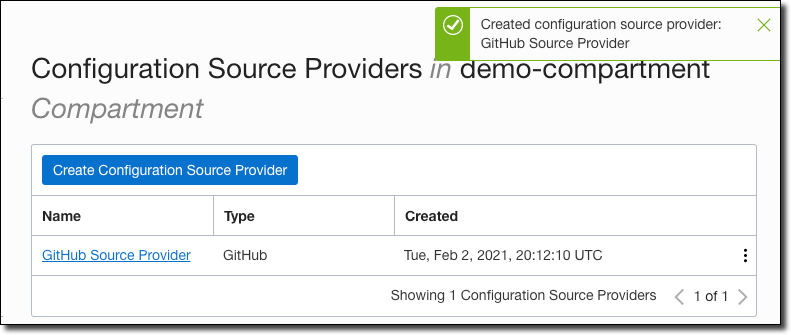
The provider is now ready to be used in the next step.
Creating a Stack
In this step, we’re going to create a Terraform script that does some basic resource creation, check that in to our GitHub repo and then create a stack in Resource Manager that pulls from our GitHub repo.
Navigate to the directory where you cloned the GitHub repo that we created above and create a file called demo.tf. We’ll keep this from getting too complex by just using a single file for this Terraform configuration. First, add the provider block. Since this is going to run in the Oracle Cloud, we only need to declare the region in our provider.
Next, we’ll add a resource block that will create an Object Storage bucket for us. We’ll add a few variables to store the bucket name and namespace and we’ll output the result of the bucket creation. Here’s the entire script.
Let’s add the file to Git, commit and push.
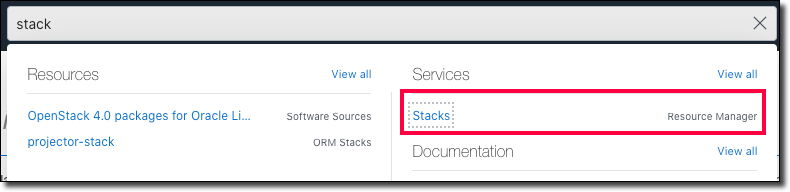
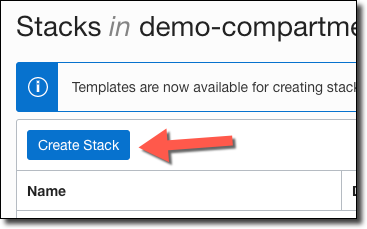
Now let’s build the stack. Search for and navigate to ’Stacks’ in the OCI console.
Click ‘Create Stack’.
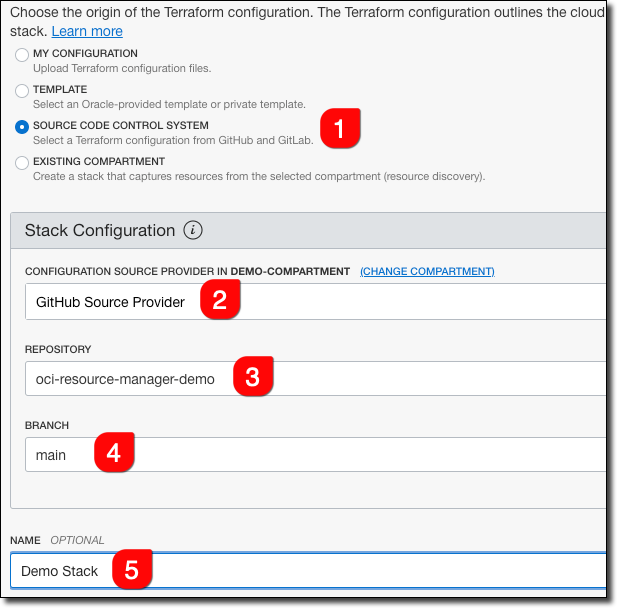
Choose ’Source Code Control System’ as the origin (#1), our GitHub Source Provider (#2), the new project repo (#3) and the main branch (#4). Give the stack a name (#5).
Click ’Next’ and the second wizard page verifies that the resources that we’re creating don’t require variable configuration. If we wanted to, we could require variable name input and we’ll look at that later on.
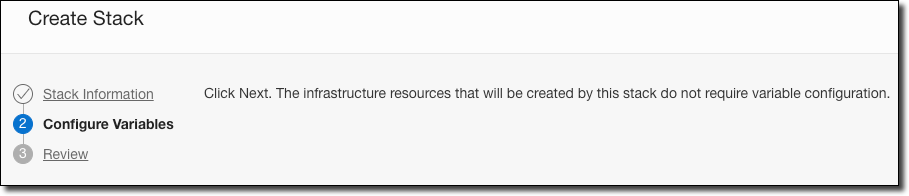
Click ’Next’, review the information and click ‘Create’. You’ll be directed to the Stack details page.
Now that our stack is created, let’s look at running jobs.
Note: Since we created the stack from our GitHub repository, every job run will first pull the most latest commit from the branch we specified.
Running Jobs
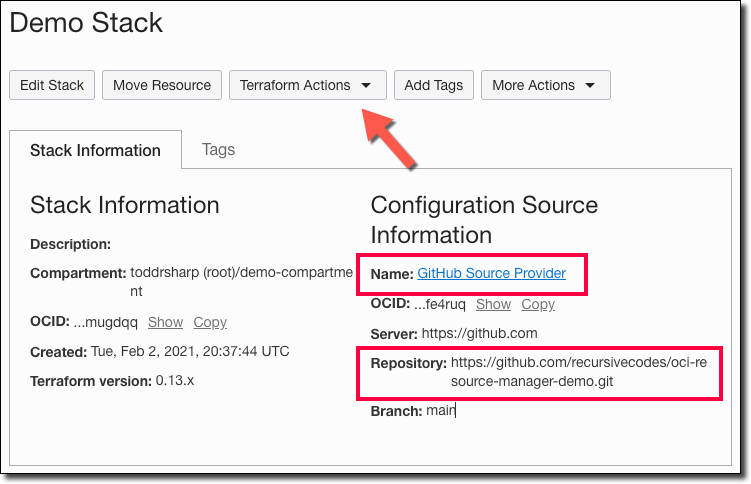
See that dropdown at the top of the page labeled ’Terraform Actions’? Click that to reveal the possible actions we can take with our stack at this point.
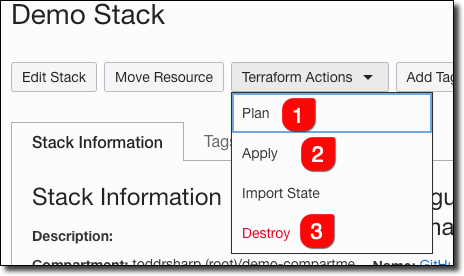
To run terraform plan against this stack, click ‘Plan’ (#1), to run terraform apply click ‘Apply’ (#2), and to run terraform destroy click ‘Destroy’ (#3).
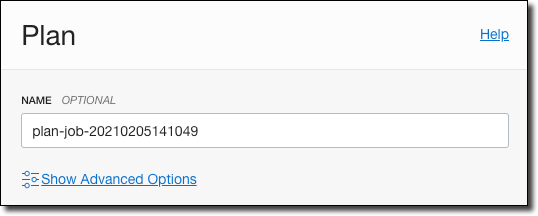
When running a plan, give it a name and click ‘Plan’.
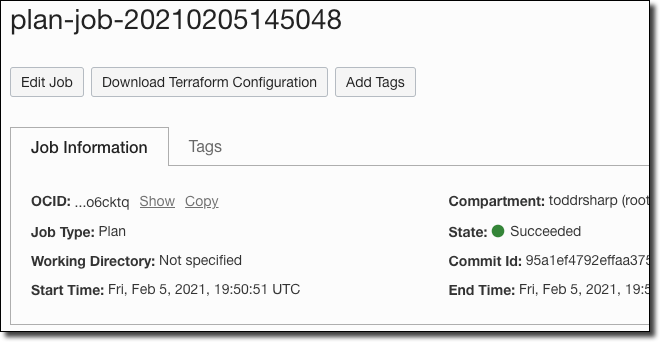
After the plan runs, you’ll see a success message on the plan details page. Notice the commit hash of the commit used to run this plan.
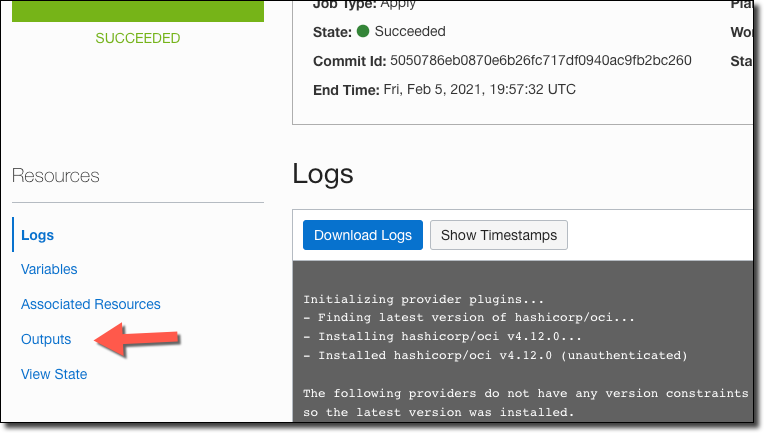
Observe the Log in the plan details page.
Back in the stack details, apply the plan.
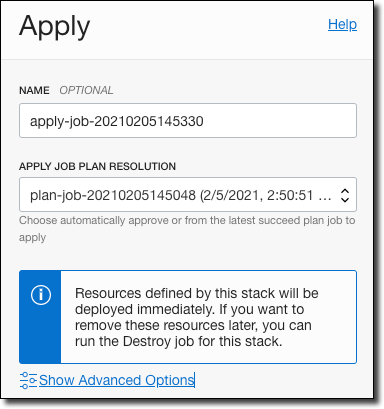
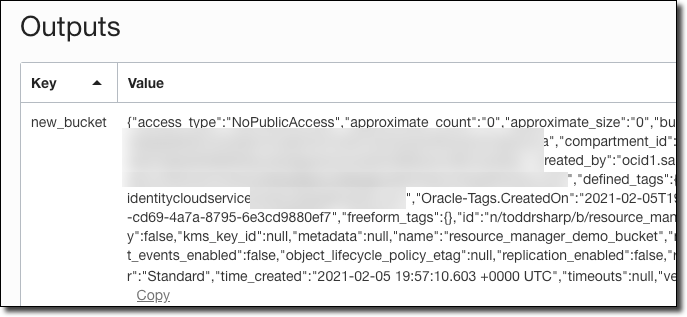
Observe the Log output on the apply job, and once it’s complete you can view the job output.
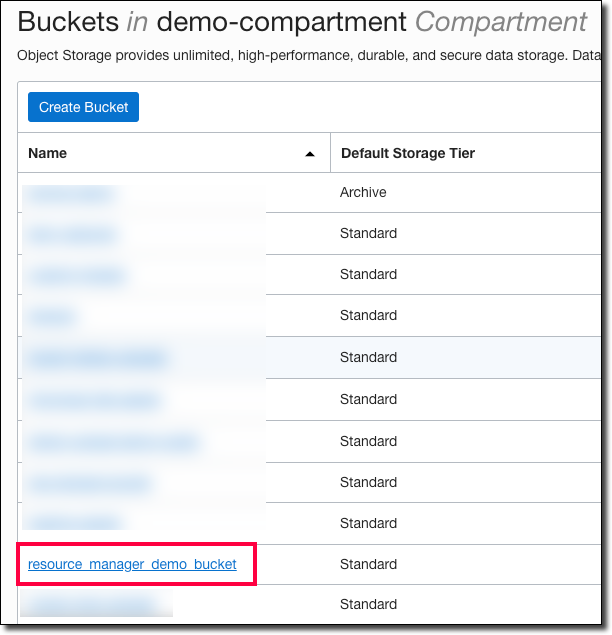
We can confirm via the Object Storage bucket list page that our new bucket was created.
Finally, to clean up and remove the bucket that was created via our stack, head back to the stack details and create and run a ‘destroy’ job.

The destruction will be confirmed via the log output.
Summary
In this post, we learned how to run our Terraform scripts in the Oracle Cloud via Resource Manager. In the next post, we’ll look at some ways to make our scripts even more powerful by adding support for variable inputs and validation so that we can distribute and share our Terraform projects or simply improve the UX for our team members who use the scripts.
Photo by Aron Visuals on Unsplash
Related Posts

Querying Autonomous Database from an Oracle Function (The Quick, Easy & Completely Secure Way)
I've written many blog posts about connecting to an Autonomous DB instance in the past. Best practices evolve as tools, services, and frameworks become...

Brain to the Cloud - Part III - Examining the Relationship Between Brain Activity and Video Game Performance
In my last post, we looked at the technical aspects of my Brain to the Cloud project including much of the code that was used to collect and analyze the...

Brain to the Cloud - Part II - How I Uploaded My Brain to the Cloud
In my last post, we went over the inspiration, objectives, and architecture for my Brain to the Cloud project. In this post, we'll look in-depth at the...