Archiving Stream Data To Object Storage With Service Connectors
Posted By: Todd Sharp on 4/16/2021 12:00 GMT
Tagged: Cloud

Last year, we launched the Service Connector Hub for Oracle Cloud Infrastructure. If I’m being honest, I really didn’t pay much attention when the service originally launched because it didn’t seem like something developers would use very often. However, the service got much more interesting this week with a few enhancements that were just announced.
Before we get into the cool stuff, let’s first define what the service is. Essentially it’s a way to take data, in a serverless manner, from a source to a destination with an optional task in between. Simple in definition, but infinitely powerful and necessary. The following illustration describes which services can act as sources, destinations, and tasks (as of the date this blog post was published).
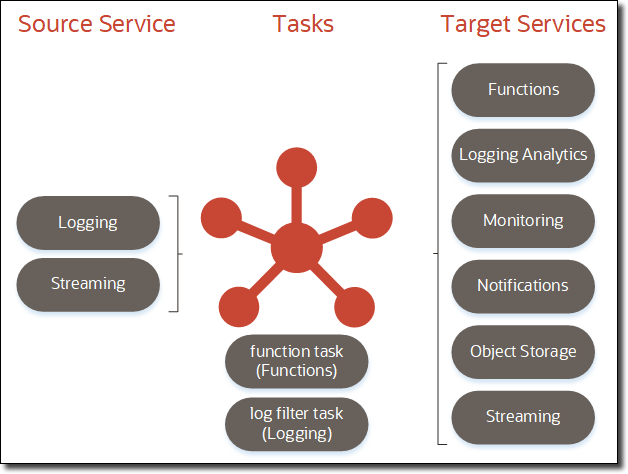
So what is possible here? In addition to moving large volumes of data from OCI to third-party services like Splunk and Datadog, you can now do things like archive stream data for compliance or archival purposes by creating a service connector to move Streaming data to Object Storage. You can even reformat or modify the data by adding a task in between the operations. Since you can use a stream as both a source and a target service, you could potentially use a service connector to filter or consolidate streams.
This opens up many possibilities for moving data around within Oracle Cloud, but it also enables the movement of data between cloud providers (or your datacenter). I’ve been playing with the service a bit, and I thought it would be a good idea to show you a simple use-case to illustrate what I mean. Here's a quick table of contents if you'd like to skip around.
Archiving Stream Data to Object Storage
In this example, we’re going to use Service Connector Hub to read an existing stream of data and archive that data to Object Storage. Then we’ll enhance the example by adding a task in between the source read and target write operations. Let’s dig in and see how to configure things.
Using an Existing Stream
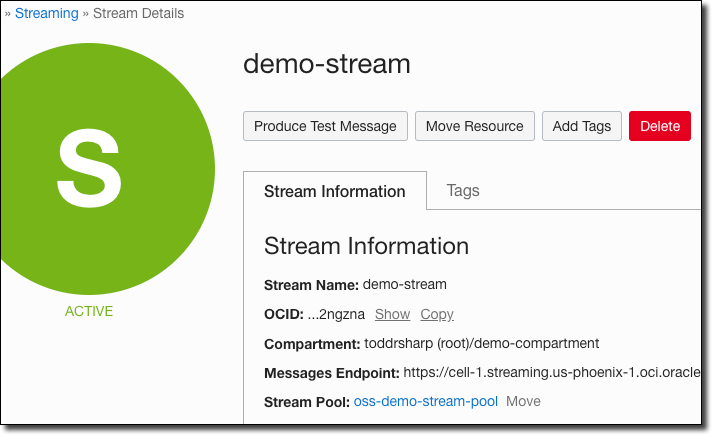
There are tons of resources and documentation online to get started with Oracle Streaming Service. I’ve blogged about the service many times, so I won’t cover how to create a stream in this post. I’ll assume that you’ve already got a stream created and you’d like to archive data from that stream to Object Storage. For this demo, I’ll be using a stream named demo-stream that resides in a stream pool called oss-demo-stream-pool as shown below.
Create Object Storage Bucket
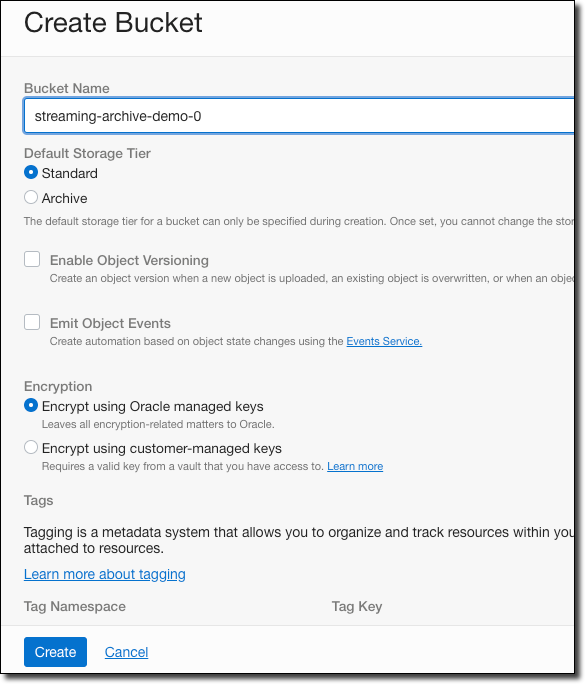
I could use an existing Object Storage bucket to archive the stream data, but for this demo, I’ll create a new bucket called streaming-archive-demo-0 that will contain all of the archived data.
Create Service Connector
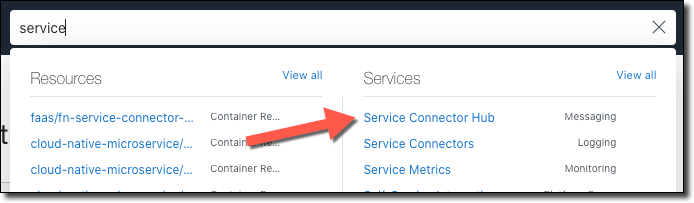
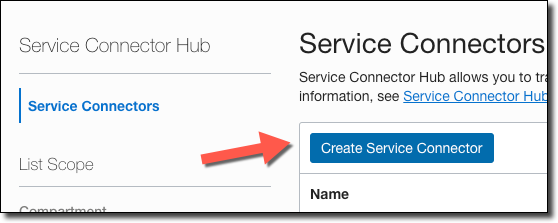
For simple archiving operations, we don’t need to write a single line of code. Instead, we just create a service connector and point it at the source (stream) and destination (bucket). Navigate to the Service Connector Hub via the burger menu (or by searching for it).
Click on ‘Create Service Connector’.
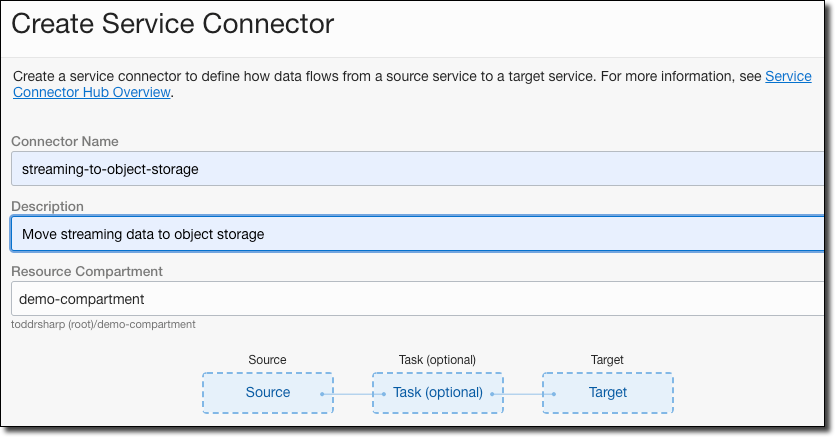
Name the connector, provide a description, and choose the compartment to store the connector.
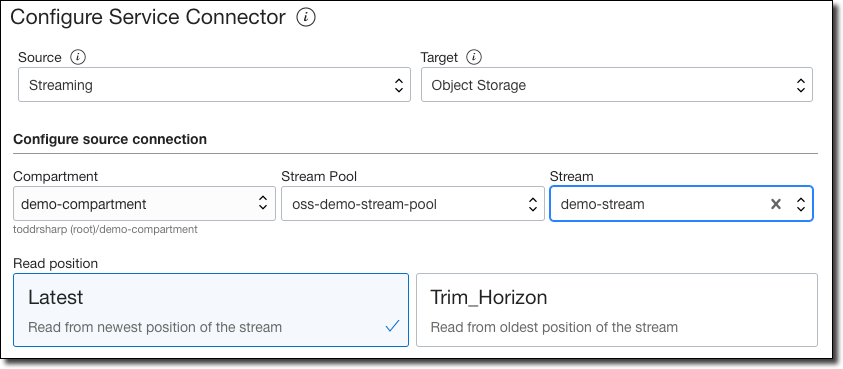
Choose ’Streaming’ as the source, and ‘Object Storage’ as the target. Chose the compartment where the stream pool resides, choose the stream pool, and the stream. You can choose to read from either the ‘Latest’ offset or ’Trim Horizon’ (the oldest non-committed offset).
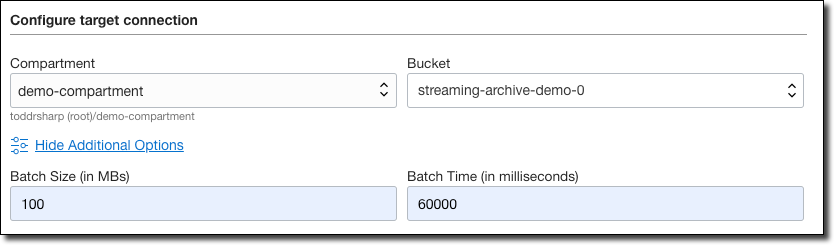
Choose the compartment where your bucket resides and the bucket. Click on ’Show Additional Options’ and enter a batch size and batch time.
Batch Options: The service connector will only write to the target when either of the batch thresholds (size or time) is exceeded. The example below will write to the bucket when 100MB are queued in the stream or every 60 seconds.
Click ‘Create’ and the service connector is ready to archive your streams.
Publish Messages
To test this out, we can write some messages to our stream using the OCI CLI. When writing messages to a stream, we must pass the message as a JSON object with two keys: key and value. Both the key and the value must be Base64 encoded. I’ll publish two separate messages, one with key1 and another with key2. Both will contain a simple JSON message payload. Here’s how I encoded the values.
I plugged these encoded values into my CLI commands and published both messages.
Now I simply wait the 60000 milliseconds (60 seconds) for the archive operation.
Confirm Archive Operation
After the 60 second wait period, we can check that the stream data was written to our Object Storage bucket.
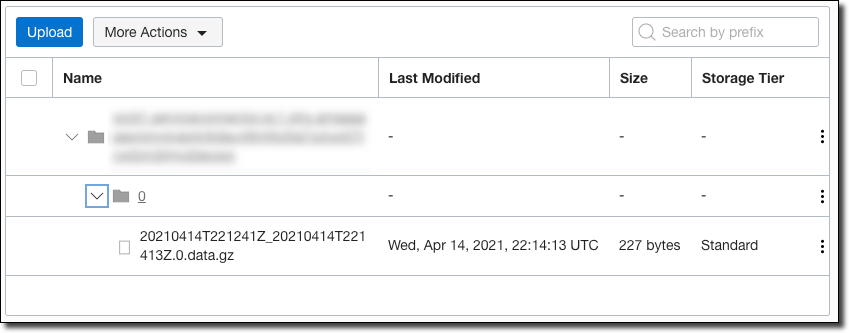
As shown above, the stream data was written to a compressed file in my bucket and labeled with the timestamp at which it was written. We can now download, extract, and view this file (I opened it in Excel).

As you can see, both of the messages that I published via the CLI were archived into the bucket. Without writing a single line of code or deploying any infrastructure we have a reliable archive of our stream data in OCI!
Add a Functions Task to Filter Stream Data
Archiving stream data is easy and useful, but sometimes we may want to filter the data that is being archived into Object Storage based on some criteria. We also might want to create a new stream of data based on some subset of the original stream data. Using a functions task, we can do just that! To do this, we need to create an application, a function and deploy the function to the cloud. Let’s do that.
Create App
First, create an application that the function will belong to. You can do this via the OCI CLI or console, but I like to use the Fn CLI.
Create Function
Next, create a function with the CLI and navigate to the function directory. I’m using Node.JS for simplicity here, but any supported language would work.
Edit Function
We’ll edit the function to filter the incoming stream data.
Note: The stream data will be passed to the function in an array of objects. Each object will have the same structure as the archive output above. You must return an array of objects from the function containing either a subset of the input data or the entire input data (if nothing needs to be filtered).
As mentioned above, the key and value of the message are Base64 encoded, so we’ll use the atob module to decode it. Make sure to include the dependency in your package.json file:
Finally, I implemented the function to filter the incoming array and only return the items whose key match key2.
Then deploy the function to the application.
Modify Service Connector to Add Functions Task
Back in the Service Connector Hub, edit the service connector to add a task that will invoke the function that we just created.
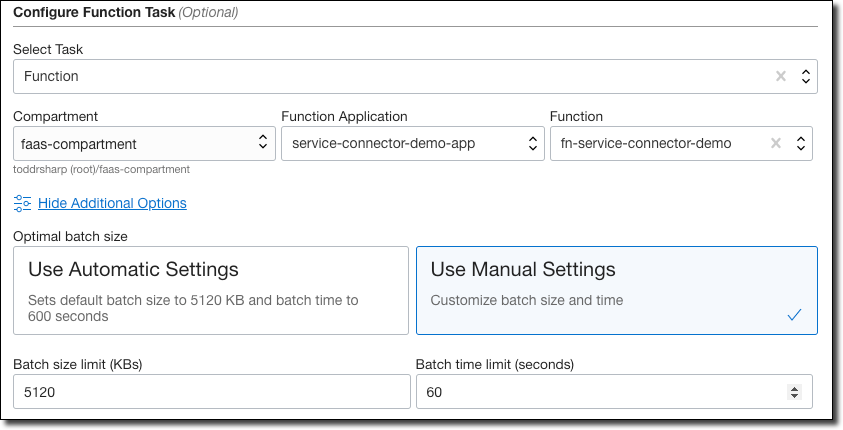
Like earlier, we can adjust the batch size and time limit to meet our needs. In this example, the function task will be invoked when either 5120KB of data is queued or every 60 seconds.
Next, I published a batch of new messages for both key1 and key2 via the CLI. After waiting the requisite amount of time, I checked the Object Storage bucket and noticed a new archive.
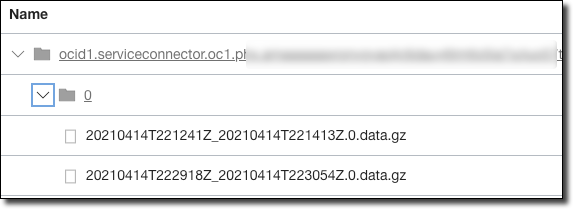
I downloaded, uncompressed, and read this archive:

And it worked! Only the messages with key2 are archived in the Object Storage bucket
Summary
In this post, we looked at using Service Connector Hub in OCI to move data from a source to a destination with an optional task in between. We looked at a specific example of archiving stream data that uses Oracle Streaming Service as a source to an Object Storage bucket as a destination and then modified that example to filter the stream data into a subset via an Oracle Functions task. As mentioned earlier, any combination of source, destination (with an optional task) can be used to move data in the Oracle Cloud. Stay tuned for more enhancements to Service Connector Hub in the near future!
For more information and examples, check out the Service Connector Hub documentation.
Image by Даниил Некрасов from Pixabay
Related Posts

Querying Autonomous Database from an Oracle Function (The Quick, Easy & Completely Secure Way)
I've written many blog posts about connecting to an Autonomous DB instance in the past. Best practices evolve as tools, services, and frameworks become...

Brain to the Cloud - Part III - Examining the Relationship Between Brain Activity and Video Game Performance
In my last post, we looked at the technical aspects of my Brain to the Cloud project including much of the code that was used to collect and analyze the...

Brain to the Cloud - Part II - How I Uploaded My Brain to the Cloud
In my last post, we went over the inspiration, objectives, and architecture for my Brain to the Cloud project. In this post, we'll look in-depth at the...