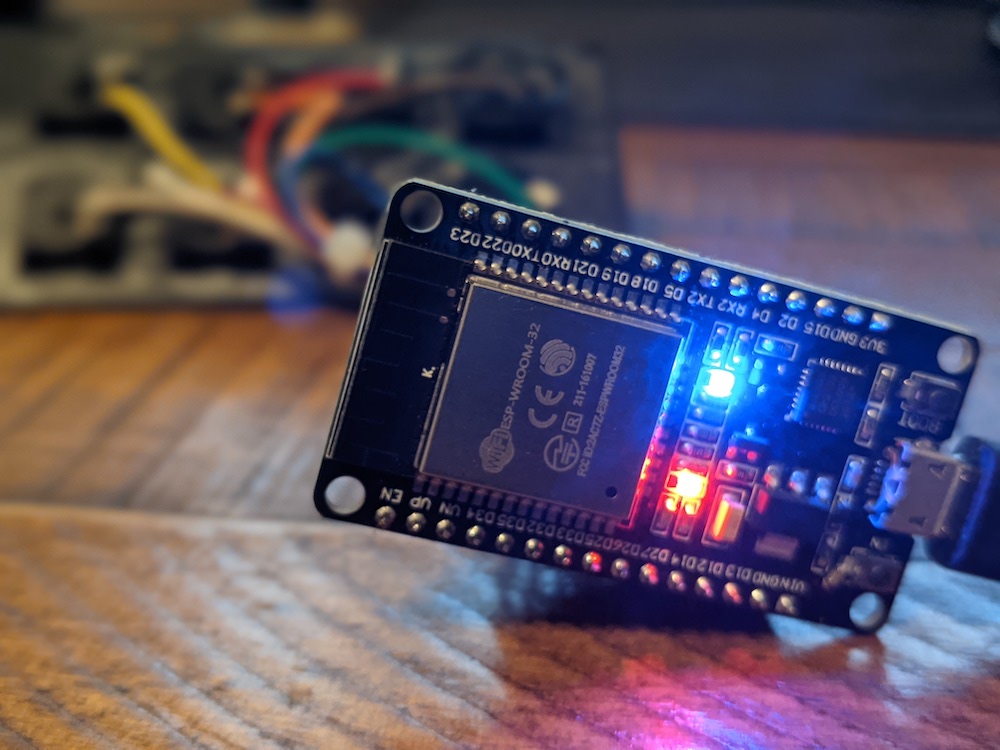
Can You Invoke OCI REST APIs Directly from an Arduino (ESP-32)?
Posted By: Todd Sharp on 4/23/2021 12:00 GMT
Tagged: APIs, Cloud

Recently I had a flash of inspiration to build a standalone project on a microcontroller that would invoke OCI APIs directly from the device. I’ve played with microcontrollers and single-board computers many times in the past, and every time I’ve done so it has always involved some sort of VM or service in the cloud that would act as a “proxy” for the device. Often times this would be a service tier (either a Java or Node application) that would perform some task like data persistence or retrieval. On other occasions, it might be some kind of message queue like RabbitMQ that the device would produce messages to or consume messages from. Often times the “cloud” bit can’t be avoided, but wouldn’t it be nice if certain tasks could be performed without having to turn up a service in the cloud? We can already do this to some extent by persisting or querying a database with Oracle REST Data Services, but I wanted to open this up a bit more and provide the ability to utilize the full complement of Oracle Cloud Infrastructure REST APIs from a microcontroller. This would provide the ability to interact directly with a cloud tenancy from an Arduino device, but since it’s a somewhat complex operation, it would only work on boards with a decent amount of RAM onboard like the ESP-32.
Why would you want to do this? That’s a good question! There are quite a few use cases that inspired me down the path to seeing if I could make this work. One potential use case would be writing data collected from the microcontroller directly to Object Storage or to the OCI Monitoring Service via custom metrics. This could prove very valuable for customers who collect large amounts of data from their environment and would like that data to be available in the cloud for further analysis. Another use case for invoking the OCI REST APIs on a device would be to take advantage of the Oracle Streaming Service and produce/consume messages directly from the device. This would eliminate the need for a third-party messaging queue as well as “yet another” VM running in the cloud. Maybe you just want to automate certain tasks or collect bits of data about your tenancy on demand from a simple little device. There are tons of potential uses, and I’m sure your mind is already coming up with a bunch of ideas that I haven’t even thought of.
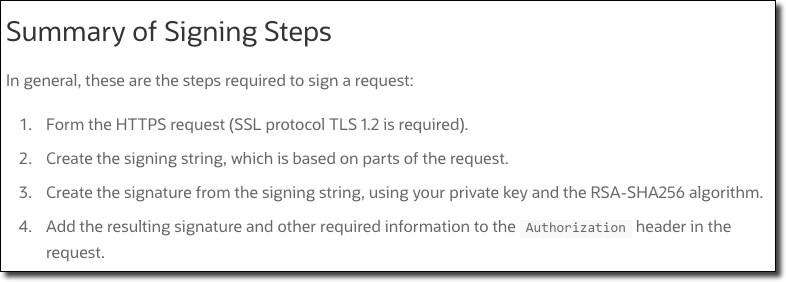
So, enough backstory and justification. You’re here because you want to know the answer to the question that I posed in the title. Can it be done? The answer, of course, is YES! And I’ve thrown together a little (unofficial) library to help you out with this. This is not an “official” SDK, but it will help you make calls to the OCI REST API from your ESP-32. Honestly, I hesitated to even create a library in favor of just demoing how to sign your REST API request in a blog post, but the process turned out to be pretty complex so for portability and repeatability sake, I bundled it into a library. If you’ve ever tried to manually sign an HTTP request to the OCI REST APIs, you’ll know that this is not a fun (nor easy) thing to do. The docs certainly make it sound easy:

For the most part, it’s not complicated. But it does require some specialized libraries to encode and sign the request, and thankfully the ESP-32 ships with mbedtls which we can use to do the rather complicated signing operations. Let’s dig in and see how to use this library to call the OCI REST APIs.
Heads Up! We’re not going to discuss how the library itself signs and makes the HTTPS request. Instead, we’ll look at how to use the library in your own Arduino project. If you’d like to see how the library constructs and signs the request, check the source code on GitHub.
Here is a handy table of contents for your navigation pleasure:
OCI APIs (Unofficial Library)
The purpose of this library is to let you invoke Oracle Cloud Infrastructure (OCI) REST APIs directly from your device.
Before You Use This…
You should already be familiar with the OCI REST APIs:
You should also have already created the required keys and collected the necessary OCIDs. See Required Keys and OCIDs.
About
This library exists to make it easier to make calls to the OCI APIs from your microcontroller. The request signature process is complex, and it can be tricky to sign an HTTPS request from a memory-constrained device. I created this library to simplify the process.
Please note! This library has only been successfully tested on an ESP-32. It has not been tested on any other board, and probably won't work on any other board due to memory constraints and dependent libraries.
Using This Library
To use this library in your own project, download the latest release from GitHub and unzip it into your Arduino library directory. There are several examples included that you can access by opening ‘File’ -> ‘Examples’ -> OCI REST for ESP32 in your Arduino IDE.

Documentation
The latest documentation for this library lives online at https://recursivecodes.github.io/oci_rest_api_esp32/html/index.html.
Usage
Include the Library
Declare Variables for Keys and OCIDs
Declare some variables to hold your keys and OCIDs. Keep this out of source control!
Construct OCI Profile
Pass in your tenancyOcid, userOcid, keyFingerprint, apiKey. If your private key is password-protected, pass the password in as the 5th argument.
Construct OCI Instance
Construct an instance of the Oci class, passing in your profile. This will initialize the API class and configure the NTP server needed to obtain a timestamp to include with each request.
Request Object
Construct a request object. Pass in the REST endpoint host, the path, HTTP method as the first 3 arguments.
The example above makes a secure request because a copy of the endpoint's Root CA Cert is passed in as the final argument. You can get a copy of the Root CA Cert in many ways. Here's an example using openssl on *nix compatible systems:
If you want to make the request insecure (the Root CA Cert will not be validated), pass NULL instead of the cert.
If you want/need to add request headers to the API call, construct and pass an array of Header structs in argument 4 and the length of that array in argument 5.
Response Object
Construct a response object. This will ultimately hold the results (or any errors) of your API call.
If you want/need to retrieve any headers from the API response, construct and add an array of Header structs. Just add the name of the header to retrieve, the value will be populated when the API call is complete.
Call API
Call the apiCall() method of Oci, passing the request and response objects.
If successful, the statusCode property of the response object will be populated with 200. You can then print/handle the result as needed. In this example, I'm deserializing the JSON string into an object using ArduinoJson.
The previous example might produce output such as this:
Publishing and Subscribing to an Oracle Stream
One of the more exciting possibilities with this library is the ability to publish and consume messages from an Oracle Stream. There’s an example included in the library, but let’s take a look at how easy it is.
We’ll need this library, ArduinoJson, and the mbedtls library (available when using ESP-32 boards) to Base64 values. Install them, and include them in the sketch.
Set the required variables for the tenancy and instantiate the library as we did above. Then we’ll set a few variables necessary for streaming.
Next, create a postMessage() function. In this function, we’ll create a JSON object and Base64 encode the value of the message. We’ll then POST that message to the proper API endpoint.
To read from a stream, we’ll first need a cursor. Create a variable to store the cursor globally (since it’ll change with each retrieval) and add a function called getCursor(). We’ll use LATEST as the cursor type.
Finally, add the getMessages() function that will retrieve the messages from the stream.
Call the functions as necessary:
Summary
In this post, we looked at how to call OCI REST APIs from an Arduino (ESP-32) device. Please leave your feedback below if there are any further enhancements that you’d like to see in this library.
Related Posts

Querying Autonomous Database from an Oracle Function (The Quick, Easy & Completely Secure Way)
I've written many blog posts about connecting to an Autonomous DB instance in the past. Best practices evolve as tools, services, and frameworks become...

Brain to the Cloud - Part III - Examining the Relationship Between Brain Activity and Video Game Performance
In my last post, we looked at the technical aspects of my Brain to the Cloud project including much of the code that was used to collect and analyze the...

Brain to the Cloud - Part II - How I Uploaded My Brain to the Cloud
In my last post, we went over the inspiration, objectives, and architecture for my Brain to the Cloud project. In this post, we'll look in-depth at the...