Adventures in CI/CD [#4]: Deploying A Microservice To The Oracle Cloud With GitHub Actions [OCI CLI Edition]
Posted By: Todd Sharp on 5/1/2020 12:00 GMT
Tagged: Cloud, Containers, Microservices, APIs, Integration, Java, Open Source

Welcome back to this fun series where we dive deep into the always exciting world of CI/CD. We’ve made it to step 4 in this series which is where we finally get to deploy our microservice application to a virtual machine in the Oracle Cloud. I know it may seem like it has taken us a long time to get to this point, but we’ve covered some very important foundational material so far that you might want to catch up on if you’re just joining us.
- Adventures In CI/CD [#1]: Intro & Getting Started With GitHub Actions
- Adventures in CI/CD [#2]: Building & Publishing A JAR
- Adventures in CI/CD [#3]: Running Tests & Publishing Test Reports
In this post, we're going to talk about deploying our microservice to a virtual machine in the Oracle Cloud and to do that we'll utilize the OCI CLI.
Note: We’re going to be working with the Oracle Cloud Infrastructure (OCI) Command Line Interface (CLI) and Software Development Kit (SDK) as we move forward in this blog series. This means you will need some information about your cloud tenancy and other items such as public/private key pairs handy. If you have not yet configured the OCI CLI on your local machine, you may want to do that now or simply refer to the documentation on how to do so to find some of the data that we’ll require in our GitHub Action workflow.
Can You Keep A Secret
We’re going to be using the OCI CLI to create (or ensure the existence of) the cloud infrastructure required to deploy our microservice application. In order to use the CLI we’re going to need to first make sure that it is installed on the runner VM and secondly we’re going to need to create the necessary config file on the runner VM that is used by the CLI to authenticate our requests. To store the information required to create the config file we’re going to use GitHub Secrets.
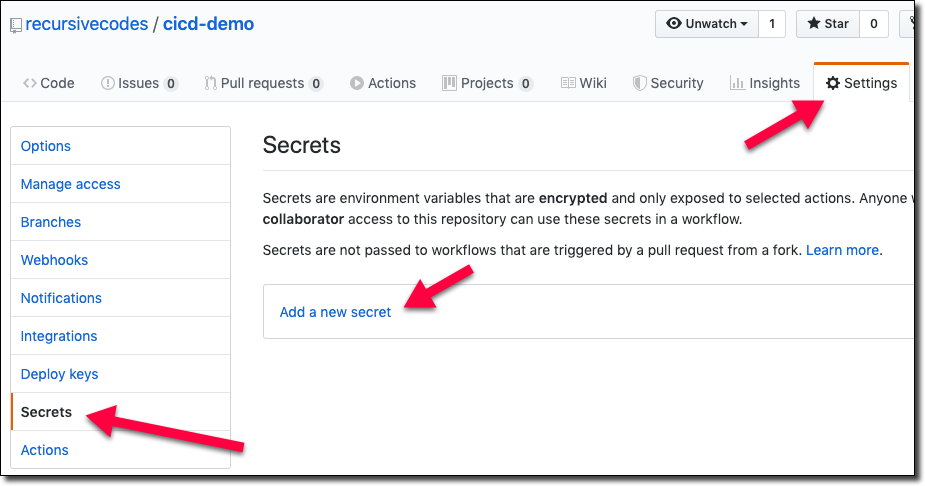
Secrets are environment variables that are encrypted and only exposed to selected actions. Anyone with collaborator access to this repository can use these secrets in a workflow.
Let’s create our secrets! Remember, all of the data we need here is available in your existing OCI CLI config file (usually located at ~/.oci/config). To get started, go to the ’Settings’ tab in your project at GitHub and click ’Secrets’ in the sidebar and then click ‘Add a new secret’.
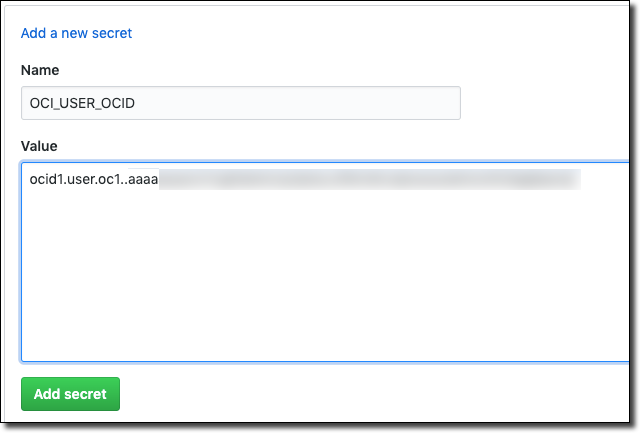
Let’s create secrets for the following credentials:
- User OCID
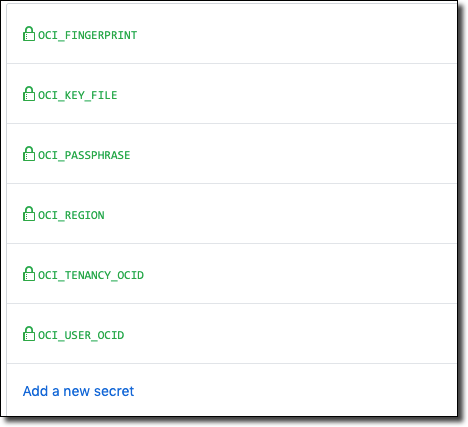
- Key Fingerprint
- Key Passphrase
- Tenancy OCID
- Region
- Key File Contents
I like to prefix the secrets so that as I add additional secrets to my project for other purposes it is easier to tell what the secret is being used for, so I’ll prefix these secrets with OCI.
Continue until you have all of the necessary values configured as secrets in your GitHub project.
Using Secrets In Your Workflow
Using the GitHub secrets in your workflow is quite straightforward. Each secret gets added as an environment variable prefixed with “secrets” (don’t worry, sensitive secret values will be properly masked in the console output). That means we can easily grab them and write out a config file, so let’s add a step to do that.
Installing The CLI
We can install the CLI via the provided install shell script, making sure to pass the --accept-all-defaults flag so that the script does not wait for any user input.
At this point, we’ve written our config file and SSH key to the runner’s disk and installed the CLI. The only step left is to fix the permissions on those files so we can use the CLI.
We can now use the CLI to perform any operation that we need to provision and deploy our microservice.
Creating The Instance
We can now move on to creating our VM instance. We will need some information in order to create our instance via the CLI, so create some more secrets containing the proper values for the following elements. Here’s a quick overview of the necessary secrets for creating and working with a VM instance.
| Secret |
Description |
|---|---|
|
|
The Availability Domain in which the instance will reside. |
|
|
The compartment in which to create the instance |
|
|
An OCID for a custom image to use to create the VM. In my case, a custom image that has Java 11 pre-installed. |
|
|
The shape you want to use for the VM. For example VM.Standard2.1 |
|
|
The text content of an SSH private key that will be used to connect to the running instance to perform start/stop operations and to push the JAR file to the instance. |
|
|
The public part of the SSH keypair used to connect to the new instance. |
|
|
The OCID of the subnet to associate the instance. This subnet should have a security list that has the proper ingress rules in place to expose the necessary ports for your application. |
Set the proper values into secrets as shown above. We’ll assume that you Virtual Cloud Network has been setup and configured outside of the build process, but if necessary you could use the CLI to provision one for you during your build.
Before we try to create our new instance we should first check to see if the instance hasn’t already been created (in a previous run). If it exists, we’ll use that instance but if it does not yet exist we will create it. Let’s add a step to our workflow configuration to perform this check via the CLI.
Now we can create a conditional step to create the instance if it does not yet exist. We simply add in `if` to check for the INSTANCE_OCID that would have been set into the environment variables in the previous step.
Since the ‘Create Instance’ step only runs if there is no INSTANCE_OCID in our environment, we need to make sure that we set it as a result of the new instance creation here so that we can use it in subsequent steps. Also, note that we have added —wait-for-state RUNNING to the create instance call which means it will block our pipeline execution until the instance exists. This is important since we wouldn’t be able to work with it going forward unless it is up and running.
Deploy App
OK, so now we have an instance created and up and running, we’re ready to deploy our application to the running instance. We’re going to use a few different ‘actions’ from the marketplace - one to send remote commands via SSH and another to securely transfer our JAR file to the instance. In order to use those, we’re going to need the instance IP so add a step to our build pipeline to grab the public IP:
Stop App
Before we push our JAR file lets first stop the running application on the server. We’ll use the SSH Remote Commands action to accomplish this which lets us execute these commands over SSH. This means we’ll need our username and the private key associated with the public key we used earlier to create our instance (you should have already set this into your secrets if you followed above). This command will find the PID of the running application and kill that PID. Then it will create a directory for our application deployment to make sure it exists.
Push JAR
Now that the application has been shut down we can push our JAR file. For this we’ll use the SCP Command action, passing the source file from our runner VM’s workspace build directory into the target app directory that we created in the previous step.
Start App
The last step in our deployment is to restart the app now that the latest version has been uploaded. We’ll use the Remote Commands action again and this time I’ll rename the uploaded JAR and make sure to use nohup so that the java -jar command continues to run after we disconnect and capture the output into a timestamped log file.
Run Build
Once we’ve configured all of our build steps we can commit and push our code to GitHub to watch the magic happen

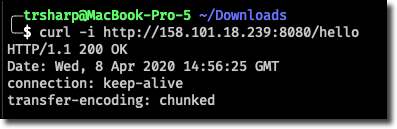
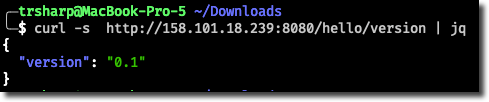
We can confirm the deployment by making a cURL call to our microservice.
And from here on out we can enjoy the beauty of CI/CD. Make a change, commit the code and observer our automated deployment. Obviously you’d wrap some additional logic around the process, but this series is about giving you the basic foundations on which to build.
Let’s add another controller method, commit and push our code.
After our pipeline runs we can test the new endpoint.
TL;DR
Wow, we covered a lot in this post, but it’s all great stuff! In this post, we installed and configured the Oracle Cloud Infrastructure Command Line Interface (OCI CLI) into our GitHub Actions runner VM and then used the CLI to conditionally create a VM instance in the Oracle Cloud. We then remotely stopped our microservice application on the cloud instance, pushed our new JAR and then remotely started our microservice application.
Next
In our next post, we will consider an alternative method for deploying our microservice application to the Oracle Cloud by using a Gradle plugin to perform the same activities instead of using the OCI CLI.
Source Code
For this post can be found at: https://github.com/recursivecodes/cicd-demo/tree/part-4
Photo by Maximilian Weisbecker on Unsplash