Adventures in CI/CD [#5]: Deploying A Microservice To The Oracle Cloud With GitHub Actions [Gradle Plugin Edition]
Posted By: Todd Sharp on 5/4/2020 12:00 GMT
Tagged: Cloud, Containers, Microservices, APIs, Integration, Open Source

We’ve made it to post number five in this series, and I have to say that I’m having more fun than I should be allowed to have playing around with CI/CD and deploying microservices to the Oracle Cloud. I have learned a ton putting this series together and I truly hope you are enjoying it and finding it useful. To recap, here’s what we’ve done so far:
- Adventures In CI/CD [#1]: Intro & Getting Started With GitHub Actions
- Adventures in CI/CD [#2]: Building & Publishing A JAR
- Adventures in CI/CD [#3]: Running Tests & Publishing Test Reports
- Adventures in CI/CD [#4]: Deploying A Microservice To The Oracle Cloud With GitHub Actions [OCI CLI Edition]
For brevity and to prevent repeating myself I will assume you have at least read the last post in this series so if you have not yet done so, please do that before continuing. In that last post we used the OCI CLI to create our instance but this time we’re going to switch our application to use the OCI Java SDK Gradle plugin by my esteemed colleague Andres Almiray. You’ll need many of the secrets from the previous post created in your repo, so if you haven’t created them yet then you might want to do that now.
Configure Gradle
First we will need to add the OCI Gradle plugin to our build.gradle file in the plugins block:
Since the plugin utilizes the OCI Java SDK which depends on javax.activation we’ll need to add a buildscript dependency:
Next, we’ll register a new task in our build that we can later invoke from our build pipeline. We’ll pass in the necessary variables from the pipeline, so register the task like so in your build.gradle:
This task will utilize the SetupInstanceTask method of the plugin and as I said above we will be able to pass additional variables in when we execute the task later on. Let’s move to our workflow YAML file and remove the references to the OCI CLI that we added in the last post in this series. Remove the following:
We’ll still need our OCI config file as it will be used for authentication by the Gradle plugin, so leave that step in and add another command at the end of it to create a blank cloud-init file. We won’t populate it for now, but if you wanted to further customize your newly launched instance you could certainly populate this shell script (or have a version checked in to your GitHub repo that you could copy over).
Now let’s add a step to use Gradle to invoke the task that we registered above. Note that the create instance task will also create all of the necessary VCN infrastructure to support the instance.
This step will complete successfully regardless of whether or not the instance exists beforehand so we don’t have to worry about checking that our instance already exists before we invoke it. It will also write out a properties file containing relevant data about the instance that we can use to get information like our instance’s public IP so we’ve eliminated yet another call to the CLI/SDK. That said, let’s add a step to our workflow to read the properties file and retrieve the instance IP as well as the security list ID so we can add an ingress rule for the app that our microservice runs on.
Now we can add the ingress rule using the addIngressSecurityRule task that the OCI Gradle plugin provides.
From here on out the build continues as it did in the previous post. We can stop the app, push the JAR and start the app with the following steps:
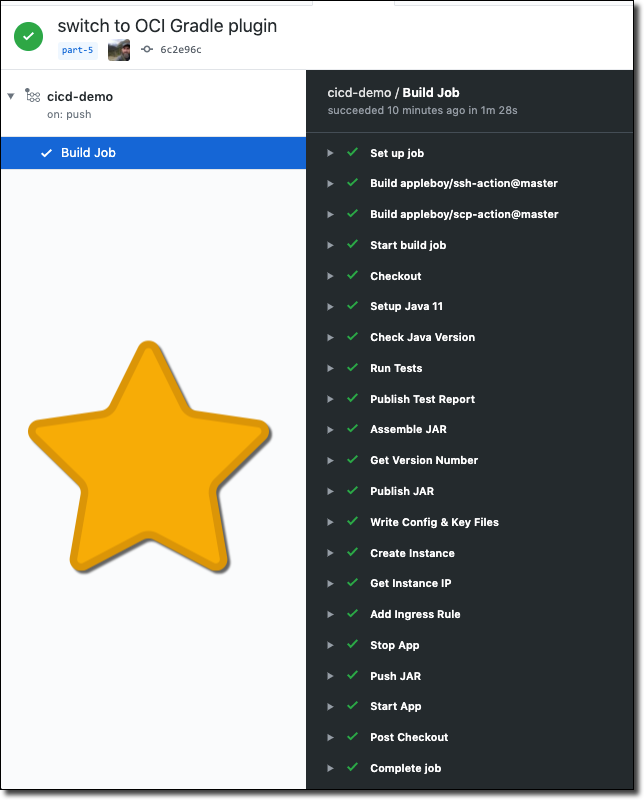
Once we commit and push our refactored build we can observe the workflow execution in GitHub Actions:

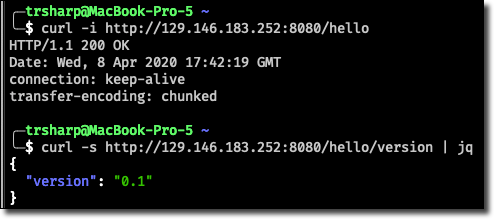
And we can confirm the application has been deployed on the new instance:

TL;DR
In this post, we refactored our microservice deployment to utilize the OCI Gradle Plugin to create our instance instead of using the OCI CLI. This presents an alternative option if you prefer to use Gradle but accomplishes the same end goal - deploying our microservice application on a VM in the Oracle Cloud.
Next
I know it feels like we have covered a whole lot of content so far in this series, but trust me when I say we’re only about halfway done with what I plan on covering. Next up we’re going to spend a few posts going into some more “advanced” topics. The first thing we’ll look at is adding some database interactions to our microservice because a simple “hello, world” can only teach us so much. And since working with the database involves schema changes, we’ll also look at database migrations in a future post. There is lots more to come even after those topics, so stick around and thank you for reading!
Source Code
For this post can be found at https://github.com/recursivecodes/cicd-demo/tree/part-5
Photo by Dylan McLeod on Unsplash