Adventures in CI/CD [#8]: Deploying A Microservice With A Tested Persistence Tier In Place
Posted By: Todd Sharp on 5/15/2020 12:00 GMT
Tagged: Cloud, Containers, Microservices, APIs, Integration, Java, Open Source

We have covered a ton of content already in this long series on CI/CD, and now we’re ready to look at the next step in our adventure on the path to CI/CD enlightenment. In case you’ve missed anything, here’s what we have covered so far:
- Adventures In CI/CD [#1]: Intro & Getting Started With GitHub Actions
- Adventures in CI/CD [#2]: Building & Publishing A JAR
- Adventures in CI/CD [#3]: Running Tests & Publishing Test Reports
- Adventures in CI/CD [#4]: Deploying A Microservice To The Oracle Cloud With GitHub Actions [OCI CLI Edition]
- Adventures in CI/CD [#5]: Deploying A Microservice To The Oracle Cloud With GitHub Actions [Gradle Plugin Edition]
- Adventures in CI/CD [#6]: Adding A Persistence Tier To Our Microservice
- Adventures in CI/CD [#7]: Testing The Persistence Tier With Testcontainers
In this post, we’re going to focus on the changes necessary to deploy our microservice now that we have added a persistence tier and tested it in our pipeline with Testcontainers. Since we used Liquibase to manage our DB migrations, it should be a pretty painless journey to deploy our application to the Oracle Cloud. So far we’ve got our application tested against Oracle XE both locally and in our pipeline and we’re confident that we’re ready to deploy our changes to our “production” instance which is currently set up as a VM in the Oracle Cloud. We’ve yet to configure any database for production yet, so it’s time to spin up an instance of Autonomous DB in the cloud. If you’re new to Autonomous DB, here’s a video to walk you through the process of getting started.
Autonomous Wallet
Our Autonomous DB connection requires the use of a “wallet” to make a secure connection. You’ll need to download your wallet from the Oracle Cloud console. If you’re unsure how to do that, here’s another tutorial that will show you how to download that:
You can also download your wallet via the CLI if you prefer:
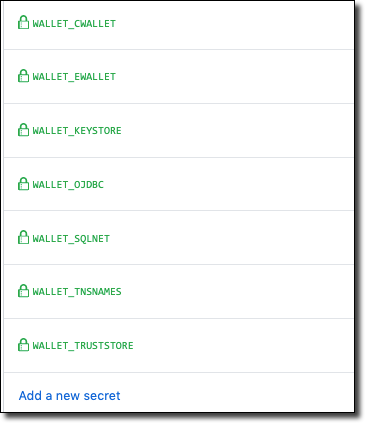
Now that we’ve downloaded the wallet, we’ll need to create GitHub secrets with our wallet file contents so that we can get them into our build and ultimately into our VM so the application can use the wallet to create the secure connection. Let’s convert our wallet contents to base64 so we can store them as secrets in GitHub. Here’s a quick bash script to help with that (or you can certainly do it manually).
Create secrets in GitHub for each file and use the base64 contents as the secret.
Next, add a step in our workflow to write our configuration files to our production VM’s filesystem (using the ssh-action action that we’ve used in other steps).
Configure Production Datasource
We’ll need to add a new configuration file, so create a new file in src/main/resources called application-oraclecloud.yml. Make sure you use that exact name because Micronaut supports environment detection and is able to detect when your application is running on the Oracle Cloud and will load your environment-specific configuration accordingly. That means that we can specify config variables that only apply to a particular environment. Populate your new application-oraclecloud.yml file like so:
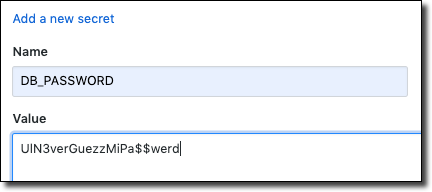
Here you’ll have to use your specific TNS name within your URL as the default value (notice the backticks surrounding the URL - these are necessary since it contains colon characters). Also, default the username to your schema user. We’ll set the DATASOURCE_PASSWORD when we launch the JAR file, but we’ll need one more secret in GitHub to contain that value, so create one called DB_PASSWORD.
Finally, modify your ’Start App’ step to pass the password value into our app as a system property when we launch the JAR. Micronaut will pick up this value and set it as appropriate.
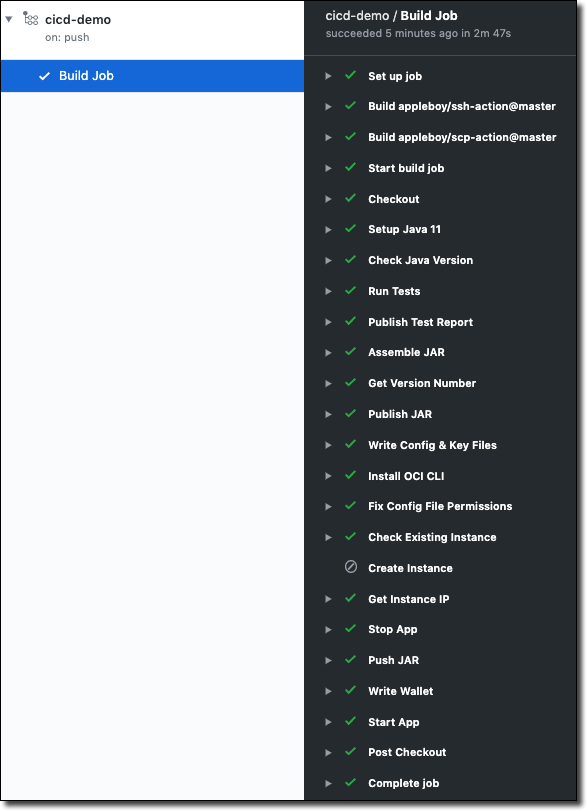
After pushing the changes your pipeline job should execute successfully.
If you SSH into the VM and look at the output log you should see something similar to the following. Notice that our Liquibase migration has been properly run against our production Autonomous DB instance.
You can confirm the deployment with a few cURL commands:
Which will create and return the new user object.
And to retrieve that user by ID:
Which returns the same user object:
TL;DR
In this post, we created an Autonomous DB instance, downloaded our wallet credentials and modified our GitHub Actions pipeline to write our wallet to our production VM. We then created a production-specific datasource configuration and modified our “Start App” step to pass our DB password to the application when launching it.
Next
In the next post, we’ll switch gears and look at deploying our microservice application as a Docker container.
Source Code
For this post can be found at https://github.com/recursivecodes/cicd-demo/tree/part-8
Photo by Bill Jelen on Unsplash
Related Posts

Querying Autonomous Database from an Oracle Function (The Quick, Easy & Completely Secure Way)
I've written many blog posts about connecting to an Autonomous DB instance in the past. Best practices evolve as tools, services, and frameworks become...

Sending Email With OCI Email Delivery From Micronaut
Email delivery is a critical function of most web applications in the world today. I've managed an email server in the past - and trust me - it's not fun...

Brain to the Cloud - Part III - Examining the Relationship Between Brain Activity and Video Game Performance
In my last post, we looked at the technical aspects of my Brain to the Cloud project including much of the code that was used to collect and analyze the...