Stand Up A Free Blog In 15 Minutes With Ghost In The Oracle Cloud
Posted By: Todd Sharp on 11/13/2019 5:12 GMT
Tagged: Cloud, JavaScript, Open Source

Back in September we announced a new "always free" tier for Oracle Cloud that gives developers and students a completely free way to try out the Oracle Cloud. As a developer advocate and evangelist for the Oracle Cloud I am a huge fan of this tier because I truly believe in our cloud platform and I know that as more developers get a chance to experience it they will find it easy to use and will undoubtedly make the Oracle Cloud their choice going forward for their cloud needs. I've spent some time recently highlighting some possible uses of the new free tier, so after you've read this post please check out some of my other ideas and get started on the free tier today!
- Blast Off To The Cloud: Free Team Chat With Rocket.Chat In The Oracle Cloud
- Install & Run Discourse For Free In The Oracle Cloud
- Installing Node-RED In An Always Free VM On Oracle Cloud
- How To Setup And Run A Free Minecraft Server In The Cloud
In today's post, we'll create an "always free" VM, configure it for internet access and then install Docker (for container management), Ghost (a free, open source blogging/CMS platform written in Node.JS) and Caddy Server to act as a reverse proxy and automatically manage our TLS certificates for HTTPS encryption on our new blog. The process is not complicated, and I promise you'll be able to get your blog online in 15 minutes if you follow the tutorial below.
Here are the steps we'll take. If you already know how to create a VM or have already done so, skip ahead as necessary.
- Create An Always Free VM
- Before You Install Ghost
- Install Docker
- Install Ghost
- Install Caddy
- Configure Ghost
Create An Always Free VM
If you're new to Oracle Cloud, you'll have to first sign up for a completely free account. You'll need to have a credit card on file, but you'll absolutely never be charged if you stick to the "always free" services. Once you've signed up for your free account, log in and head to the Oracle Cloud dashboard. It looks like this:

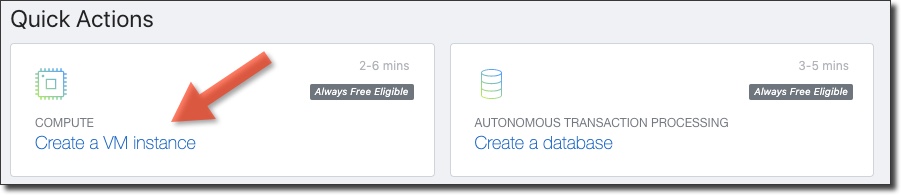
Let's create a VM. Click on 'Create a VM instance':
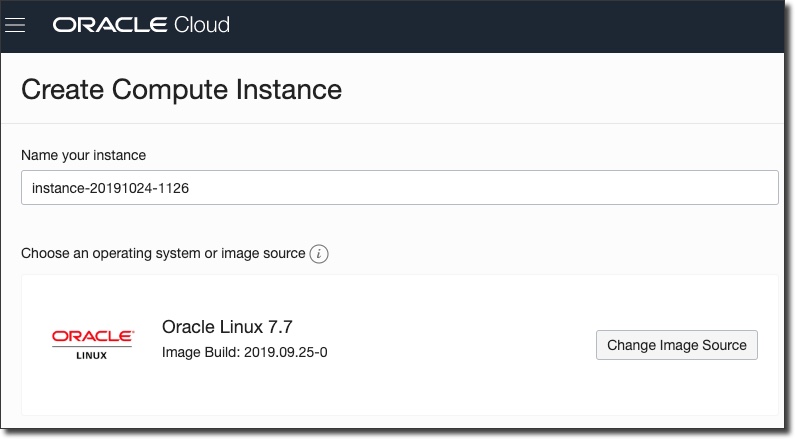
Give your instance a name and optionally change the image source. The instructions below will be for the default OS which is Oracle Linux, so it's probably best to stick with the default.
If necessary, click 'Show Shape, Network, Storage Options' and make sure the Availability Domain and Instance Type are both 'Always Free Eligible'.
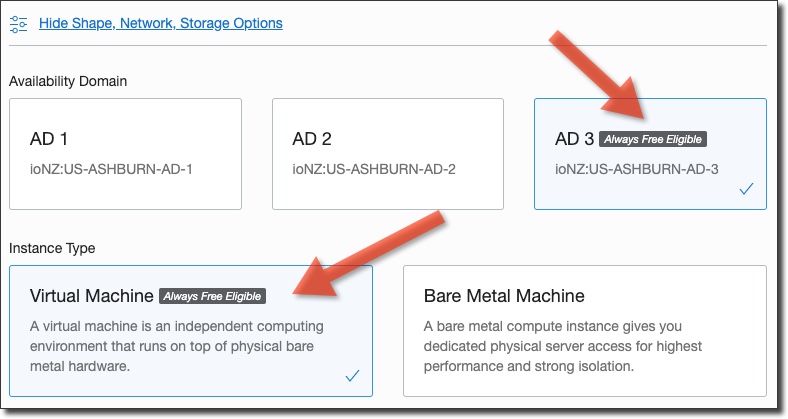
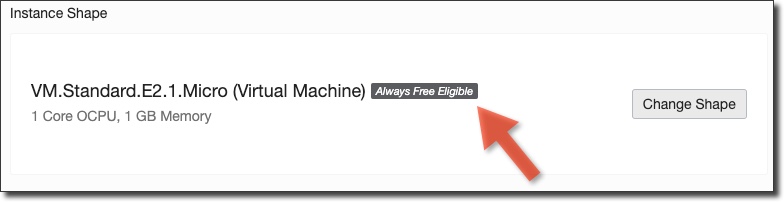
Same thing goes for the instance shape - choose the 'Always Free Eligible' option.
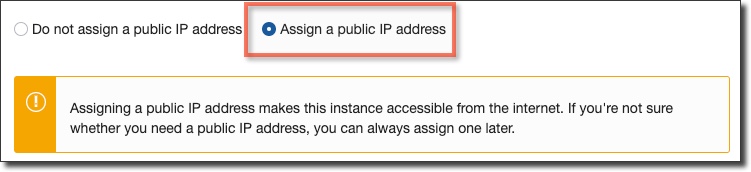
Make sure to check 'Assign a public IP address' otherwise you will not be able to access the VM via the web!
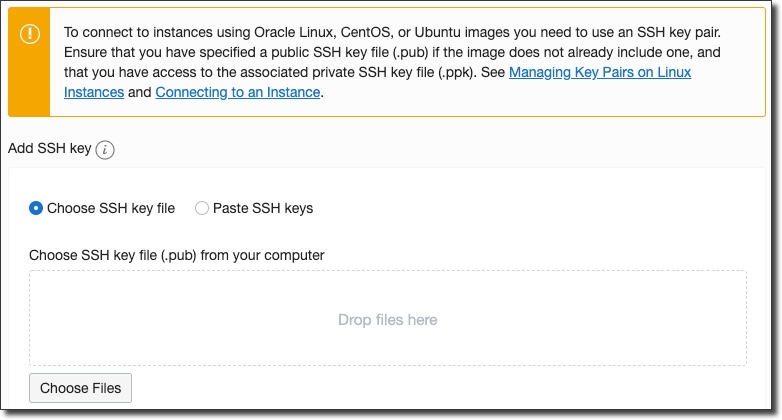
Next, choose a public key file that has an associated private key that can be used to access this VM after it is created.
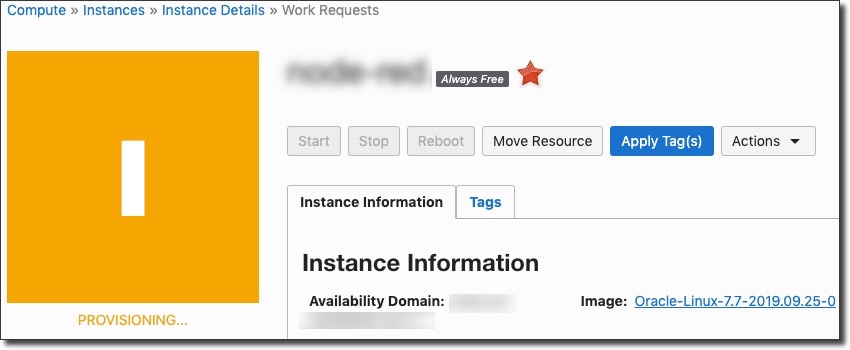
Click on 'Create' and you'll be directed to the instance details page and the VM will be in a 'Provisioning' state:
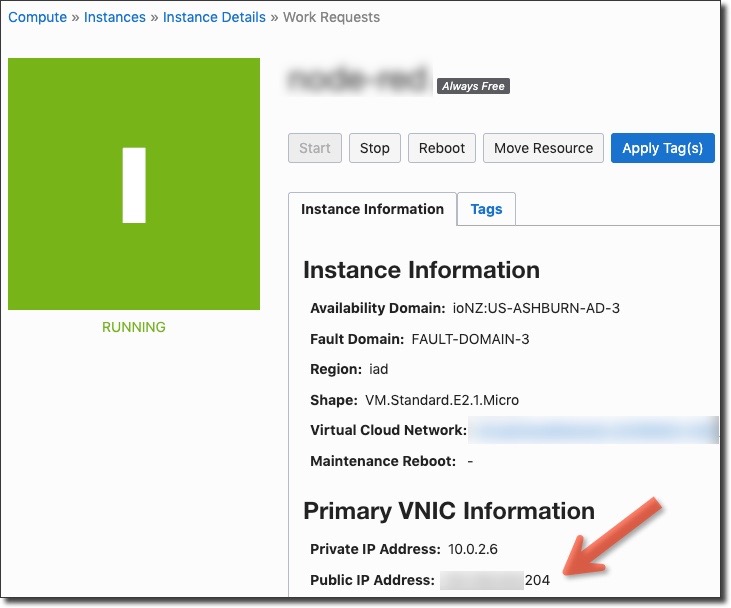
After a short wait the instance will become 'Available'. Copy the public IP address that has been assigned to the VM. We'll need this as we move on in this tutorial.
Your VM is now ready to go. You can now SSH in to the machine using the private key associated with the public key you uploaded when you created the VM.
Before You Install Ghost
We'll need to take care of a few items before we can start the Ghost install. If you skip this step your install will certainly fail.
Domain Name Record Set
The first thing we'll need to do is associate our VM's public IP address with a domain name. We're going to get free HTTPS out of the box by creating a reverse proxy with Caddy which makes use of Let’s Encrypt to automatically provide you SSL protection for your communications. In my case, I'm going to use the URL ghost.toddrsharp.com, so I'll add an A record with my DNS host to point at my VM's IP address:
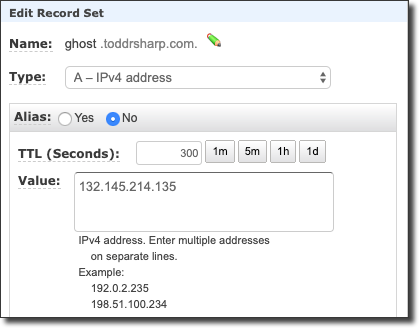
Follow the directions of your particular hosting provider to point a domain (or subdomain) at your VMs IP address and you're ready to SSH in to the VM and continue the process.
Configure Firewall And Security List
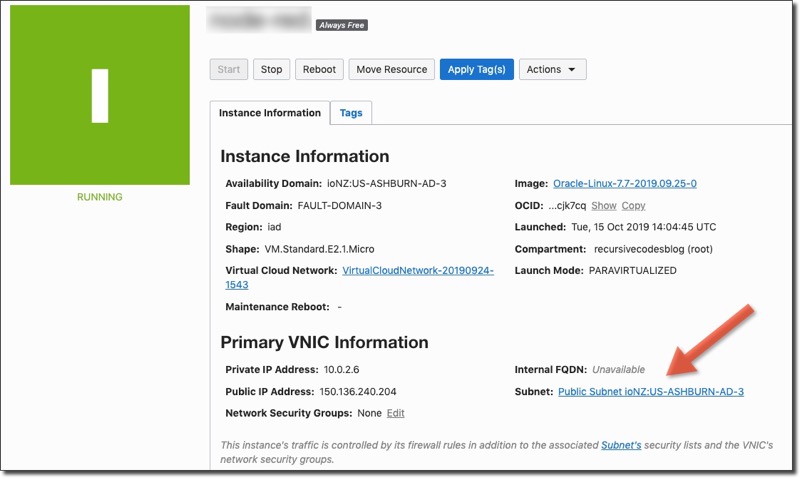
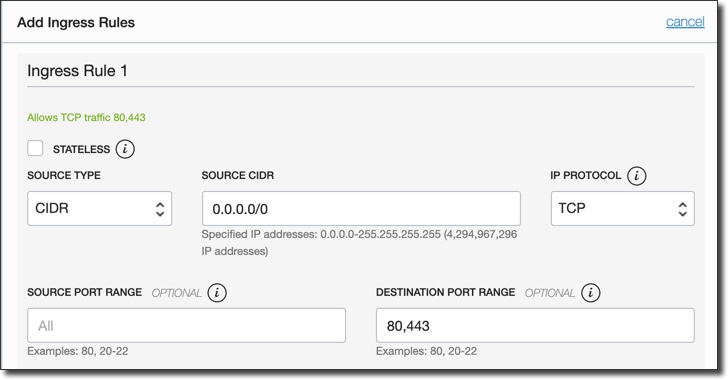
We'll need to open some ports in our firewall and security list to expose the Ghost application to the web, so let's start by add some ingress rules to our VM security list in the Oracle Cloud dashboard. From the VM details page, click on the subnet:
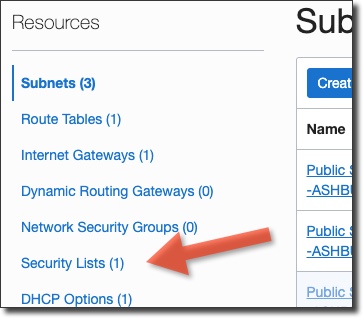
On the subnet details page, click on 'Security Lists'.
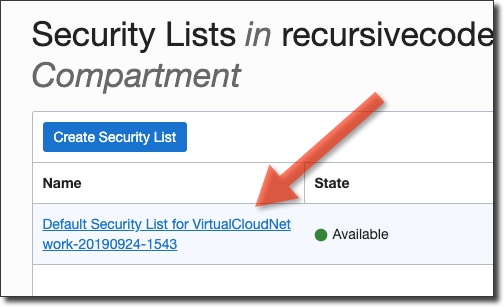
Click on the default security list to edit the rules.
Click 'Add Ingress Rule' and enter a rule to open ports 80,443 to the 'Source CIDR' 0.0.0.0/0 (all IP addresses):
Install Docker
At this point, it's time to SSH in to our instance and start the install process. Once you've connected, run a quick sudo yum update -y to make sure everything is up to date. Next, install Docker:
Before we move on, let's make sure our non-root users can run Docker commands by running:
Important: You'll need to log out, and log back in to ensure your opc user can run Docker commands without sudo.
If you want, confirm the Docker install by running:
docker run hello-world
Install Ghost
Create a directory in the VM that we'll use to store config related to our blog as well as map to our Docker container for persistent storage of our container data.
mkdir /home/opc/ghost
Now we'll install Ghost, which is as simple as running the following command:
Here we are calling docker run with some various arguments to run the ghost image from Docker Hub (the run command will pull the image, if necessary, before running). The --restart always will ensure that this container will restart every time the container exits or Docker restarts (including when the VM reboots) so we don't have to concern ourselves with creating a service. Creating a service is certainly an option, but I find this flag works fine for this application. Read the Docker documentation if you would like to learn more about starting containers automatically. Note, we're mapping the /home/opc/ghost/content drive in the VM to /var/lib/ghost/content in the Docker container. This allows us to make sure that our content and the container's SQLite database will persist across container restarts. We're also exposing port 2368 which is the port that Ghost runs on. Once the container is pulled and running we are ready to move on to installing Caddy. If you get stuck, or run into issues running the Ghost Docker container, refer to the documentation on Docker Hub.
Install Caddy
Before we can move forward, we'll need a few firewall ports open on the VM for ports 80 and 443. That can be accomplished with:
For the Caddy install we'll once again use Docker, and again it is a single command that will get us up and running. Before we run that though, create a config file for Caddy at /home/opc/ghost/Caddyfile and edit it with vim or nano. Populate it like so, changing the URL to the domain name that you've pointed at your VM:
This file tells Caddy to act as a reverse proxy for our domain and redirect all traffic to http://ghost-blog:2368. Now let's run Caddy with:
We're linking up with our Ghost container with the --link flag which will create a secure tunnel between the two containers and add an entry in the /etc/hosts file to map ghost-blog to the Ghost container's IP. We're passing in our Caddyfile by mounting the VM volume, and mounting /home/opc/.caddy which will allow Caddy to store the TLS certs on our VM and prevent it from having to generate new certs every time the image starts. Once this command completes, you're blog is up and running at your domain with a valid TLS cert and all!
Configure Ghost
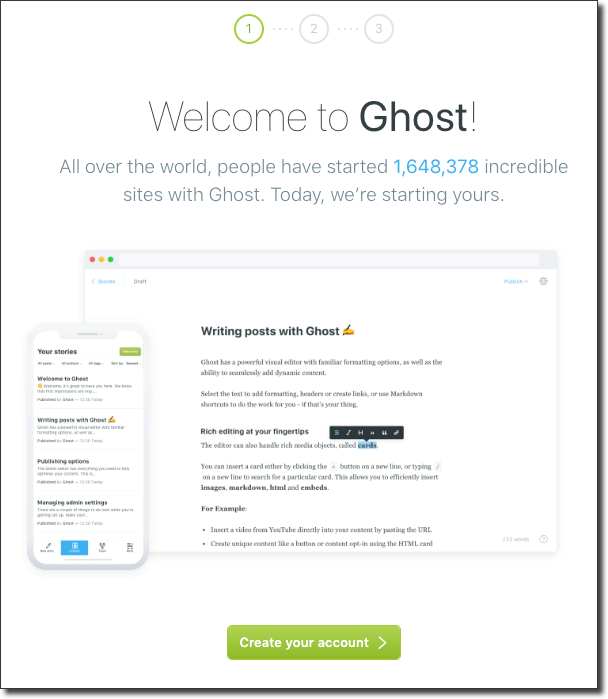
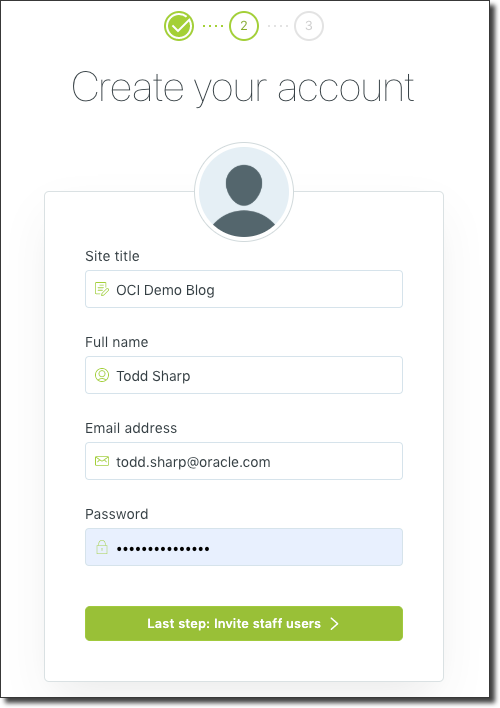
Visit your blog at the domain you have configured, and add /ghost to the end of the URL to visit the admin section and create your account and finish the configuration.
Once you've created your account and logged in you are ready to start customizing your blog and creating content! Take a look at my blog to get an idea what you can do with Ghost: https://ghost.toddrsharp.com.
Photo by Ante Hamersmit on Unsplash
Related Posts

Querying Autonomous Database from an Oracle Function (The Quick, Easy & Completely Secure Way)
I've written many blog posts about connecting to an Autonomous DB instance in the past. Best practices evolve as tools, services, and frameworks become...

Brain to the Cloud - Part III - Examining the Relationship Between Brain Activity and Video Game Performance
In my last post, we looked at the technical aspects of my Brain to the Cloud project including much of the code that was used to collect and analyze the...

Brain to the Cloud - Part II - How I Uploaded My Brain to the Cloud
In my last post, we went over the inspiration, objectives, and architecture for my Brain to the Cloud project. In this post, we'll look in-depth at the...