How To Set Up and Run a (Really Powerful) Free Minecraft Server in the Cloud
Posted By: Todd Sharp on 5/25/2021 2:45 GMT
Tagged: Cloud, Cloud
In this post, I’m going to show you how to set up and run your very own private, dedicated Minecraft server in the cloud. I have blogged about this before but in that post, the server was limited to 1 CPU core and 1 GB of RAM. In this post, we're going to create a server with up to 4 CPU cores and 24 GB of RAM! That’s more than enough resources to host a game with 20+ friends with excellent performance (and still have enough leftover to create another server for something else). And best of all, it’s absolutely free! Forever!! I’m sure you’re just as excited as I am about this, so let’s jump right into it and get started!
Here is what we'll be covering in this post. Feel free to jump around if you need to skip a step.
- Why is this a big deal?
- Sign Up for an Always Free Account
- Create a Virtual Machine Instance
- Connect to the Running VM in the Cloud
- Summary
Why is this a big deal?
In this post, we’re going to launch a new OCI Virtual Machine that uses a new Ampere Arm chip. These VMs provide better price-performance and near-linear scaling for CPU-bound workloads compared to x86-based instances. They are suitable for a wide range of workloads including web applications, media encoding, AI Inferencing, and much more. We’re very proud that Oracle is now partnering with leading technology vendors to make Arm server-side development first-class and easy.
Sign Up for an Always Free Account
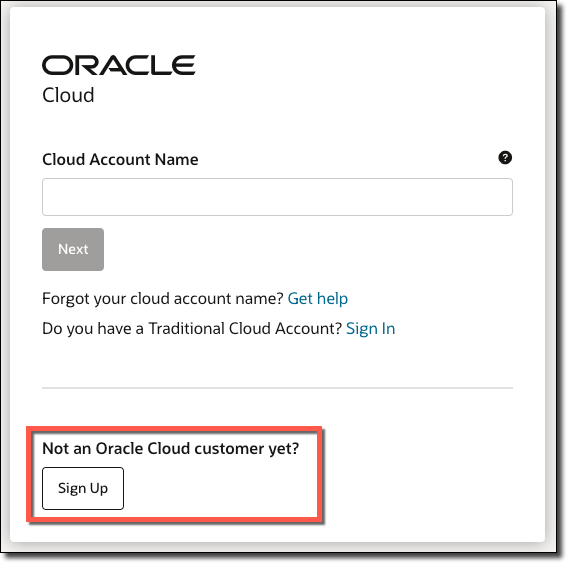
If you do not yet have an account, you’ll need to sign up for an “always free” account in the Oracle Cloud. Head over to cloud.oracle.com/free and click 'Sign Up'. If you already have an account feel free to skip ahead to the next section.
You’ll need to enter a bit of information to sign up, starting with your first and last name and your email address. You’ll get an email to verify your email address.

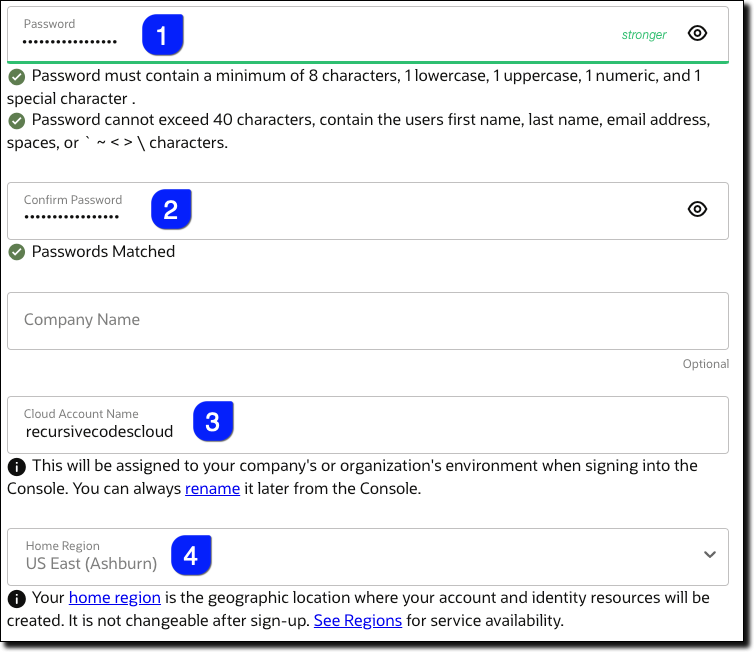
After you verify your email address, enter a password (#1), and confirm the password (#2). Next, choose a name for your ‘Cloud Account Name’ (#3 - also known as tenancy). You’ll want to choose something unique and memorable because you will use this account/tenancy name to log in going forward. Also, choose a home region (#4) that is close to you (geographically speaking). I’m in Georgia in the United States, so I chose ‘US East Ashburn’ as my home region.
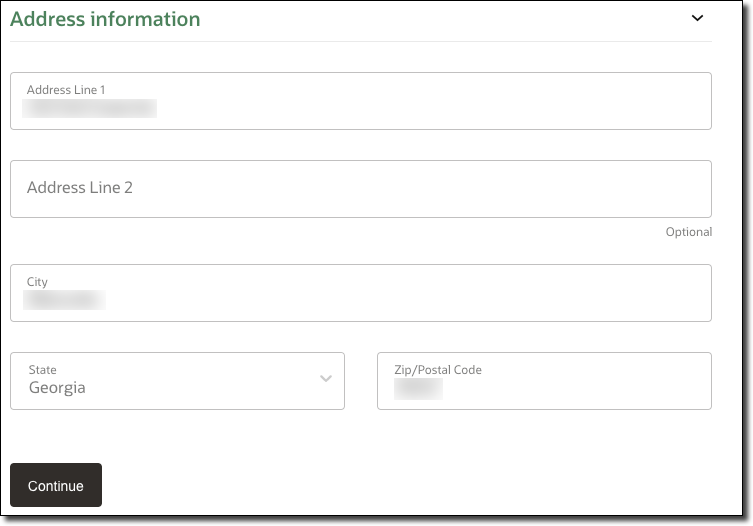
Next, enter your address and then click ‘Continue’.
Now you’ll need to enter and verify a mobile number.
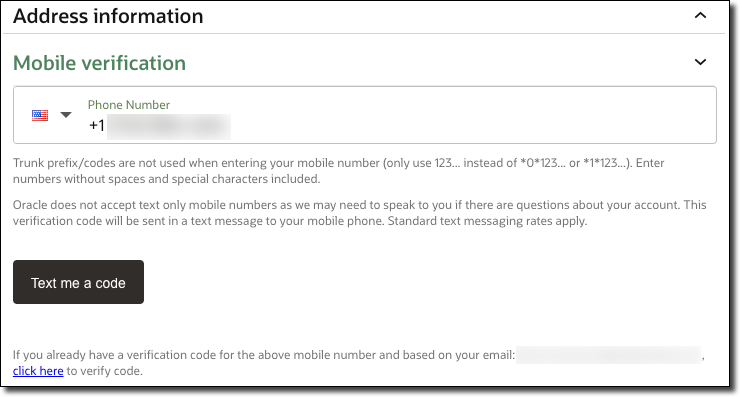
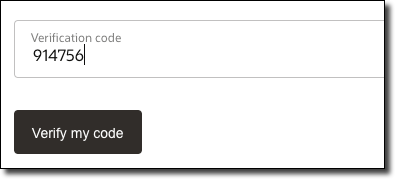
When you receive your code, come back to the signup page and enter your verification code.
Next, you’ll need to enter a credit card. This is used for verification purposes and kept on file for easy upgrading to a paid account later on if you choose to do that. You will 100% not be charged unless and until you manually choose to upgrade the account.
Seriously! You will never be charged for an “always free” account. If you want to upgrade to a paid account, you must manually and intentionally do so!
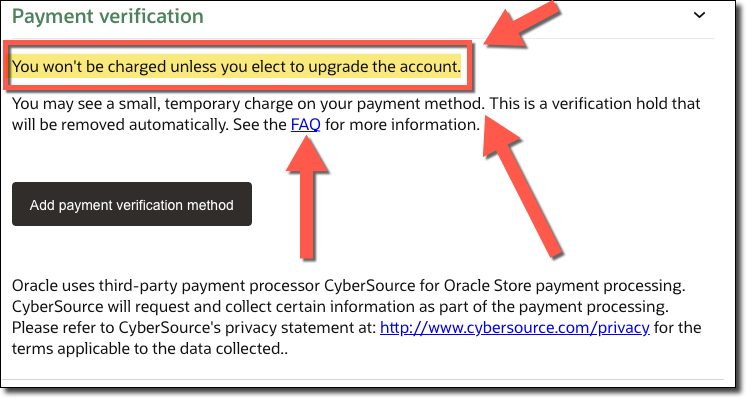
Once you’ve added a payment verification method, you’re ready to finish signing up. The only thing left to do is agree to the terms and conditions and click 'Start my free trial’!

Be Patient! It takes just a few moments to provision your brand new cloud account. You’ll receive an email once it’s ready to go and at that point, you can log in and continue on with this tutorial.
Create a Virtual Machine Instance
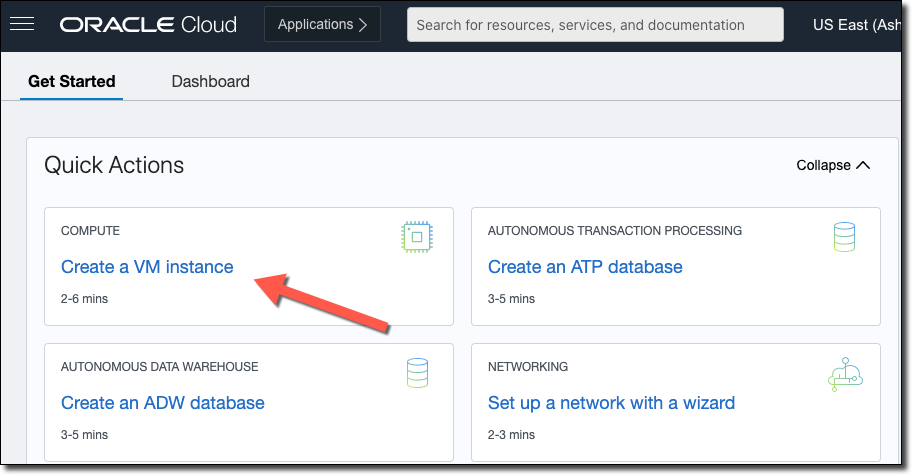
The first thing that you’ll need to do to get your Minecraft server up and running is to launch a new “virtual machine” (VM) in the Oracle Cloud. This is easy, and to get started you can click on ‘Create a VM instance’ right on the main landing page of the Oracle Cloud console.
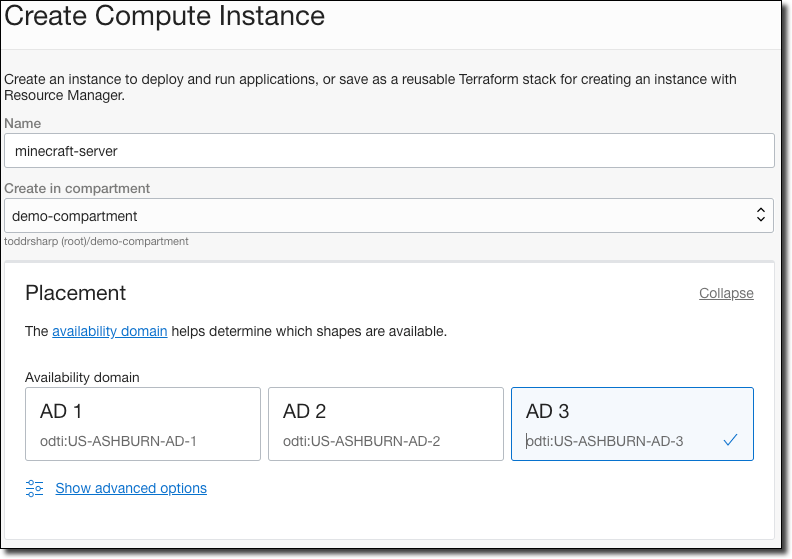
Give your VM instance a name (I called mine “minecraft-server") and choose a “compartment”. Compartments are just a way to group different things together. You can just leave the default (“root”) compartment selected. Also, choose an “availability domain” - any of them will do, it doesn’t matter for this server!
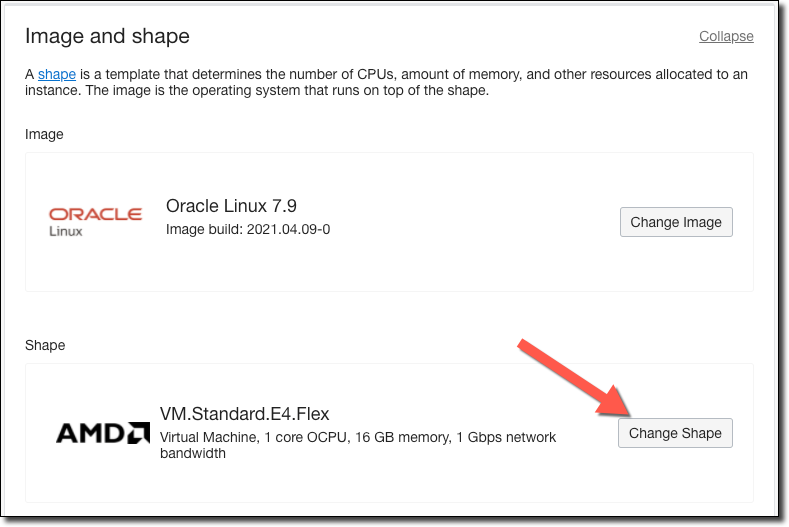
Now, scroll down to the ‘Image and shape’ section. Make sure that “Oracle Linux 7.9” is selected and then click on ‘Change Shape’.
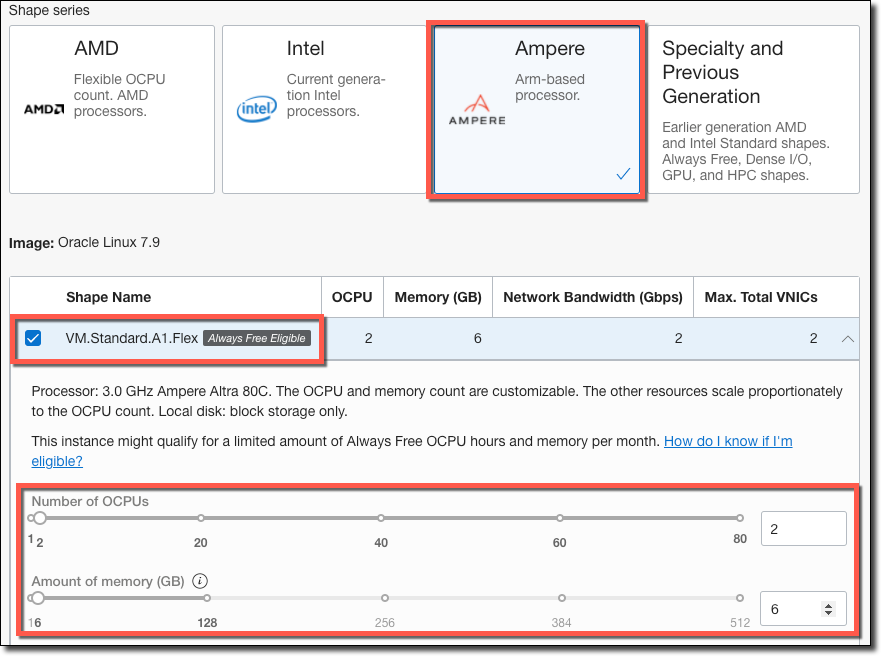
In the shape dialog, select the 'Instance type' of ‘Virtual Machine’ and then select ‘Ampere’ (ARM) under ’Shape series’. Choose the ‘VM.Standard.A1.Flex’ shape and choose the amount of CPU and RAM that you want to allocate to this server. For your “always free” ARM servers, you get up to 4 OCPU and 24 GB of RAM to allocate. This means that you can turn up one virtual machine with 4 OCPU and 24GB of RAM, or 4 servers each with 1 OCPU and 6GB of RAM (or any combination up to the limit). It just depends on what you want to dedicate to each VM!
Pro Tip! You can check the server requirements for Minecraft to make sure that you size your server appropriately for your needs.
Here I’ve selected to allocate 2 OCPU and 6GB of RAM, which should be plenty of resources for a reliable server that can host 20+ players at a time! And I still have 2 OCPS and 18GB of RAM in my “always free” tier to run other VMs!!
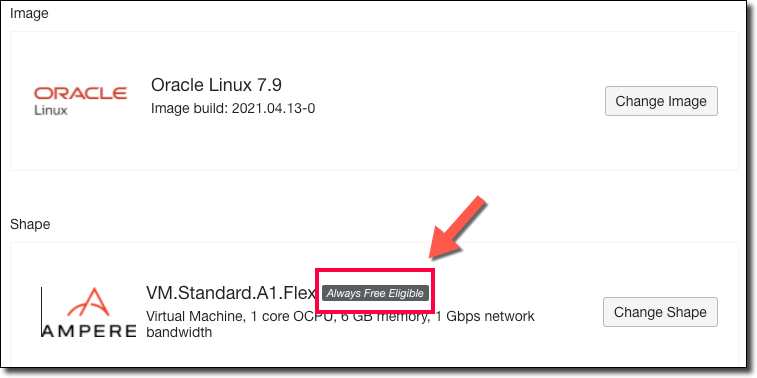
After you have selected the shape, confirm that you see the “Always Free Eligible” label displayed.
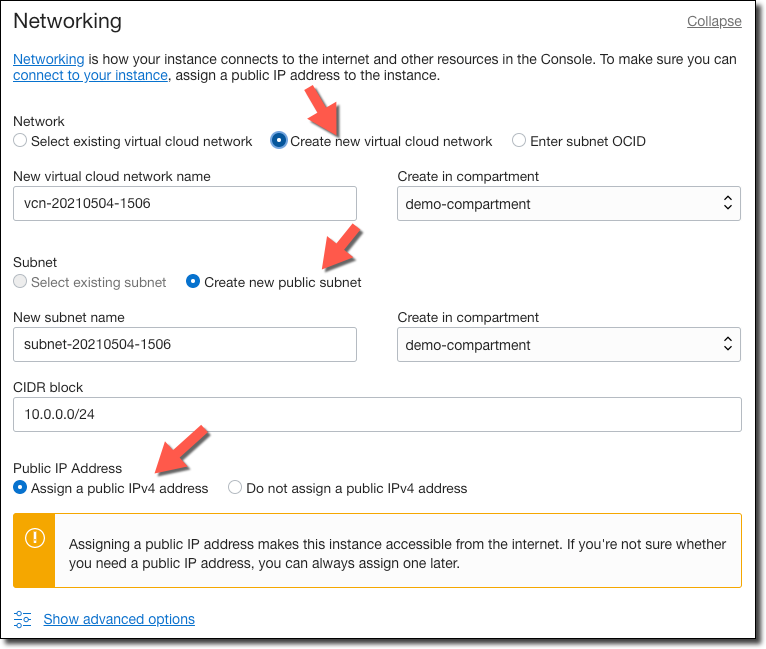
Next, we’ll need to choose a virtual cloud network (VCN). If you already have an existing VCN with a public subnet, choose that. If not, select ‘Create a new virtual cloud network’. Then, choose ‘Create a public subnet’ and accept the default names. Finally, make sure that ‘Assign a public IPv4 address’ is selected (otherwise you couldn’t connect to this server from the internet!).
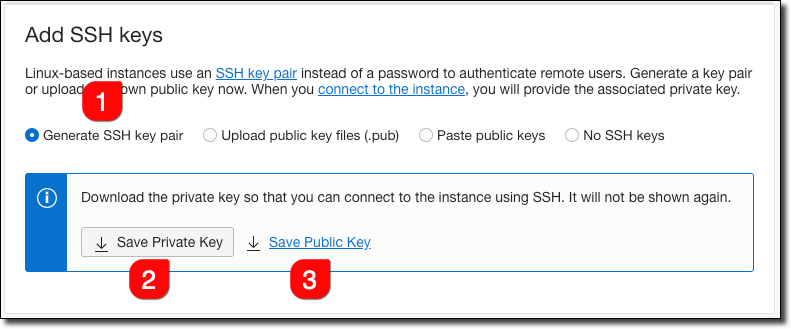
Now we need to associate an “SSH” key pair with this VM. If you’re familiar with this concept and already have a public key that you want to use, choose ‘Upload public key files’ and upload your public key. If you’re not familiar with this, think of these keys as a unique set of identifiers that allow you to securely log in to your server. Click ‘Generate SSH key pair’ and save your private and public keys to your local machine. We’ll use these in just a bit to log in to the VM.
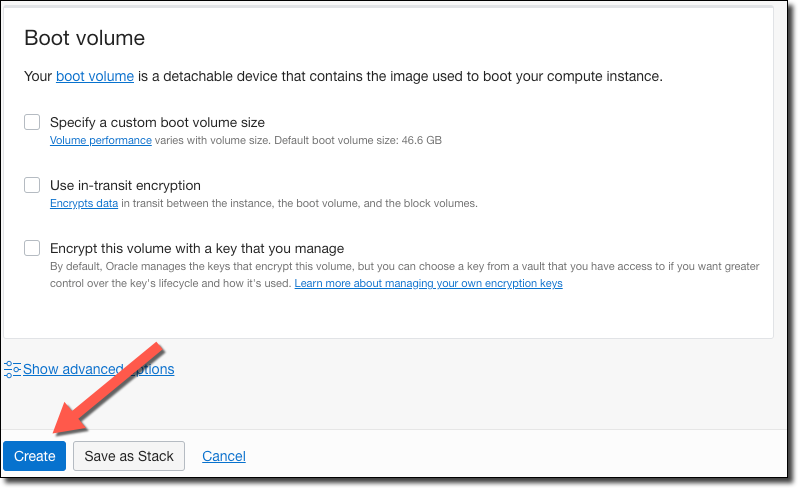
Leave boot volume defaults and click ‘Create’.
As soon as you click ‘Create’, you’ll be redirected to the VM details page and your VM instance will be in a PROVISIONING state.
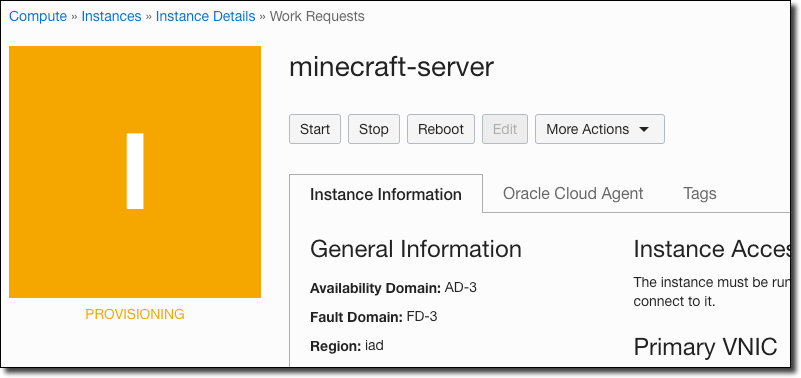
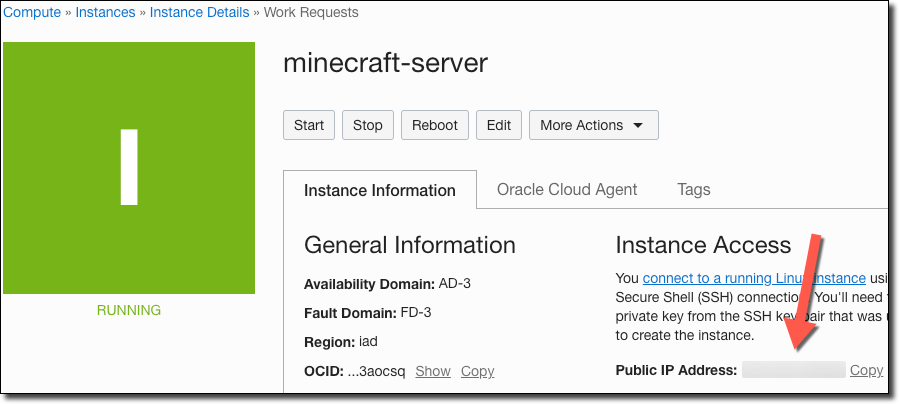
After 30-60 seconds or so, the state will switch to RUNNING. Find your public IP address and copy it.
Connect to the Running VM in the Cloud
In order to start installing the Minecraft software on our VM, we need to remotely connect to it. If you are not familiar with SSH, I recommend that you first read up on it and learn how to install (or utilize existing installed) an SSH client on your machine. This process is a little different depending on which operating system you use - here is a great article that goes over your options depending on your OS.
To connect to your VM, you’ll use the username opc (which stands for ‘Oracle Public Cloud’, if you were curious). On my Mac, I connect with the following command (note that I’ve blurred out my server IP address here):

Install Java
Since the Minecraft server software runs on Java, you’ll need to first install the Java Development Kit (JDK) on the VM. You can find out which version of the JDK is available to install with the following command:
This command should list something that looks similar to this:
You’ll want to choose the latest (highest number) version to install. Copy the package name and install it with:
After the install is complete, you can confirm the install with:
Which should return something like:
Install Minecraft Server
And now we get to the really exciting part where we get to install the Minecraft server! Head over to this page (on your local machine, not the VM) and copy the link to the latest Minecraft server download jar.
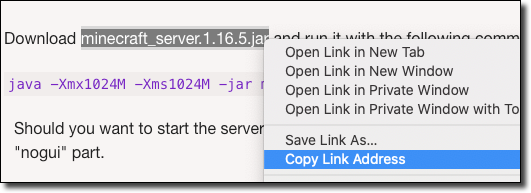
Back inside the VM, download it with this command:
And now try to run the server with:
Oh no! It didn’t work! You’ll probably see output similar to this:
There will now be a file inside the same directory that the server JAR file is located. Open up the eula.txt file with Nano to edit it:
Edit the file to change false to true.

To save exit, type CTRL+C, ‘Y’ to accept changes, and then ENTER.
Open Firewall and Security List Ports to Allow Public Access
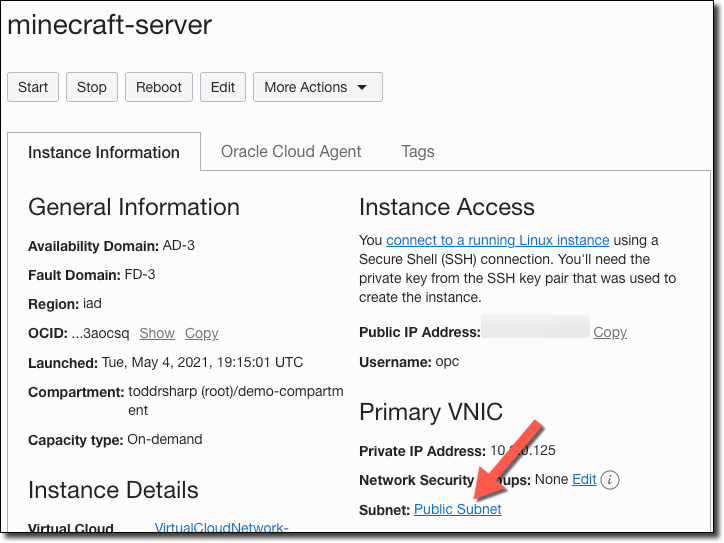
Before we try to run again, let’s fix the networking so that players can reach this server through the Oracle Cloud firewall. Back in the VM details, click on the link for the subnet that was created (or that you chose).
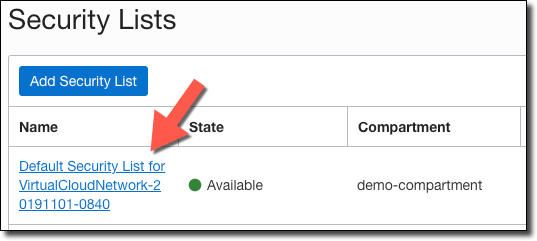
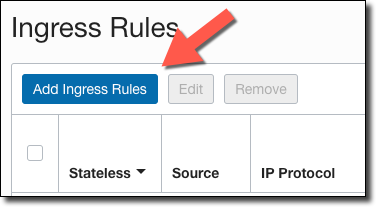
Click on the default ’Security List’.
Click ‘Add Ingress Rules’.
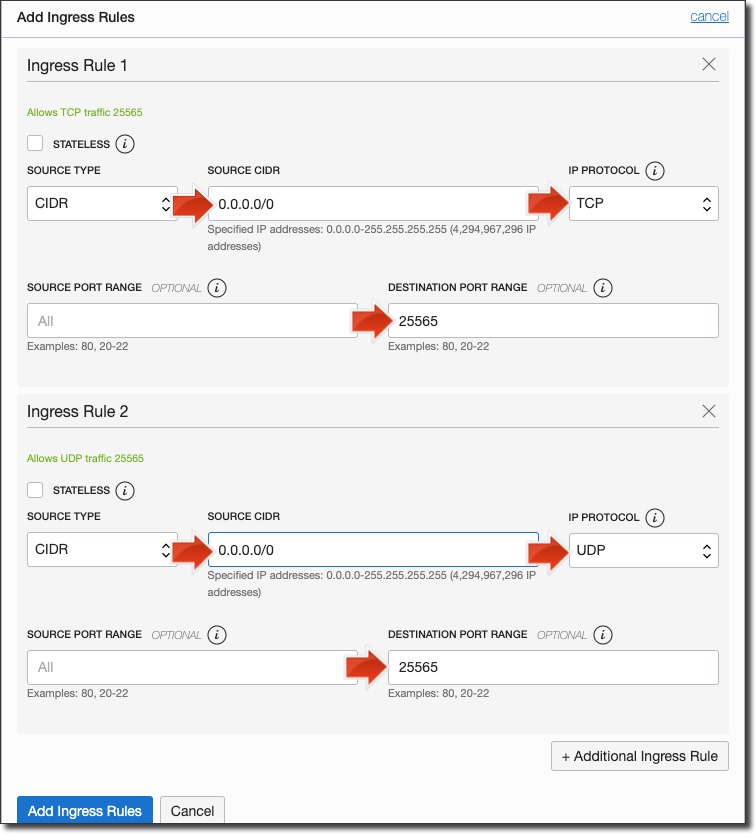
Add 2 Ingress Rules - one for TCP and one for UDP - each with a ’Source CIDR’ of 0.0.0.0/0 and a destination port range of 25565 as shown below.
You'll also need to open up these ports on the VM's firewall, so run the following commands back in your SSH terminal:
Starting The Server
At this point, the server is ready to be started! Run the server again with:
After a minute or so, your server is up and running! You can now connect up to your server using the public IP address and start playing on your own server! Of course, you can customize your server even further if you want and you can read more about setting up your server and configuring it here.
Summary
In this post, we looked at how to launch and run your own absolutely free Minecraft server in the Oracle Cloud. There are tons of more awesome projects that you can do with your "always free" account in the cloud. Here are a few links to inspire you!
-
Stand Up A Free Blog In 15 Minutes With Ghost In The Oracle Cloud
-
Create & Host Your Own Dedicated Counter-Strike: Global Offensive (CS:GO) Server for Free (Forever!)
Image by Chickenonline from Pixabay
Related Posts

Querying Autonomous Database from an Oracle Function (The Quick, Easy & Completely Secure Way)
I've written many blog posts about connecting to an Autonomous DB instance in the past. Best practices evolve as tools, services, and frameworks become...

Brain to the Cloud - Part III - Examining the Relationship Between Brain Activity and Video Game Performance
In my last post, we looked at the technical aspects of my Brain to the Cloud project including much of the code that was used to collect and analyze the...

Brain to the Cloud - Part II - How I Uploaded My Brain to the Cloud
In my last post, we went over the inspiration, objectives, and architecture for my Brain to the Cloud project. In this post, we'll look in-depth at the...