Create & Host Your Own Dedicated Counter-Strike: Global Offensive (CS:GO) Server for Free (Forever!)
Posted By: Todd Sharp on 1/22/2021 4:13 GMT
Tagged: Cloud, Developers

Video games have been around for about 50 years, becoming mainstream and more popular as the years and decades have passed since the 1970s. My first experience with video games was on an Atari 2600 back in the early 80’s playing classics like Space Invaders, Pac-Man, and Pitfall. From there, it was on to a Commodore 64 where I’d spend countless hours playing Jumpman, Swiss Family Robinson, and tons of text-based dungeon classics (so many that I can’t even remember most of their names). I still remember saving money from my very first job - a miserable paper route - to buy the original Nintendo Entertainment System (NES) back in the late '80s. I spent many long days and some late nights with Mario and Link back in my younger years.
Gaming has always been a passion of mine. I’ve owned a lot of consoles and played countless games in my lifetime, but things drastically changed for me back in the early 2000s. That was when the Sony PlayStation 2 released the "Network Adaptor” which allowed the PlayStation 2 to connect to the internet and gave me the ability to play online multiplayer games for the first time in my life. I’ll never forget being able to play SOCOM U.S. Navy SEALs with my buddy Danny from the comfort of our own homes. Online multiplayer gaming has grown exponentially since the early days and has even spawned careers for some gamers who record, publish, and stream their adventures online for mass audiences who willingly consume the content.
From the early days of LAN parties to the modern cloud era, gamers have often desired the ability to host their own servers for multiplayer games. There are many reasons why - from the ability to mod and customize the gameplay experience to the need for improved security or performance. Hosting a dedicated game server gives you the freedom and control that you don’t have when using public servers. In this post, I’ll show you how to deploy and host your very own game server in the cloud. We’ll focus on Counter-Strike: Global Offensive (CS:GO) in this post, but we’re going to use Linux Game Server Managers (LinuxGSM) so you can use this same process to turn up your own private server for any of 110 different game servers that are supported by LinuxGSM. The best part is that we’ll be doing this all on an always free virtual machine (VM) in the Oracle Cloud, so you’ll never have to pay a single dime for your own private, dedicated gaming server!
Create Account
As I said above, we’re going to use an always free (forever - no, really!) VM in the Oracle Cloud to run our CS:GO dedicated server. To get started, we’ll need to sign up for a brand new account (if you don’t have one yet). Go to cloud.oracle.com and click ’Sign Up’.

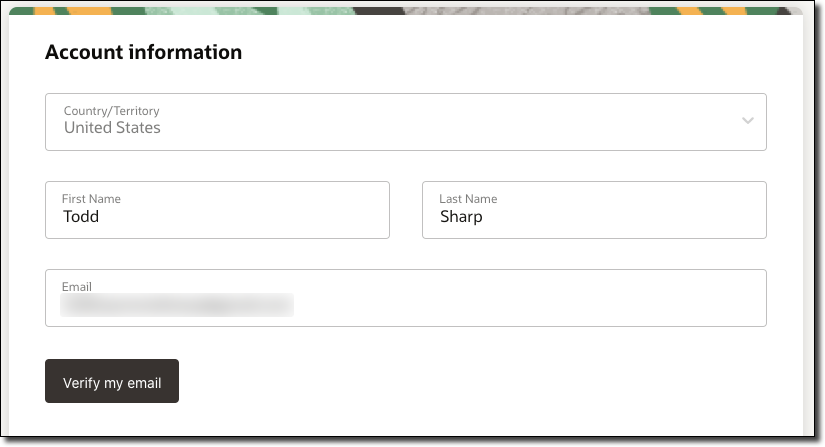
On the next page, choose your Country/Territory, enter your name and email and then click ‘Verify Email'.
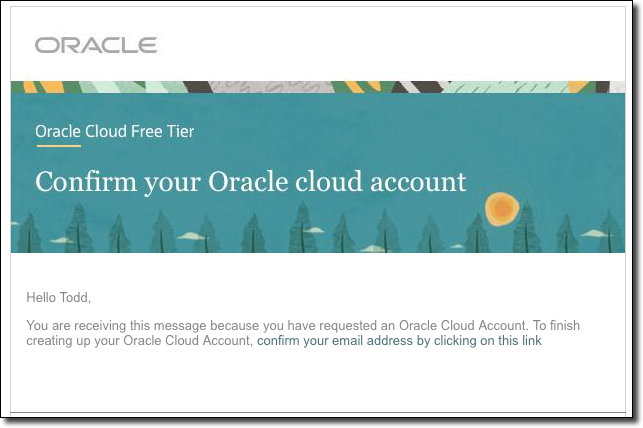
You’ll receive the following email - click on the link to verify your email to continue.
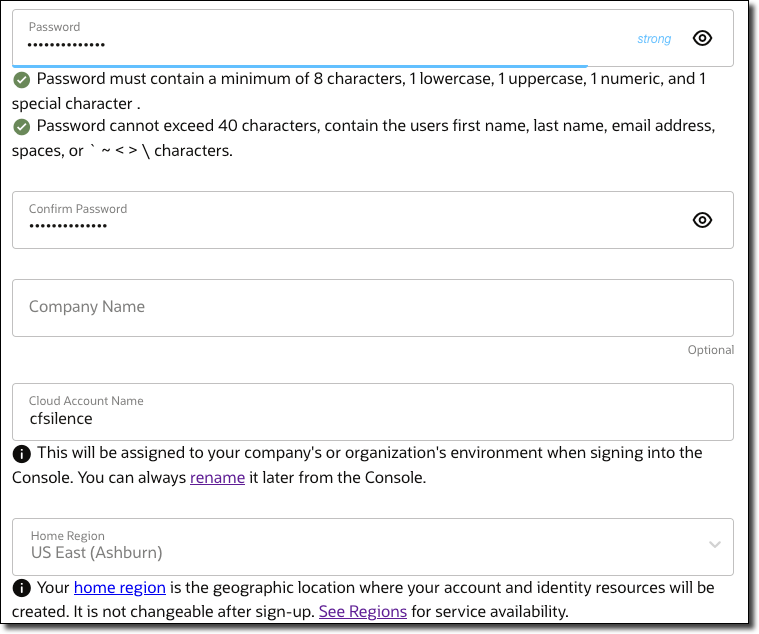
Next, enter (and confirm) your cloud account password, cloud account name and choose a home region. This region will be where your VMs physically reside, so for best ping and latency you should probably choose a region that is geographically close to where you live.
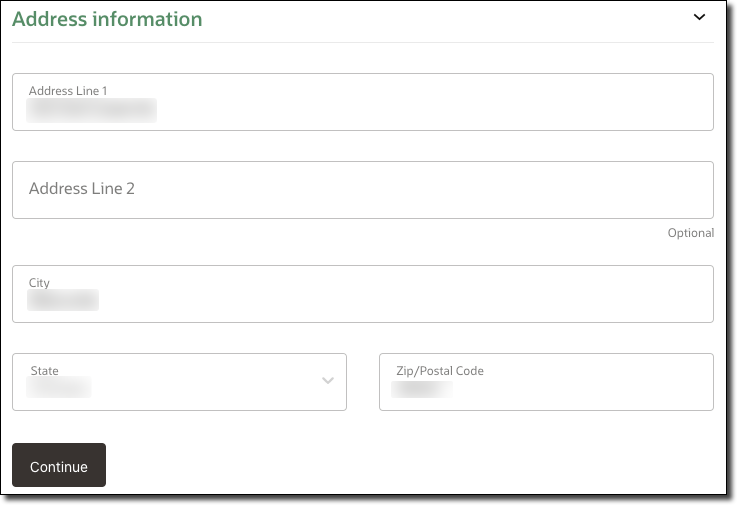
Enter your mailing address and click ‘Continue’.
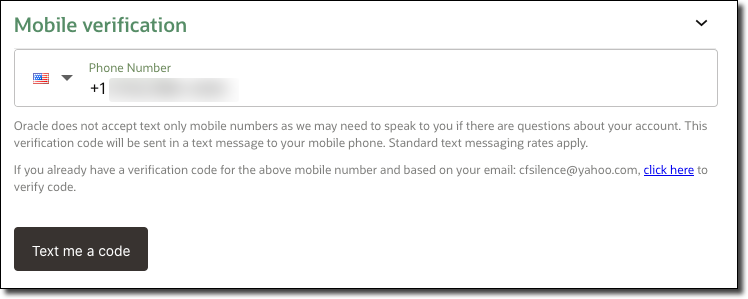
Now you’ll need to add & verify your mobile number.
Next, you’ll need to add a payment method that will be used later on if you decide to opt-in to paid services.
Note: You will not be charged without upgrading to a paid account when your 30-day trial ends.
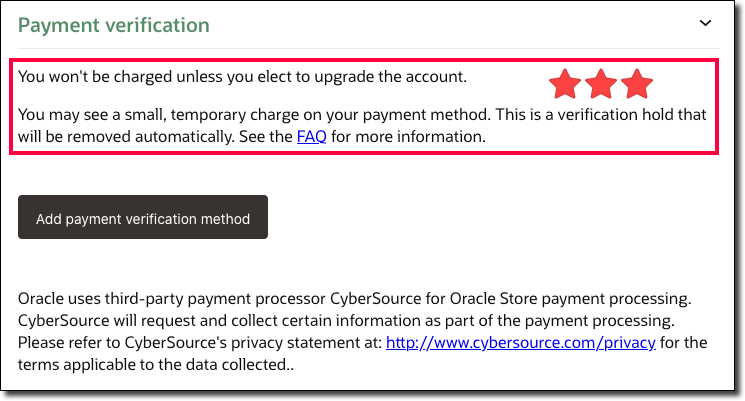
I know you’re concerned about being billed - trust me, I am always skeptical of entering my credit card for free services too! But, I promise you that if you follow the instructions below and always make sure that you are selecting resources that are labeled “Always Free Eligible” you will never see a single penny charged to your account. Now we are finally ready to agree to terms and start trial!
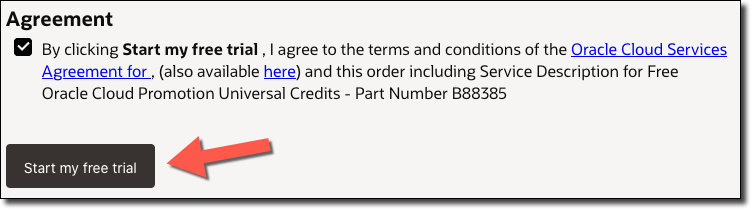
Heads Up! It may take a few minutes to configure everything in your Free Tier account. You’ll receive an email letting you know when everything is ready for you to log in and move forward!
Create Virtual Machine
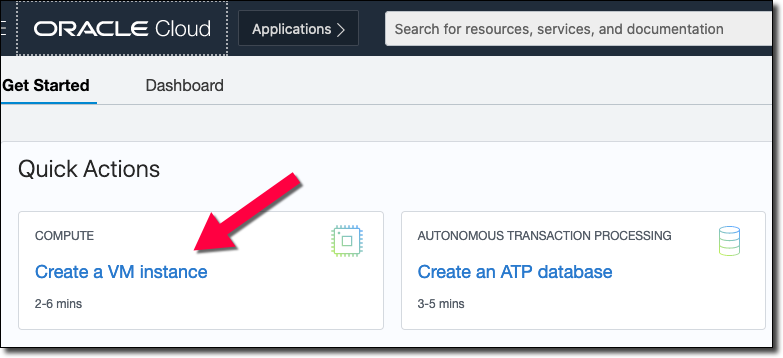
Once your account is created, login to the Oracle Cloud dashboard. We are now ready to create our Virtual Machine (VM) that will be used for our dedicated server. On the dashboard landing page, click ‘Create a VM instance’.
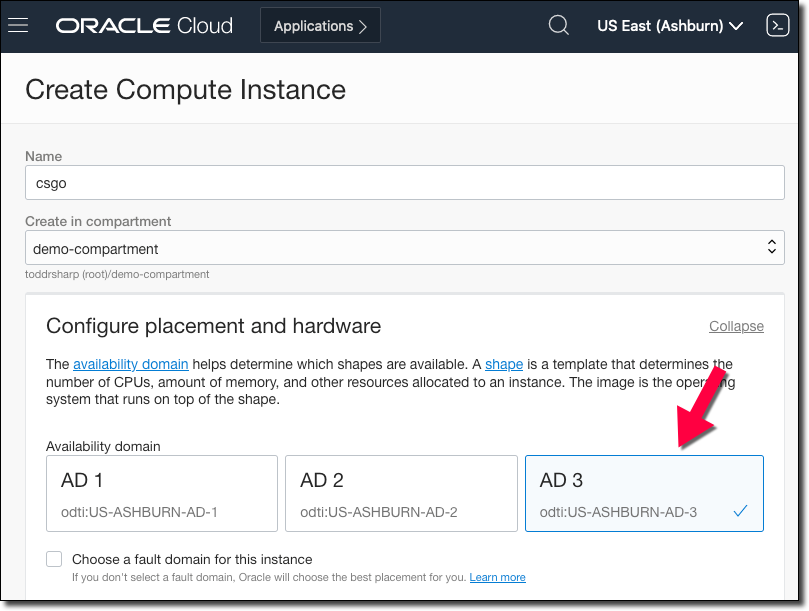
On the next page, we will enter all of the information needed to create our new VM. First, enter a name for the VM. Next, choose a “compartment”. This is basically just a “container” for your VM and other resources to keep them organized. I used a compartment called “demo-compartment” below (it’s where I keep all my blog demos) but you can leave it as your “root” compartment. Next, we need to choose an “availability domain”. Try choosing “AD 3” because this is usually where the “always free” VMs are available.
Next, click on the ‘Change Image’ button.

LinuxGSM works with Ubuntu 16.04 LTS, Debian 9, or CentOS 7. Let’s choose the Ubuntu 16.04 LTS shape. We can choose the “Minimal” shape to keep the server light.

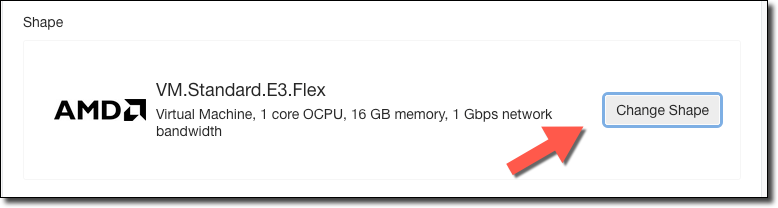
Next, click on ‘Change Shape’.
Make sure that ‘Virtual Machine' (#1) is selected, choose 'Specialty and Legacy' (#2), and then choose the 'VM.Standard.E2.1.Micro' shape (#3) that is labeled as 'Always Free Eligible'.
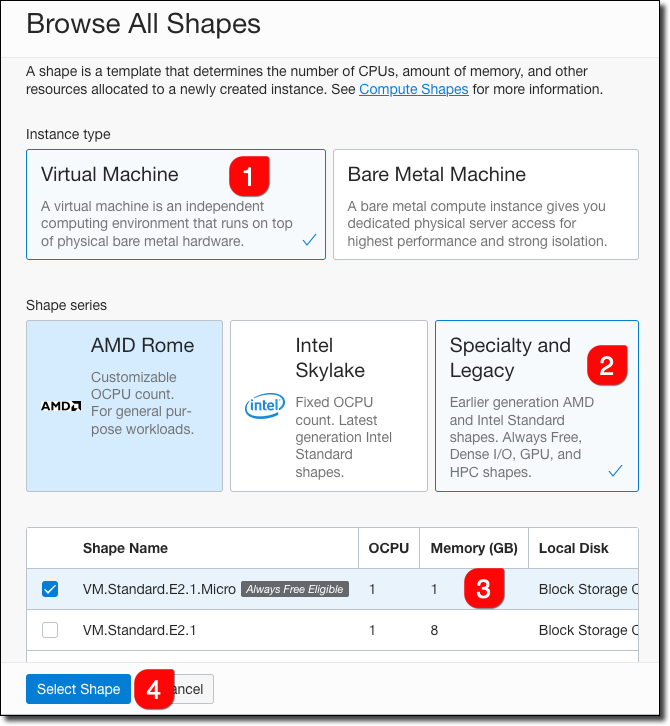
Can’t Find The Free Shape? If the “always free eligible” shape is not listed, try the other ADs in your region.
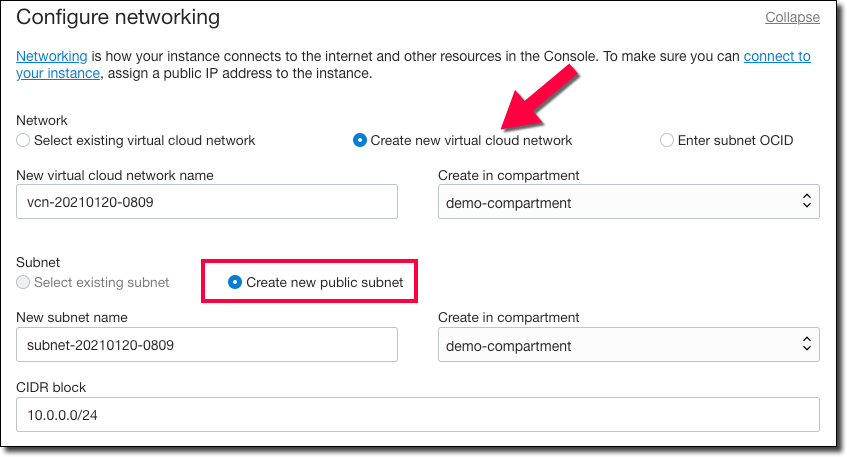
Next, we need to configure networking, so choose 'Create new virtual cloud network’ and make sure ‘Create new public subnet’ is selected. Leave the names, CIDR block, and compartments populated with the default info.
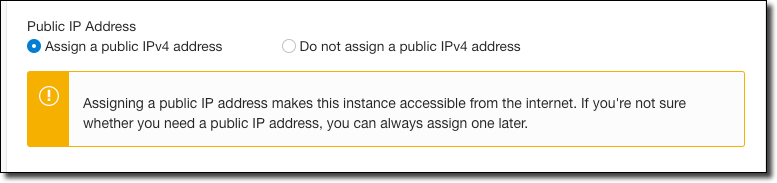
Make sure that ‘Assign a public IPv4 address’ is chosen (otherwise we won’t be able to connect to the server from CS:GO)!
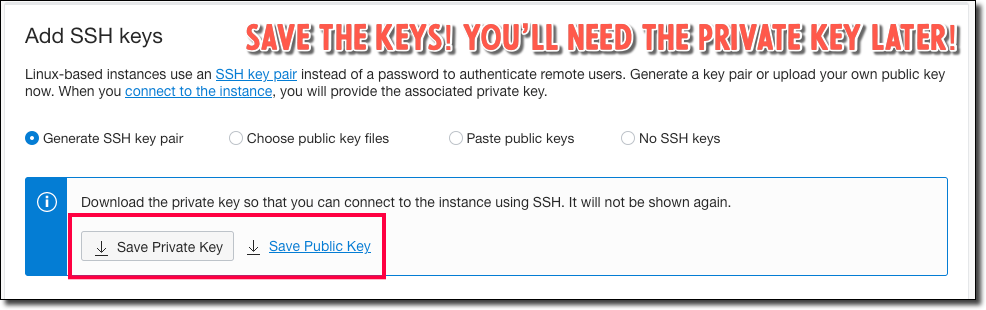
Next, under ‘Add SSH keys’, select ‘Generate SSH key pair’ and click on ’Save Private Key’ and ’Save Public Key’. You’ll want to save these in a directory on your machine as we will need them in just a bit to connect up to the VM securely!
Note: If you are comfortable with SSH keys and already have one that you would like to use, feel free to upload it or paste it here.
That is all the info we need to provide to create the VM, so scroll down and click on ‘Create’! You’ll be redirected to the VM details page and the VM will be initially in a ‘Provisioning’ state. After a minute or two, it’ll switch to ‘Running’, and at that point, we can move forward.
Update Security List & Configure Network
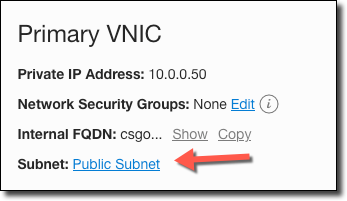
Now we need to configure our Virtual Cloud Network (VCN) to allow traffic into our VM in the cloud. From the VM details page, find a link to the ‘Public Subnet’ that was created. Click on this link.
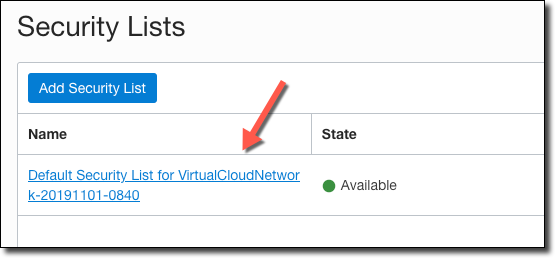
On the next page, under Security Lists, click on the link to the Default Security List for the VCN.
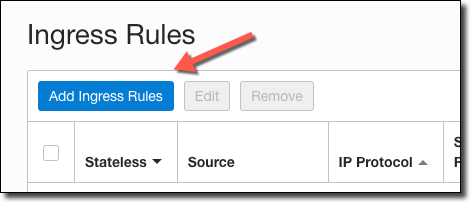
On the Security List details page, click on ‘Add Ingress Rules’.
Create two ingress rules, both from the Source CIDR 0.0.0.0/0 (the entire internet), both for port 27015. One rule should use the protocol TCP, the other rule will use UDP.
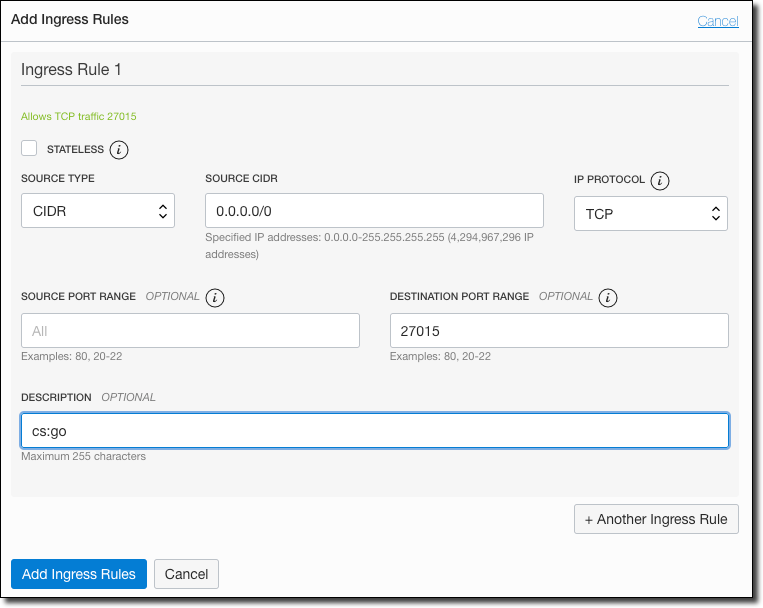

Save the ingress rules, and now we’re ready to connect to the VM to configure the local VM firewall and install the server.
Connect to the VM
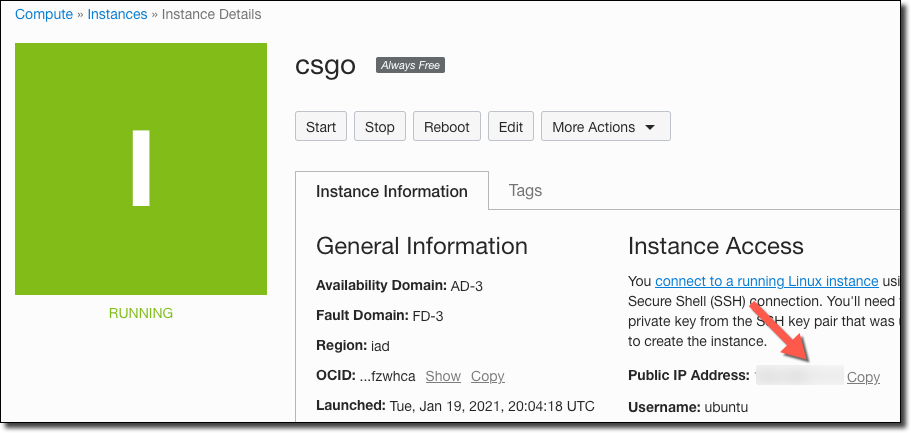
Now we’ll need to connect to the running VM in order to configure the local VM firewall and proceed with the server installation. We’ll need the public IP of the VM to connect, so copy it from the VM details page.
We’ll use the command line to connect to the VM using SSH. If you are on a Mac or Linux machine, open a new terminal window and connect with the user ubuntu and substitute your VM IP and the path to the private SSH key that you saved earlier to your machine.
Using Windows? Windows 10 (finally) includes a built-in SSH client as of the Windows 10’s Fall Creators Update. If you’re on a different version of Windows that doesn’t include the built-in SSH client, you’ll need to install a third-party client. Search for “Windows SSH Client” in your favorite search engine to download and install a third-party SSH client.
On my Mac, this looks like this:
Next, we’ll need to open port 27015 in the VM firewall for both TCP and UDP. It’s necessary to open these ports on the VM just as we did on our VCN above by adding Ingress Rules to our Security List. We can do this on the VM with the following commands:
Now we can install the server!
Install CS:GO Server
As I mentioned earlier, LinuxGSM is going to help us install and manage our CS:GO server. The following steps are based on the LinuxGSM documentation for CS:GO, so if you get stuck or things have changed since this blog post was originally published you can always refer to their docs.
Install Dependencies
We need a few extra packages before we can move forward. Run the following on your VM to install them (remember, we’re using Ubuntu 16.04).
Create a Linux user to be used for the csgoserver. Make sure that you choose a strong password when prompted.
Now download linuxgsm.sh and make it executable.
Create Game Server Login Token (GSLT)
When we run the installer, we’re going to need to enter a Game Server Login Token (GSLT), so head over to Steam and create one.
Note: The App ID you use to generate the GSLT needs to be 730 even if the server shows an App ID of 740 when you launch it (at least this is what worked for me, YMMV).

Click create, then keep the token shown on the next page handy for the next step below.

Keep this token handy - we’ll need it in just a minute.
Run LinuxGSM CS:GO Installer
Finally, it’s time to install the server. Run the script like so:
The installer will run for a bit, prompting you for a bit of info as it goes. The output should look similar to the following (I clipped some content out to keep it readable).
The installer will ask if the install was successful (confirm there are no errors above) and then proceed with the server configuration.
Enter your GSLT that we created above. Next, the installer should wrap up with:
The install should complete:
Start the server!
And that is it! Your free-forever CS: GO server is now ready to start hosting your games! From the Steam client (or within CS: GO itself) click on ‘Favorites’ and then ‘Add Server’.
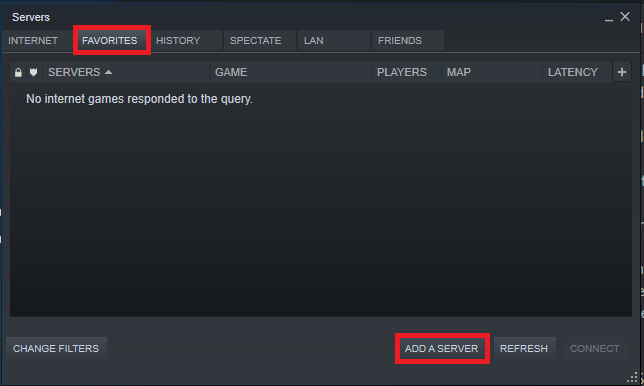
In the add server dialog, enter the IP of your server and add port 27015.
You can further configure and mod the server as desired, but that is out of the scope of this blog post. Check the LinuxGSM docs for more info about the server usage on the VM. If you’d like to make sure that your VM is always backed up, check out my older post on Backing Up Your Always Free VMs In The Oracle Cloud.
What’s Next
Since you still have one more free VM in your account, you can always use the steps above to create another VM and find one of the other 110 supported servers on LinuxGSM and run one of them, or you could consider one of the following projects:
- How To Setup And Run A Free Minecraft Server In The Cloud
- Launching Your Own Free Private VPN In The Oracle Cloud
- Installing Node-RED In An Always Free VM On Oracle Cloud
- Stand Up A Free Blog In 15 Minutes With Ghost In The Oracle Cloud
- Blast Off To The Cloud: Free Team Chat With Rocket.Chat In The Oracle Cloud
- Install & Run Discourse For Free In The Oracle Cloud
- Launching Your First Free Autonomous DB Instance
- Backing Up Your Always Free VMs In The Oracle Cloud
If you liked this tutorial, be sure to follow me on Twitter (@recursivecodes). Let me know what you’d like to see next!
Photo by Muhannad Ajjan on Unsplash
Related Posts

Querying Autonomous Database from an Oracle Function (The Quick, Easy & Completely Secure Way)
I've written many blog posts about connecting to an Autonomous DB instance in the past. Best practices evolve as tools, services, and frameworks become...

Brain to the Cloud - Part III - Examining the Relationship Between Brain Activity and Video Game Performance
In my last post, we looked at the technical aspects of my Brain to the Cloud project including much of the code that was used to collect and analyze the...

Brain to the Cloud - Part II - How I Uploaded My Brain to the Cloud
In my last post, we went over the inspiration, objectives, and architecture for my Brain to the Cloud project. In this post, we'll look in-depth at the...